Wrapping the guides.
by Al Campbell
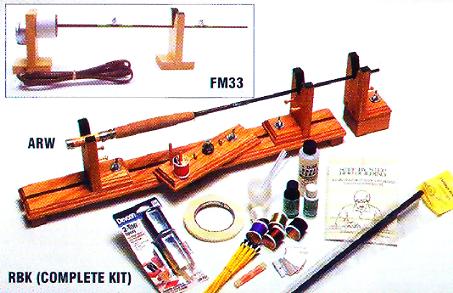
It's finally time to wrap some thread on the guides.Ā Before we can wrap
the thread, we need to get prepared.Ā Do you have a stand designed for
wrapping the guides?Ā You could buy one, the selection is great.Ā The
catalogs are always full of rod stands.Ā If you need a look at one, go back
to part four of this series and take a look at the selection offered by the
catalogs mentioned there.Ā If you plan on building more than one rod,
a good wrapping stand is a great idea.
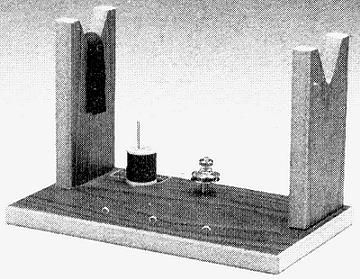
You could make one if you don't want to shell out
the bucks for a factory wrapping stand.Ā All it takes is a few boards, a
little hardware and some time.Ā You could incorporate a drying motor
for the finish too.
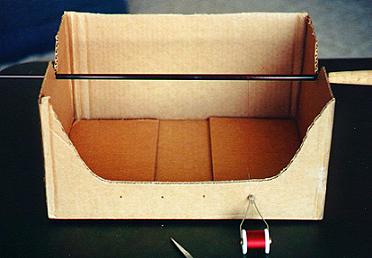
If finances are real tight, you can make a rod stand out
of a cardboard box.Ā Cut a couple of notches in the ends and poke some
holes in the front for a fly tying bobbin and you'll be ready.Ā The fly tying
bobbin will serve as a thread holder and a tensioning device.Ā
Or, you can provide thread tension with a book that has the thread
running through the middle of it.Ā
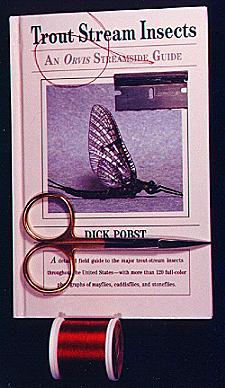
In addition to the rod stand and a thread tensioning device,
you'll need a few other tools.Ā A pair of fine point scissors will be needed to
cut the thread.Ā A razor blade is required to cut the thread flush with your wraps
after you wrap the guide.Ā You'll need a burnishing tool to smooth the thread
wraps after you wrap the guides.Ā You can use a fingernail or a fingernail care
tool for this if you like.
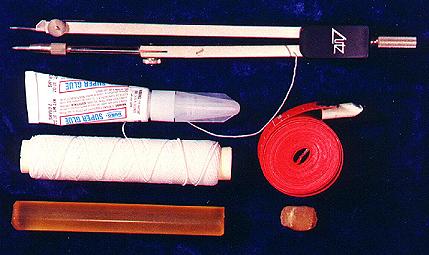
Got the tools ready?Ā Don't forget plenty of lighting.
And, you might want a lighter handy to burn off any fuzz you create on the
wraps.Ā A geometry style compass is a handy tool also.Ā I use the compass
to mark the starting point for the thread wraps.Ā This keeps the thread
wraps even from guide to guide.
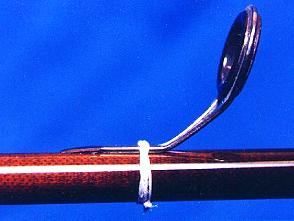 Let's get started.Ā You have the guides attached to the blank,
but you need to mark the distance from the guides where
each wrap will start.Ā I use a compass to perform this task.Ā I measure
from the loop of the guide to just beyond the foot with the compass and
make a small scratch on the blank to mark the spot where the thread
wrap will begin.Ā You don't have to scratch it very deep, just enough to
be able to see where to start wrapping the thread for each guide.
You'll also need to cut a six to eight inch piece of thread and
set it aside for later.
Let's get started.Ā You have the guides attached to the blank,
but you need to mark the distance from the guides where
each wrap will start.Ā I use a compass to perform this task.Ā I measure
from the loop of the guide to just beyond the foot with the compass and
make a small scratch on the blank to mark the spot where the thread
wrap will begin.Ā You don't have to scratch it very deep, just enough to
be able to see where to start wrapping the thread for each guide.
You'll also need to cut a six to eight inch piece of thread and
set it aside for later.
I usually start wrapping with the stripper guides
on the bottom section of the rod.Ā To start the wrap, wind the thread
around the rod once with the tag end toward the foot of the guide.
Manipulate the thread angle so it wraps over the tag end and starts
building toward the foot of the guide.Ā Snug the first few wraps by
hand, then clip the tag end short enough that you only have about
six to ten wraps of thread over it.
Continue wrapping the thread up to and onto the foot of the guide.Ā
You must keep thread tension reasonably tight to ensure a solidly
wrapped guide.Ā Manipulate the thread angle to prevent
any gaps in the thread. If the thread starts wrapping the wrong way
(over the previous wraps), back up and change the angle to continue
the progression of thread up the guide foot.Ā If you filed the guides
properly, you won't have any problem getting the thread to wrap up
the guide foot.
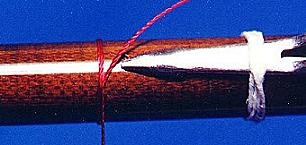
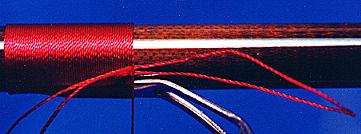
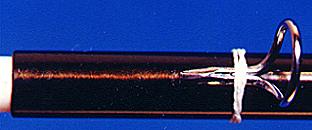
When your thread wraps get within ten to fifteen wraps from the
loop end of the guide foot, make a loop in the six to
eight inch piece of thread you cut earlier, and insert it in the thread
wraps as shown in this photograph.
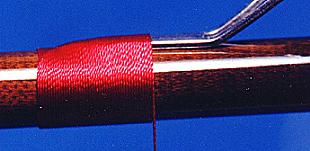
Continue wrapping the thread to the end of the guide foot,
then tension it by hand and hold tension on the thread while
you cut the thread free from the thread spool.Ā Hold pressure
on the thread you've wrapped with a thumb or finger while you
insert the tag end of the thread into the loop you inserted
under the thread wraps earlier.Ā Next, pull the loop through
the wraps so the tag end of thread pulls through with it.Ā
Tension the thread again by hand and pull it up under the
wraps snug enough that it won't slip out or become loose.
 Lift the tag end of thread and very carefully, making
sure you don't cut or fray the guide wraps, cut the tag end
with a razor blade even with the thread wraps.Ā You shouldn't
have any excess thread sticking out of the guide wraps when
you're finished with this step, and if you use a sharp razor
blade, you shouldn't have any frayed fibers sticking out of the
wraps either.Ā If you do have fibers sticking out, singe them
with a butane lighter or an alcohol burner.Ā Don't use a
candle, a match or a lighter that uses lighter fluid since
these will cause soot that will discolor the thread.Ā
Lift the tag end of thread and very carefully, making
sure you don't cut or fray the guide wraps, cut the tag end
with a razor blade even with the thread wraps.Ā You shouldn't
have any excess thread sticking out of the guide wraps when
you're finished with this step, and if you use a sharp razor
blade, you shouldn't have any frayed fibers sticking out of the
wraps either.Ā If you do have fibers sticking out, singe them
with a butane lighter or an alcohol burner.Ā Don't use a
candle, a match or a lighter that uses lighter fluid since
these will cause soot that will discolor the thread.Ā
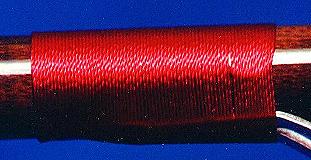
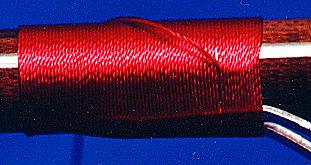
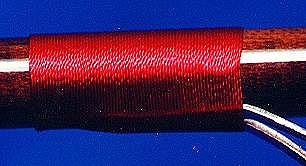
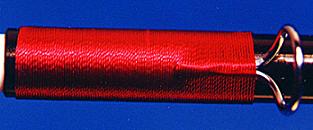
Once you have the guide wrapped and the thread cut, use a finger
nail, a burnishing tool or a similar device to smooth the thread
wraps until there are no gaps in the thread.Ā If you were careful in your
wrapping, this should be easy.Ā If you have gaps that just won't go away,
remove the thread and wrap the guide over.Ā It's a lot less expensive to
waste a few inches of thread than it is to have a fly rod you don't like
because you did a poor job wrapping one of the guides.
Repeat the wrapping process for every foot of every guide and
the hook keeper, starting each wrap on the blank and working
up the guide toward the loop of the guide.
 Once you have the guides wrapped, wrap over the female end of
the ferrule for at least three fourths of an inch to prevent
the ferrule from splitting.
Once you have the guides wrapped, wrap over the female end of
the ferrule for at least three fourths of an inch to prevent
the ferrule from splitting.
You also need to wrap next to the tip-top to strengthen it and
keep it from splitting.Ā A nice touch to any rod is to wrap some
thread that will bracket in your signature on the finished rod.Ā
If you want, you can measure from the butt of the rod and wrap
this bracket a set distance from the butt to use as a quick fish
measuring device on the finished rod.

Next week we'll give the rod a custom signature and apply a coat
or two of finish to the thread wraps.Ā Take your time and wrap
those guides right, the finished rod's performance and
appearance depends on you doing a good job wrapping the guides.
~ Al Campbell
|
