Happy tying. ~ Faruk Ekich
MATERIALS FOR POLAR SHRIMP:
Hook: Short shank up eye such as Daiichi 4250 or
Owners 5115 size 4.
Thread: UNI 3/0 orange.
Tube: Copper tubing 1/16"(1.6mm) O.D. X 1"(25mm)
long - flared on both ends.
Hook anchor: Shrink tubing 1/8"O.D.(3mm)X
1/4"(6mm) long color orange or white
colored with permanent marker.
Antennae, Carapace and Tail: Polar bear guard
hair - color orange with two strands of Crystal flash.
Eyes: Golden pheasant tippets section.
Body and Legs: Polar bear underfur.
Ribbing: Copper wire 0.010" Dia. (0.12mm).
Publisher's Note: Legal Polar Bear fur can be obtained
in the US from
Bear Lodge Angler, a Sponsor here on FAOL.
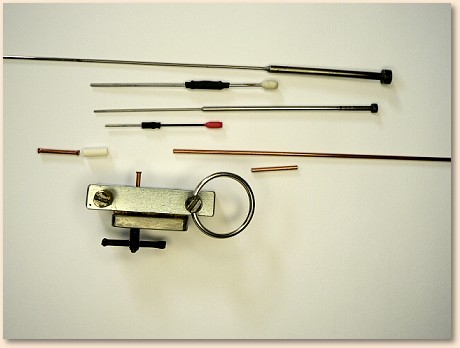
TOOLS and MATERIALS:

Clock wise from top:
bobbin with 3/0 thread
tube holding mandrel set, (This one is made out of an Ejector
Pin (see photo Special tooling above.) but any pin (such as
paper clip or wire), with diameter that enters inside of
copper tube and one end flattened and covered with
heat shrink tubing for better grip, will do.
In addition to that, a small section of copper tube
covered in shrink tube is used to grip the other end
of the tube as shown in next photo.
flared copper tube and heat shrink tubing,
polar bear hair,
copper wire, Crystal flash,
golden pheasant tippet section for eyes and
flaring tool.
TYING IN RIBBING:
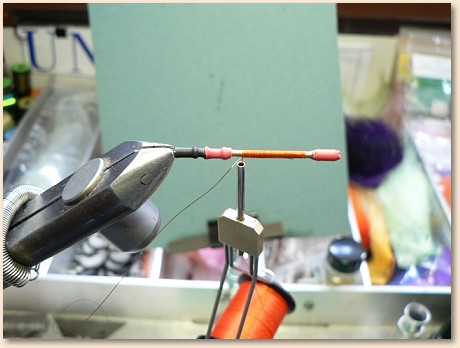
With the heat from a lighter, secure the section
of the shrink tubing at one end of copper tube
and place it on the mandrel as shown.
Apply pressure on the mandrel toward the jaws of
the vise to create the holding friction between the
jaws and the head of mandrel before closing
the jaws. Contact between three points of shrink
tube create enough tension that hold the tube in
place for good thread torque. Attach the ribbing.
TYING IN EYES:
Continue with the thread up on the shrink tube just
before the "bump" created by the flare. (This "bump"
serves well to spread the eyes and the hair).
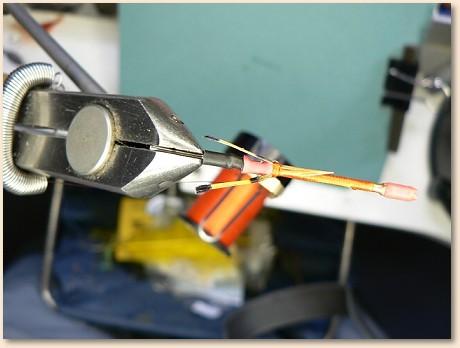
TYING CRYSTAL FLASH ANTENNAE:

Start on near side with one wrap, then swing the
other end to the far side and tie with second
wrap.
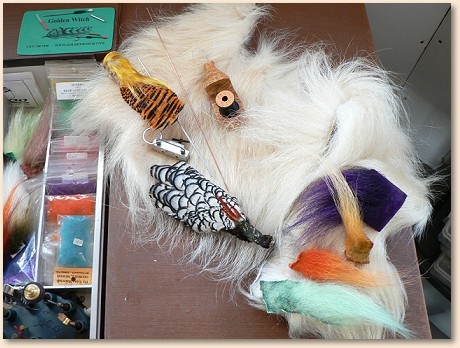
SEPARATING GUARD HAIR and UNDERFUR:
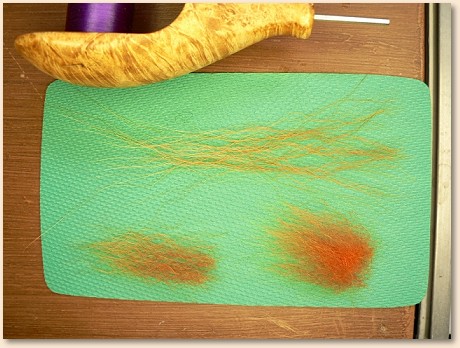
Polar bear section has three distinct lengths
of hair. Cut the clump that has sufficient amount
of guard hairs that will form the antennae,
back (carapace) and the tail.
Hold the tips of the guard hair firmly while pulling
gently on the other end of the clump.
You will separate the main, long guard hair.
Do the same now, holding the tips of the medium length
hairs and you will separate the finest fibers
that will be used for dubbing and the legs as shown.

Attach the guard hair extending out 1-1/2 length of
a tube, spreading it with the thumb nail around the
top.
FORMING THE DUBBING LOOP:
With griping "wax" such as "Wonder Wax" applied to
the thread section place the underfur making
sure that the tips are aligned to the left
and that they extend farther at tying point
going progressively shorter towards the end of the
dubbing loop. This helps to create somewhat tapered
profile of the legs.
(I double up the thread to form the loop but the
splitting method can be used).
DUBBING:

Wrap two turns over the tying point while "training"
the tips of the hair in direction facing the
antennae. Lift the tail end of guard hairs and
continue wrapping toward the head under the guard
hair.
COMPLETING THE BODY:
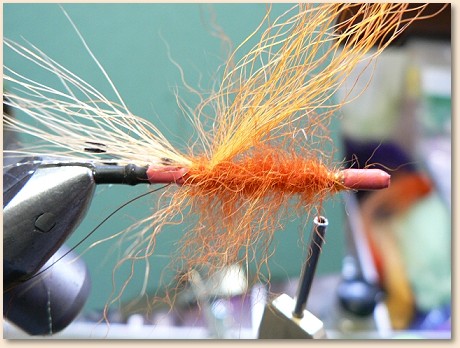
Bring the dubbing to a position approximately one
tube diameter from the flared end and tie down.
With your fingers, spread the dubbing hairs from the
top of the buddy downwards to form the legs.
RIBBING:

Rib in the opposite direction(4-5 turns), spreading
the guard hair with the thumb nail to form the back
(carapace?). Tie in and form the tail fanning the
hair out in as thin a layer as possible. Whip finish
and protect with head cement of a choice.
Tail can be shaped and manipulated to serve as a
lifting "fin," much like the Rapala lure,
or it can be trimmed down if lifting is excessive.
TOP VIEW:
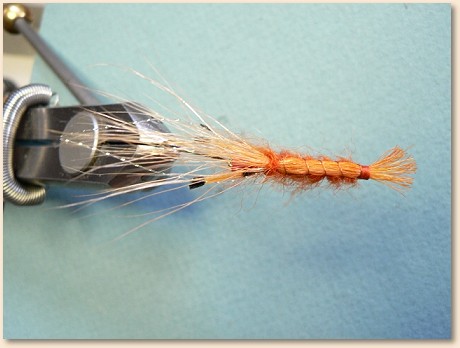
SIDE VIEW:

HOW TO FISH:
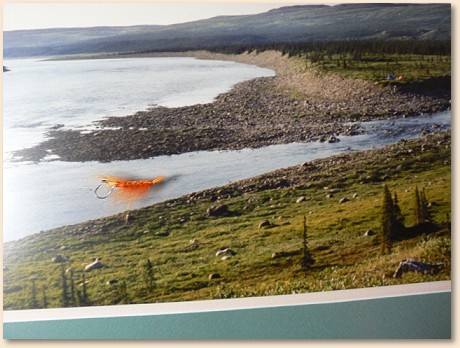
For the char and in higher velocity currents, I use
different shooting heads to match the conditions, or
High Density/High Speed Steelhead line of 275 grain
for better mending capabilities.
My leaders are 5 foot(1.5m)-20lb abrasive resistant
materials such as Stroft (or Maxima in the past).
Strikes are expected at the drift as well as on the
swing and with the char, they are awesome!
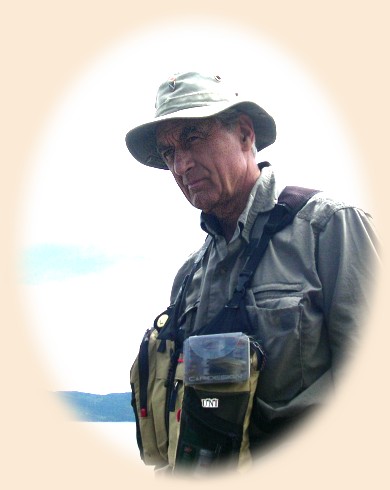
The photo above is of "MY" camp where I fished three
weeks at a time for 14 summers.
Knowing that this concept may be too complicated for
the tyers that have difficulties to flare the tubes,
I will show my dry fly skater made on the Q-Tip
or similar plastic tube, next time. It is much
simpler. In any case, should anyone have some
questions, I will be at your disposal.
Best Fishes, ~ Faruk Ekich