Compared with most crayfish patterns, the Baby Crayfish is
quick and easy to tie. The only tricky part is the fur claws.
The claws extend from the top of the crayfish, just behind the
eyes, but it is nearly impossible to position and tie the fur
inside the gap of a #8 hook. I found that it is much easier
to tie the fur onto the front portion of the body, then wrap
the thread back toward the back of the hook, inching the fur
into position. Wetting the fur before dividing and X-ing the
claws also makes it easier to complete them.
Materials List:
Hook: Mustad 9671, #8 wet nymph hook.
Thread: Black or dark brown 6/0 waxed.
Lead Wire: #30, tied onto both sides of the hook shank.
Small Legs: Brown grizzly hackle.
Body: Any long-fiber, dark brown fur.
Antennae: Any long, coarse, dark brown hair.
Mouth: Fine, dark brown deer tail and orange hackle.
Eyes: #3 black bead chain (available at craft store).
Claws: Any soft, cream-colored wool or wool-like fur. Dyed
sheep, racoon, coyote and arctic fox work well. Remove the guard
hairs tying in the claws.
Waterproof Marker: Any reddish brown color.
Superglue: Used to secure the lead wire.
Tying Instructions:
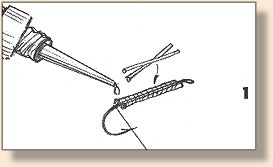
1. Attach the thread, then tie in a length of lead wire onto
the front side of the hook shank. Tie another piece of lead
wire to the other side of the hook shank, then apply a couple
drops of superglue to secure the lead.
2. Tie in six to eight strands of hair to form the antennae,
extending the material a full hook length beyond the rear of
the hook.
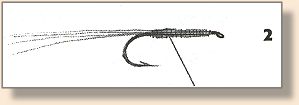
3. Attach a small amount of fine, dark brown deer tail on
top of the antennae. The hair should extend about half the
length of the antennae.

4. Tie six to eight bright orange hackle barbs over the
top of the deer hair.
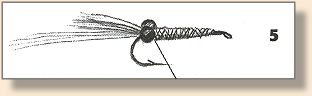
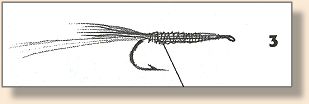
5. Attach a pair of black bead-chain eyes. Use metal eyes.
Do not use plastic.
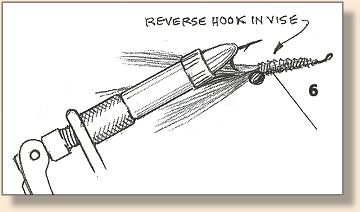
6. Rotate the fly (hook point up), and tie the fur claws onto
the top of the hook shank. Make the first few wraps, then wrap
the thread back toward the eyes. Continue to inch the thread
back until the fur is secured at the base of the eyes.
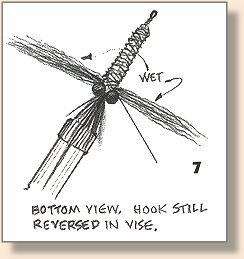
7. Divide the fur, then X the base with a few wraps of thread
to separate the claws. Wetting the fur with a little water
makes this step much easier.

8. Attach a brown grizzly hackle, then dub about two-thirds
of the body with any long-fiber, dark brown fur.
9. Palmer-tie the hackle forward (three turns), and tie it
off. Remove the excess hackle, dub the remaining portion of
the body, and tie off the head.

10. After trimming the grizzly hackle from the top and bottom
of the crayfish, color the ends of the claws with a reddish
brown marker.

11. While the ends of the claws are still wet, trim to shape
with scissors.
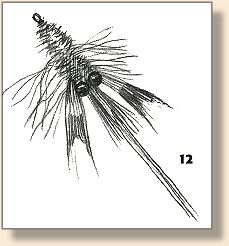
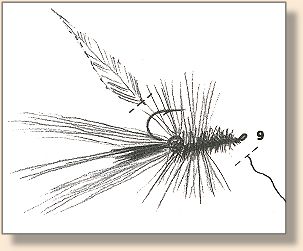
12. The completed crayfish is shown from the top.
~ Jay "Fishy" Fullum
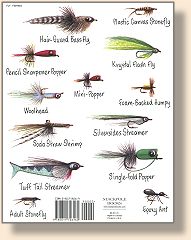
Credits: This is just one fly from a terrific new book,
Fishy's Flies by Jay "Fishy" Fullum, published
by Stackpole Books. In this book you will also find unique
material uses for tying terrestrials, dry flies, bass flies,
nymphs, poppers and some very neat saltwater flies. We've
shown the front and the back of the book to give you a little
better idea of what it contains. At $9.95 this is a real bargain!
~ DLB