Fly Of The Week

Previous Flies
Fly Tying Terms

The Skillcraft Glo Bug Tool
By Jim Meier, Fresno, CA

One of the most productive patterns for trout and steelhead is the Glo Bug. This simple little fly is most effective when the fish are spawning, as it imitates a wayward egg. The problem with Glo Bugs is that they are a pain to tie, and who wants to pay $1.85 for a bit of yarn on a hook?

This Christmas I received a marvelous gadget from my father to solve all of these problems, the Skillcraft Glo Bug Tool. This technological invention undoubtedly resulted from a fly fisherman trapped in the office staring into the trash can at yet another cheap pen just thrown away. Fishing the pen out of the trash and removing the innards he was left with a hollow tube that narrowed quite nicely at the tip. What a handy dispenser of glo bug yarn he thought to himself, and the tool was born.

Here is how it works: first you must struggle mightily to get the proper amount of yarn through the pen. Then when you tie, use just as much as necessary, leaving ½ enough for the next fly peeking out of the pen.

What follows is some of my fathers original artwork, and the step-by-step instructions if you feel you need them.

The tool assembly can be a trying experience and requires 5 things:

    1: a used up Skillcraft pen (or similar pen with a smooth barrel and metal end)

    2: 1 loop of glo bug yarn, or several smaller loops.

    3: a piece of strong wire that when doubled up will fit though the tip of the pen.

    4: a friend or spouse to help.

    5: optional, according to my father the family dog needs to be present, but if you are lacking this, I am sure it will still work.

Put the wire loop through the pen and slip the yarn through the loop, now using pliers pull the wire back out, pulling the yarn through the pen body. This may be difficult, as the idea is to compress the yarn as it leaves the tip of the pen. If it seems easy you may need a smaller tipped pen or more yarn or neither and you can just be happy.

This should give you a tool that looks something like this. These are what I received for Christmas. The one on the bottom has a ½ tied jig still on it.

Glo Bug Materials

    Hook: Jig or scud hook, size 12 - 16.

    Thread: Kevlar - this is a must, as the pressure needed to flare the yarn will break even 3/0 thread.

    Body: Glo Bug yarn in your preferred color.

Instructions for the Glo Bug:

    1. Put either a scud hook, or jig head in the vise and lay down a base layer of thread.

    2. Then I give the thread base a coat of super glue. I use a brush-on thpe made by Locktite, that way I get 3 months out of one little bottle of it.

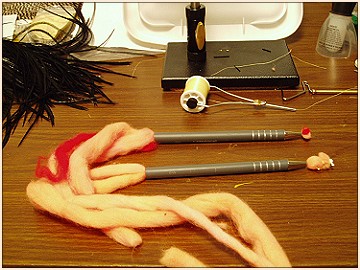
    3. Now pull out about 3/8 of an inch of yarn and cut it off clean. Lash it to the hook, loosely for two wraps then very tightly for three or four more.

    4. Move the thread off the yarn to the hook wrap it a few times and whip finish. Then pull out a bit more yarn from the pen, make sure you hold the fly as the yarn is really stuffed in there! Then cut it off clean.

    Note: If you cut it off too short, all is lost and the Devil will come see why you are yelling bad words.

    5. This should make a perfect little ball of fluff that looks like an egg to the fish.

    6. This method allows for the tying of many glo bugs in very short order. A small dot of pink or orange permanent marker on each egg adds to the effect.

This is dedicated to my father, for teaching me how to hunt, fish and be the best man I can. Thanks Dad!

P.S.
He can often be found haunting Missouri's trout waters with my equally wonderful mom. ~ Jim

About Jim:

Jim Meier is a Graduate Student studying applied geology at California State University Fresno and working for the US Bureau of Reclamation. He can be reached at glst@csufresno.edu


For more great flies, check out: Beginning Fly Tying, Intermediate Fly Tying and Advanced Fly Tying.


[ HOME ]

[ Search ] [ Contact FAOL ] [ Media Kit ]

FlyAnglersOnline.com © Notice