
THE GOLDEN VICE FLY
A few weeks ago I was just tying up some flies to no particular pattern and ended up with this fly. At the time I just wanted to use up some of my golden pheasant feathers. I’m sure every fly tier ends up buying a golden pheasant skin at some point, but then realises there are not a lot of dressings that call for it. I’ve come across a few, and in a book by Bill Tagg, he mentions a dry fly (Pop’s Gnat) that uses some of the fibres as the body material. Using that as inspiration I’ve tied a few basic nymphs with them and now this wet fly. I posted the first wee wet I tied on the board and mentioned I was just “Playing at my vice” when I came up with this, which prompted a few good puns and resulted in the above name. This is only my second tie of this pattern, the first was a size 12 and this one is a size 10. I’ve not had a chance to fish it, and probably won’t for some time yet, so if anyone gives it a go I would love to hear how it held up.

Materials:
- Thread: Uni Olive 8/0
- Hook: size 10-16, wet fly
- Tail: golden pheasant tippets
- Rib : gold wire
- Body: fibres from a yellow golden pheasant body feather
- Thorax: olive / dark green wool
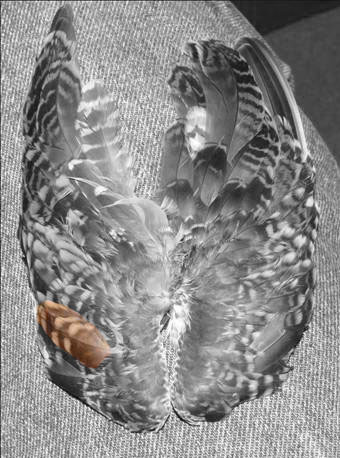
- Wing: quill slips from cock ringneck pheasant secondary feather
- Hackle: snipe
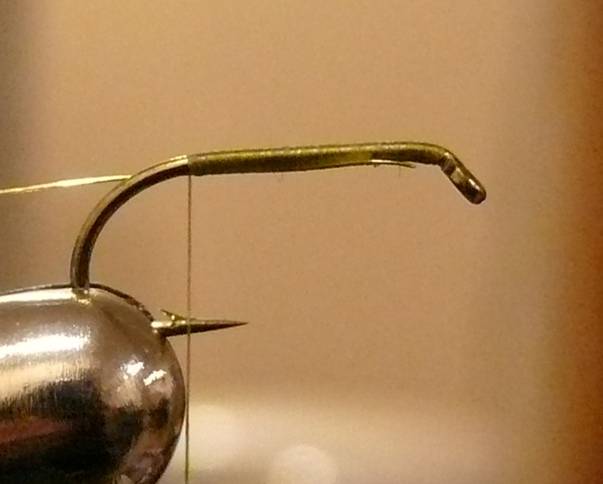
 Step 1: Tie on thread. This is a size 10 wet fly hook. The thread is Uni Olive, 8/0. I’ve put some bee’s wax on the thread as well, in part so it sticks a bit better to the shank. Also, the body material fibres are slippery, and waxing the thread seems to assist in holding them in when bound. It’s not necessary though, so if you are philosophically opposed to wax you can leave it out. Uni thread is a synthetic, so waxing doesn’t change the colour very much, the way it does with silk.
 Step 2: At the point I left the thread in the last step I’ve laid in some gold wire (Ultra Wire, size “sm”, for small I guess). I’ve laid it along the bottom of the shank and have left a wee bit sticking out at the front. We’ll get to that later. Wrap the thread to about the barb binding the wire to the hook.
 Step 3: Tie in a tail of Golden Pheasant Tippets. I try and pick them so the two bars are about a body length apart. I’ll sometimes tie them in with the 2nd bar right against the thread, or, as in this case, just over the bend; those seem to be my visual landmarks for this kind of tail. Others may prefer the bars closer together, so that they visually cut the tail into two halves; there’s no “right way”, so tier’s choice. Anyway, trim the fibres about mid-shank, not quite as far as where the wire is.
 Step 4: Wrap the thread forward, binding down the ends of the tippets. Stop just before you reach the bit of wire that is poking out, and then fold the wire back so it points towards the tail. I’ve taken the photo with the wire bent ½ way there so you can see the proportions. Once it’s pointing towards the tail, then wrap forward over the bent back wire and then back again towards the tail, completely covering the wire. This helps “lock in the rib” so it won’t slip out.
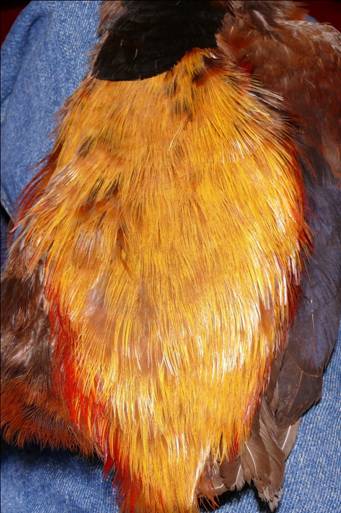 Step 5: Select a long fibred yellow feather from a golden pheasant skin. Strip the fibres off the feather and keep them in a bunch. As a variant, you could use a red feather (Crimson Vice Fly), or some of the brownish ones (Brown Vice Fly, etc.).
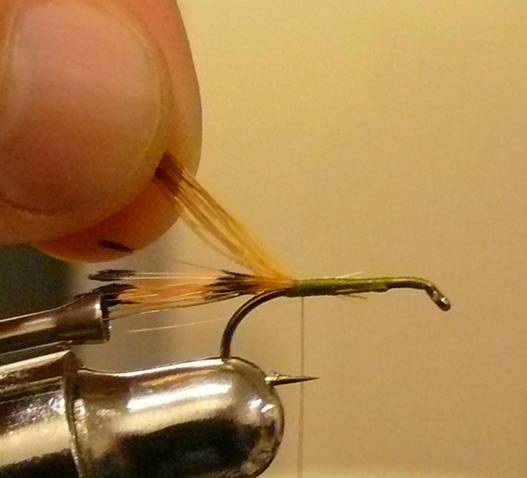 Step 6: Tie in the bundle of fibres on the side of the hook. Think of this as a natural fibre floss strand. I wrap this in the same direction as I wrap the thread, and try and keep the fibres lying flat and smooth. Because these fibres are a bit fragile, be gentle when wrapping. Also, I like to put a touch of cement on the shank just before wrapping the fibres. If a trout’s teeth cut the fibres, this will help keep the fly together.
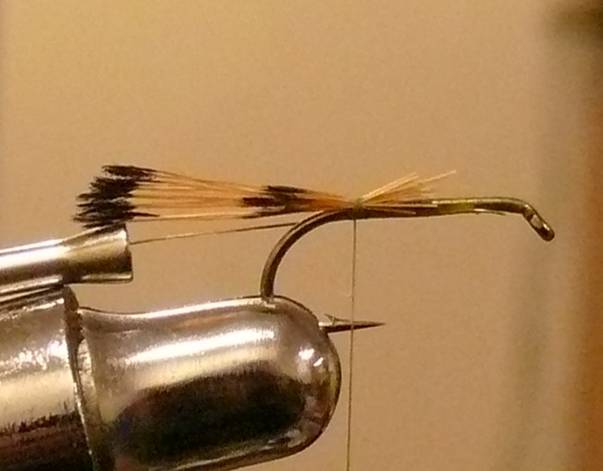
 Step 7: Tie the fibres off. On size 12 or 14, you could bend the tips back for a wing, or if tying a nymph, keep the tips for the wing case. These would be a bit small for wings on a size 10 fly, but my Golden Pheasant skin has smaller feathers than some, so you may get more length from yours.
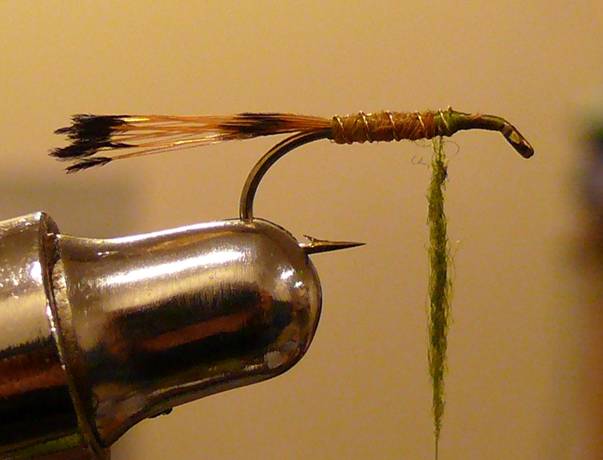 Step 8: Counter wrap your gold wire rib; again this will help protect the fibres from getting cut. Notice that I’ve taken the rib an extra turn beyond the body then broke the wire off on top of the shank. I’ll cover this with the wool dubbing, but I find if you have the room to do this then it helps keep the last visible turn of the rib neater. Otherwise, when breaking off the wire the last turn sometimes distorts. To break your wire, just press your thumb nail on the wire and push against the hook, and then wiggle the tag end until it breaks. This saves your scissors from getting dull. Dub a short section of thread with a dark green or olive dubbing. I’m using wool which more or less matches Uni Olive, but any good dubbing material would work (hare’s mask, seal’s fur, etc).
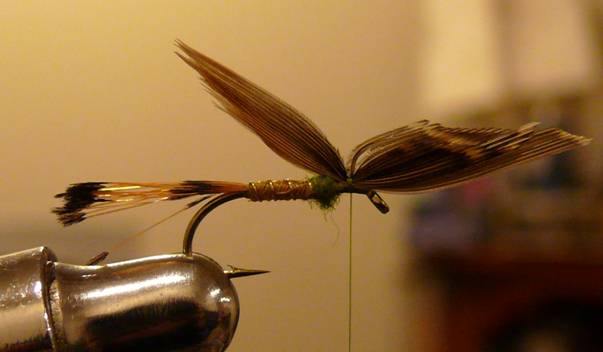 Step 9: Dub a small thorax. Then, tie in a pair of quill slip wings taken from a secondary feather from a cock ring neck pheasant. Any light brown quill would be fine.
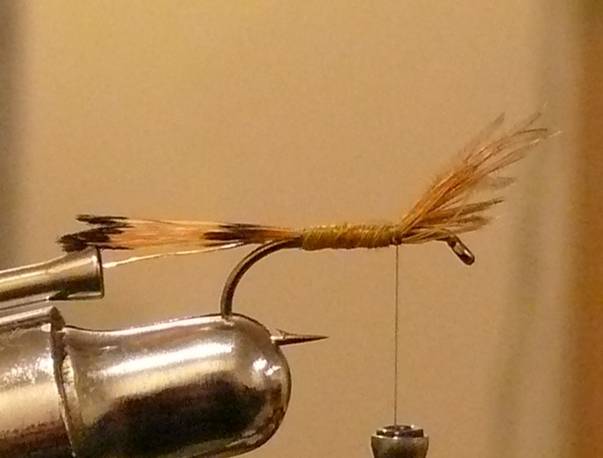
 Step 10: Select a covert feather from a snipe wing.
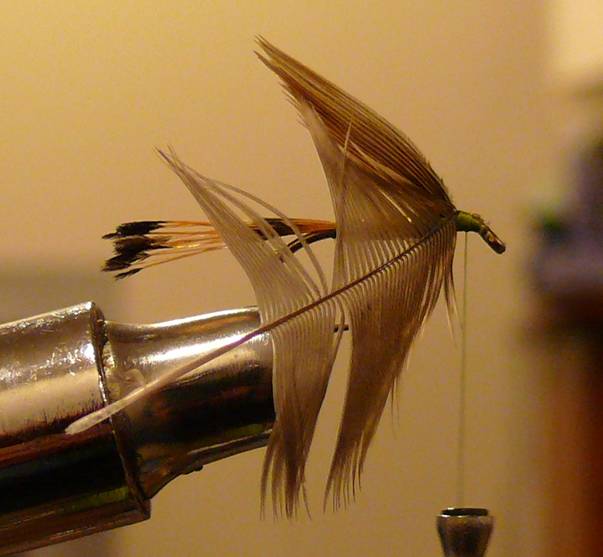 Step 11: Tie this in by the tip and make 1 or 2 turns. You can strip one side of the feather for a sparser hackle, though I obviously didn’t this time.
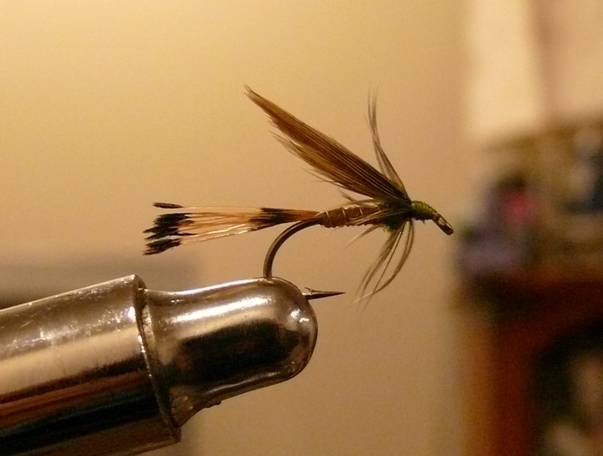 Step 12: Trim your feather, form a neat head, whip finish and cement the head.
Tight lines!
Jeff Hamm
For more great info, check out:
Beginning Fly Tying | Intermediate Fly Tying | Advanced Fly Tying.