|
I mentioned several weeks ago that the hackle floats the fly by resting
on the surface tension of the water. If you increase the amount of
hackle on a fly, you can fish it in faster water because of the increased
buoyancy created by the extra hackle in contact with the surface tension
of the water.
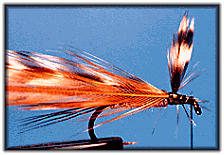
Many "western" flies have more hackle on them than their eastern
counterparts because western waters tend to be faster on average than
eastern waters. Many of the flies I tie have a decidedly western
"flavor" in that they are heavier hackled than those used in calmer
waters.
As we progress from the Adams to the Royal Wulff (later) and the Humpy
(even farther away) you will notice the heavier hackle on these western
style flies. If you live in an area that has calm water, you might find
these heavier hackled flies a bit "thick" for your water. Don't give up
yet, most patterns can be adapted to any type of water by tying them with
more or less hackle.
If you feel you need to adapt this or any fly to a calmer type of water,
just extend the body slightly, and wrap less hackle on a shorter portion
of the hook shank. That means less hackle wraps, and a fly that floats
in slow water but would sink in fast water. That wasn't too hard was
it?
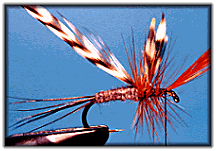
Of course, some flies were designed for fast water, and adapting them to
slow water would be a disaster. Wulff, Humpy and Stimulator patterns
must have heavy hackle to look or perform right, and therefore are
specialty flies designed for fast water. Likewise, some flies were
designed for slow water, (Catskill dry flies for example) and adding
hackle to them to increase the floatation qualities of the fly would be
grounds for expulsion from the ranks of purist Catskill fly fishing
clubs.
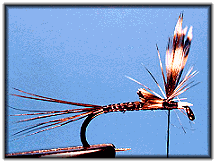
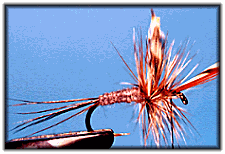
The Adams is one fly that can be adapted to almost any type of water.
It can also be tied as a thorax fly with various types of wing material,
and several types of tails. If you're like me, you won't be content to
merely tie the traditional dressing, but would rather experiment a little
with the skills you have learned to this point. You might also want to
tie this fly in some heavy hackled versions for riffles and pocket water,
and some lightly hackled versions for calmer water.
Experiment with different types and colors of body materials and wing
materials. It won't be an Adams anymore, but it will probably catch
fish. That's the beauty of tying your own flies, you can create, modify,
alter, adjust and refine any pattern you wish, and still use the same
basic tying steps you would use on another fly.
Let's get to this week's pattern. If you don't have the right hackle
for this pattern, use the hackle you have with the same tying steps as a
form of practice. For instance, if you use dun hackle and wings, you
simply create a Gray Dun instead of an Adams.
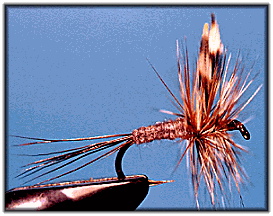
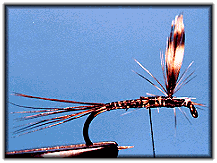
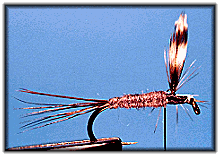
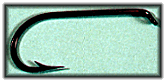
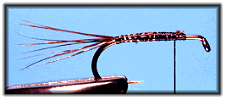
List of materials: The Adams
Hook: Standard dry fly; Mustad 94840, Tiemco 100, Eagle Claw L059,
Daiichi 1180. Size 10 - 22.
Thread: 6/0 to 10/0 Gudebrod or equivalent, color to match body or
black.
Body: Angler's Choice pure silk
dubbing, muskrat under-fur, or any other synthetic or natural fine dubbing.
Wing: Grizzly hackle tips from spade hackles or the hackle found at
the top of the neck. Hen hackle tips also work well. Length of the wing
should be about 1 1/2 times the hook gap.
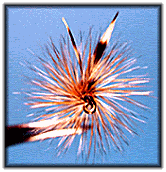
Hackle: Quality neck or saddle hackle, webby parts removed and 1/16"
of the remaining stem stripped of barbules. One grizzly and one brown
hackle. (Be careful to match the length of the barbules of the hackle
feathers.)
Tying steps:
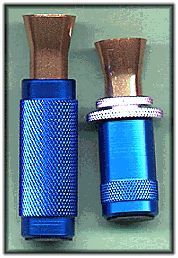
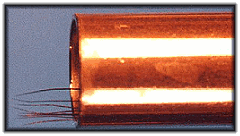
1. Cut about a dozen moose hairs from a patch of moose neck or body hair,
and drop them tip first in a hair stacker. Be sure to remove any short
hairs and under fur before you place the hairs in the stacker. (Pictured
are Griffin hair stackers. The short one is adjustable).
2. Tap the stacker on your table a few times to align the tips of the
hairs. Tip the stacker on its side and remove the cone from the stacker
body. Your hairs should appear as in the picture, the tips aligned with
each other.
3. Tie in the hair tail, length about equal to the hook shank. Don't use
too much thread pressure near the bend of the hook or the hollow hair
will flair or be cut by the thread. Gentle pressure is all that's
required to tie a tail in properly.
|