This is a fly that I saw on the late Mark Delaney’s web-site although
he just called it a Crease Fly. I call it a Minnow Crease Fly because
it is not a standard crease fly. This fly has a narrow profile body like
a minnow. There is no open space or wide opening in the center of
the fly like a standard Joe Blado’s Crease Fly because there is less
foam material. The standard crease fly is an imitation of a baitfish and
most are large and intended for saltwater use. I suppose an open space
wide opening in the center of the MCF could be used so that the fly
would be more like a pencil popper but I don’t do that as it would be
far more difficult using less foam material while still retaining the narrow
profile. The idea is to position the foam body so that most of the foam
is above the hook in order to have buoyancy above the light wire hook.
This seems to orient the fly in the water so that the hook stays below
the foam body. The fly may lie on its side or ride just below the surface
at times but this serves as a benefit rather than a liability as it can suggest
a crippled minnow.
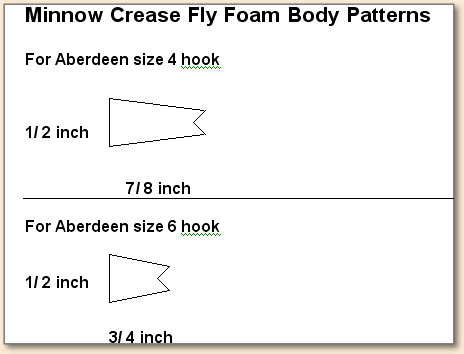
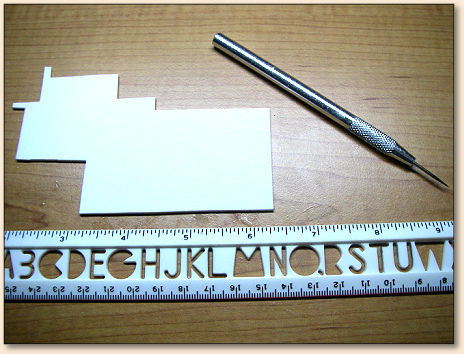
I am still trying to learn how to use my camera and correct lighting.
I found that iridescent paper does not photograph very well at
some lighting angles. The foam body pattern diagram below is
not intended to be used as a form for the body but rather as a
guide for the shape of the foam body. I just use the dimensions
to cut the foam body and then trim the body to the general shape.
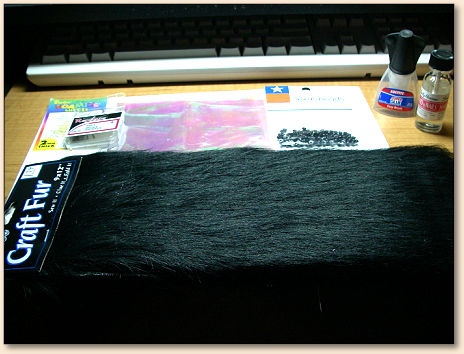
Bill of Materials
Hook: Aberdeen sizes 4 and 6
Thread: Black 6/0
Tail: Black shag (long) craft fur (Such as Darice).
Underbody: White 2mm craft foam sheet material.
Highlights: Waterproof permanent markers (Such as Sharpie)
Overbody: Iridescent gift wrap paper or similar.
Eyes: 4mm black plastic half-rounds (Such as Texas
Beads) for size 4. 3mm for size 6.Underbody/Overbody/Eyes Adhesive: Loctite Superglue
in the Easy Brush bottle.Body Overcoat: Either clear Sally Hansen’s Hard
As Nails or clear epoxy.
Method:
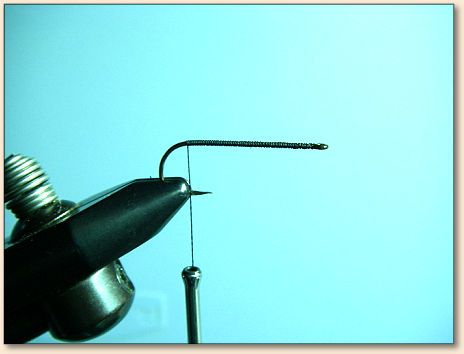
- I first lay down a thread base on the hook shank. I
am using a size four hook here so I will be using the size
4 foam pattern above.
- Then I tie in the black shag craft fur tail about three
quarters to one full length of the hook shank long. I whip
finish behind the hook eye and cut thread. I have to be
careful not to put too much craft fur in for the tail along
the hook shank or it will be too thick for the foam body
but this gives a good base for the adhesive on the body
to adhere to.
- I score the foam sheet with the bodkin before cutting
the foam piece using the dimensions on the foam body
pattern sheet for the foam underbody.
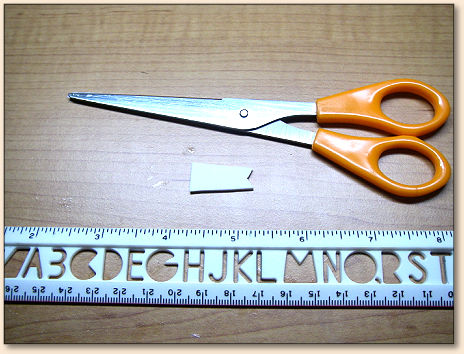
- I score a line down the middle of the piece lengthwise and
then shape the cut foam piece as to the shape of the foam body
pattern. I trim at a slight angle on either side keeping the one
half inch on the front. Then cut a shallow notch for the tail area
in line with the middle score line.
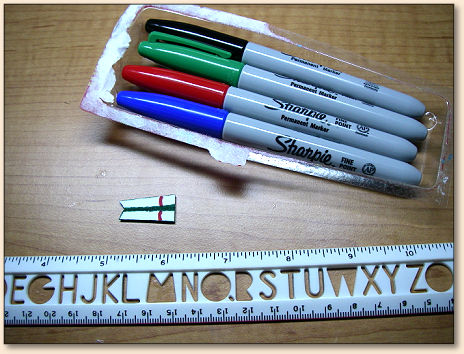
- Then I highlight the foam underbody with the waterproof
permanent markers.
- Set aside the finished underbody to let the marker ink dry for
the time being.

- I use a knurled surface such as a metal or wood file to create
the scale pattern or texture on the iridescent gift wrap paper I use
for the overbody. I used the knurled gripping surface of my bodkin
in this case but a file would be better because it is a flat surface. The
plastic handles on the craft scissors work good as a smooth surface
rubbed over the paper on the file.
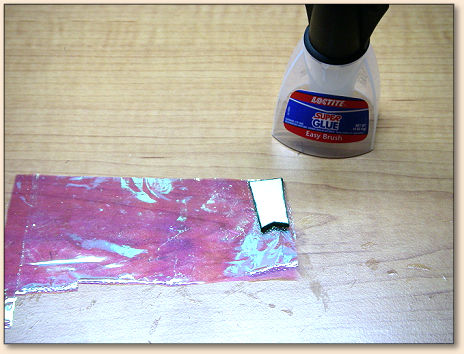
- I lay down some adhesive Super Glue onto the textured
portion of the gift wrap paper and then press the foam
underbody highlighted side down or bottom up onto the
knurled or texture scaled gift wrap paper.
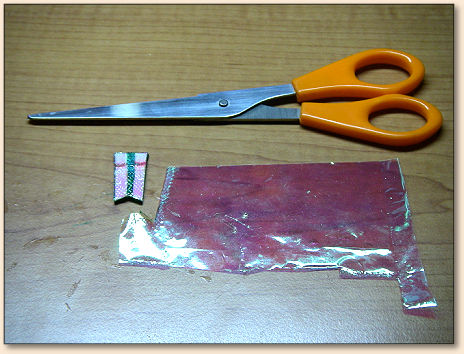
- I cut out the completed body from the gift wrap paper.
Careful to trim the overbody edges flush with the underbody.
I also check to make sure there has been a good seal as I may
have to add more adhesive to unsealed areas.
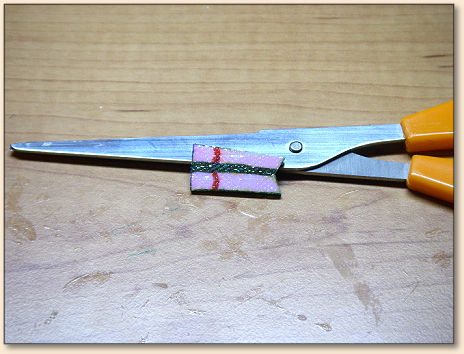
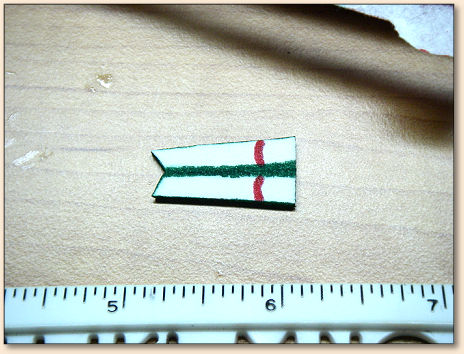
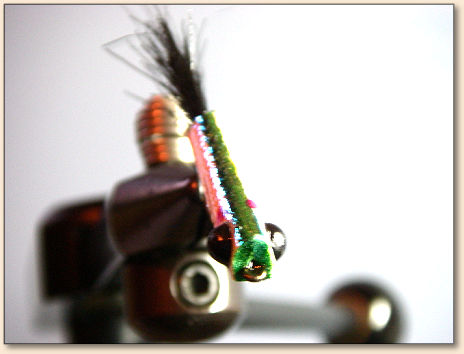
- The highlights and knurled texture scaling are more visible from
this angle. The reason I like to use the iridescent gift wrap paper
beyond the pearly flash of the paper is that the highlights of the
underbody are visible through the paper and the textured scaling
effect can also be used. But other overbody paper material also
can provide very nice effects.
- I form fit or crease the body so that it fits on the hook. Then
I apply adhesive Super Glue to the underside of the body and fit
onto the hook shank in a squeezing manner, careful to try and keep
most of the foam body above the hook shank.
- I place the fly in a bulldog type paper clip to hold the body
and hook in place until the adhesive Super Glue has dried. I may
add extra adhesive as needed.

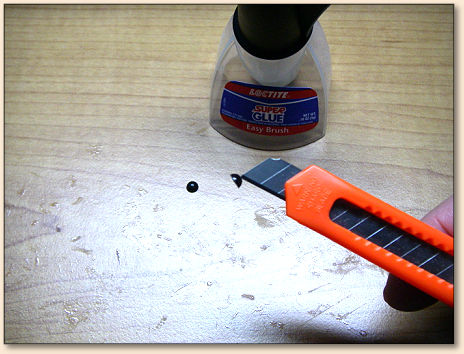
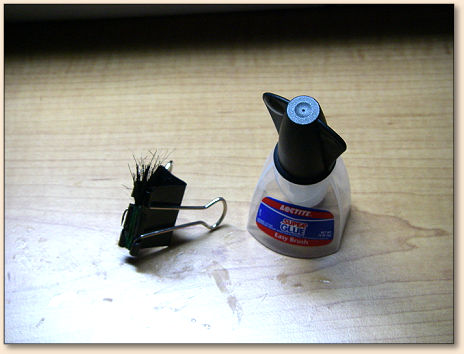
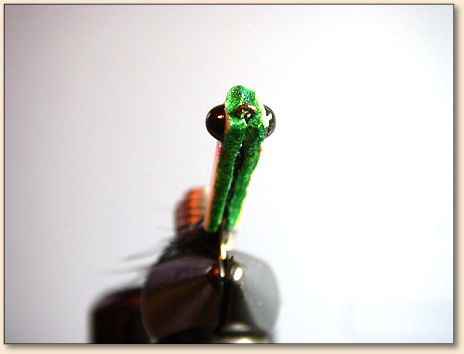
- After placing some adhesive Super Glue onto the eye area
of the fly, I use a craft utility knife tip to apply the black plastic
half-round eyes. Be very careful not to cut yourself on the knife
razor edge if you use this method. Sometimes I use my fingertips
to hold the eye in place on the body but I have to be careful not
to stick my finger to the eye or the body. I overcoat the finished
fly body after the eyes have dried.
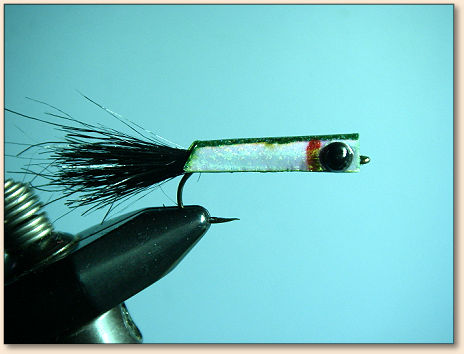
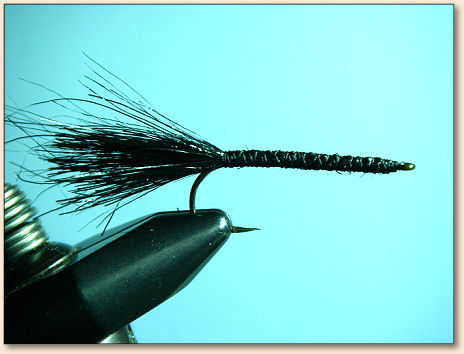
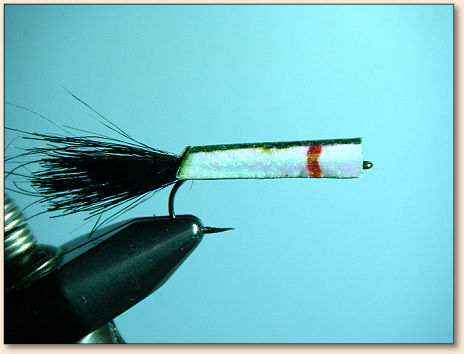
- The Finished Minnow Crease Fly.
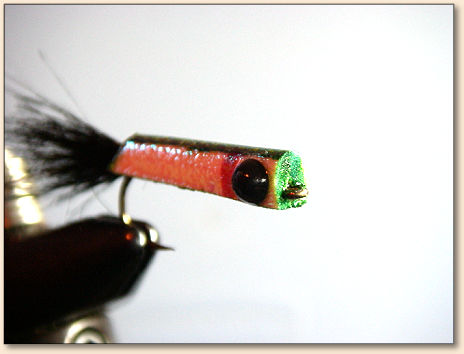
- Side View.
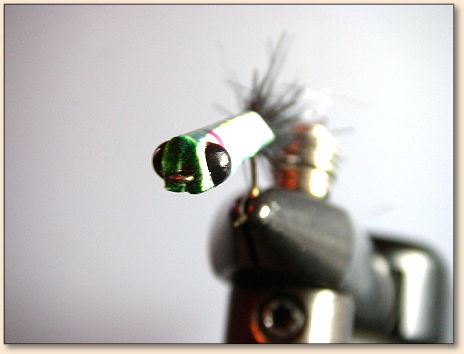
- Side View.
- Top view.
- Bottom view.
This fly seemed messy to me when I first started to tie it but
I found that as I got more practice and repetition tying it that
it became less messy and fairly easy to tie. It is also cheap to
tie and other than the hook and thread, uses very few materials.
Different types of materials may be used also.
I give credit to both Joe Blado’s Crease Fly and Mark Delaney’s
Crease Fly.
https://www.flyfishsaltwaters.com/Creasefly.htm
https://chemprof.tripod.com/crease.htm
I have caught most warm water fish with the MCF. It seems
that any fish that feeds on minnows or smaller fish will bite this
fly. I have caught Largemouth Bass, Bluegill, Shellcracker
(Redear Sunfish), and Specks (Speckled Perch, Calico,
Crappie, etc.) on this fly just to name a few. Either a twitching
or a pausing retrieve usually works well for me. I have given this
fly to some of our fellow FAOL fly anglers here in the United
States and have heard good reports about this fly. I hope you
will also have success.
Flip a fly, ~ Robert Bryan McCorquodale (dixieangler)
For more great flies, check out: and
Originally published August 18, 2008 on Fly Anglers Online.