Spruce Fly SBS

The streamer, not the bug. Tied these up to throw at runners coming up out of Hebgen a few years ago, but we hit a warm spell and had to resort to other means. Fun fly to tie; dug out my copy of Jack Dennis Western Trout Fly Tying Manual for a refresher.

hook - Mustad 3665A #6
thread - UTC 140 black
tail - peacock swords
rib - gold wire
abdomen - floss red
thorax - peacock herl
wing - 2 saddle hackles badger
hackle - badger

Part 1

mash barb and start thread at 50% mark

tie in wire rib

tie in peacock sword fibers (4)

trim sword butts and return thread to 50% mark

wrap floss forward; good luck keeping that stuff under control to lay down a smooth body

want a thin body on this one so just one layer of floss (thank goodness)

wrap wire rib forward and tie off

trim tips on a bunch of peacock herl fibers

tie peacock in

leave bobbin hanging at tie in, grab peacock herl

Part 2

twist herl around thread

and wrap forward

tie peacock off, leave about 2 hook eye distance to the front

tie in a pair of badger saddle hackle feathers

prep another badger saddle feather

and tie it in by the tip

wrap saddle hackle forward, brush fibers back

whip finish and brush the head with Sally (lacquer would give that Hotblack Desiato stuntship finish if you’re of a mind); hackle’s a bit short here but my supply of badger is a bit sparse

hairwing variation and a thicker body (fox squirrel tail for the wing, furnace hackle)

Regards,
Scott

Hi Scott,

Nicely presented, and thanks for sharing.

You interested in some constructive criticism, or prefer not?

Cheers,
Hans W

Hans,

Absolutely. Any and all welcome. Streamers are not my best.

Regards,
Scott

Scott,

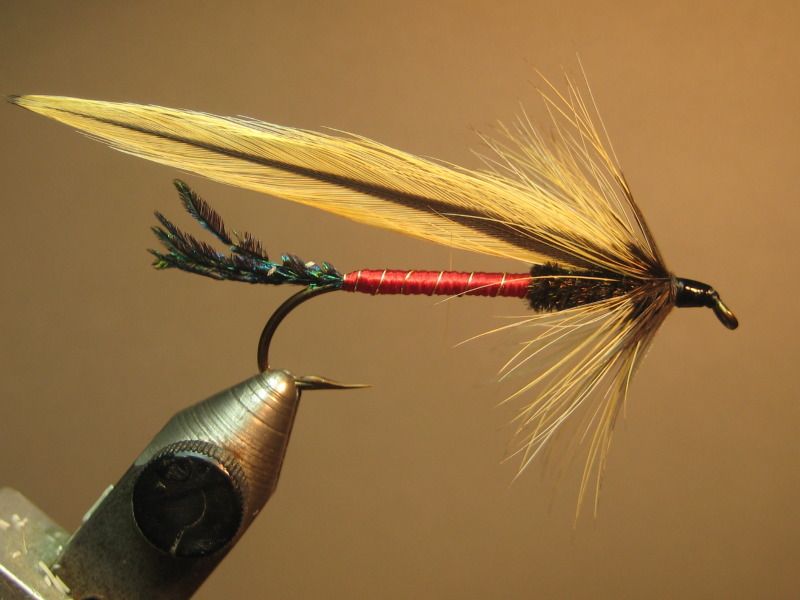
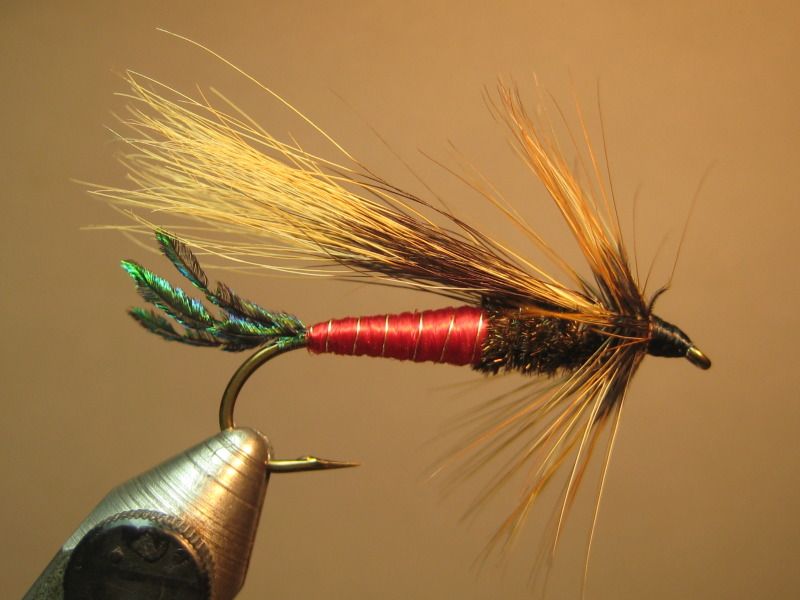
Let me start by saying again - the entire streamer is more than competently tied. The comments below are guidelines how you can make it better.

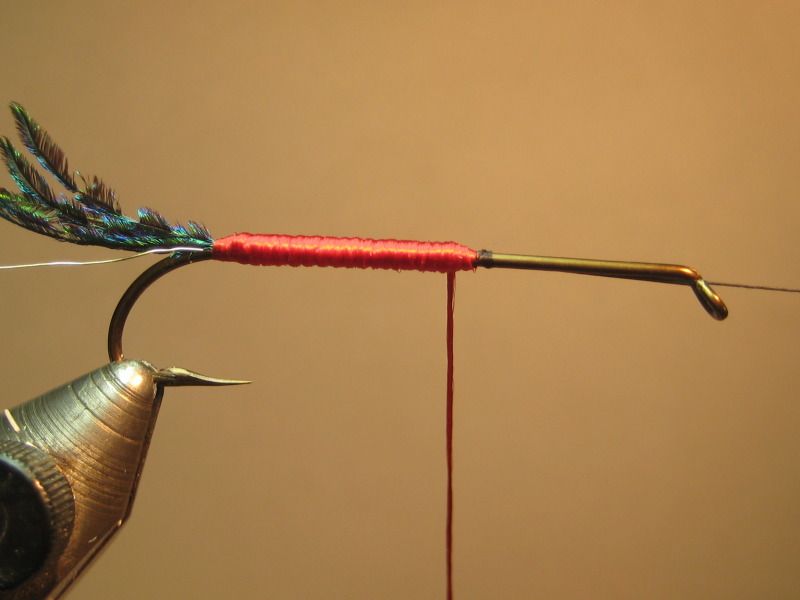
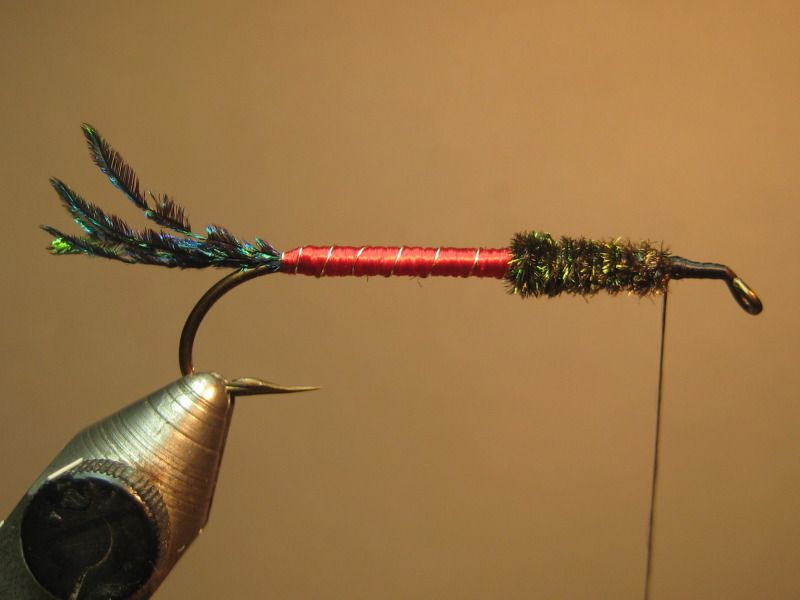
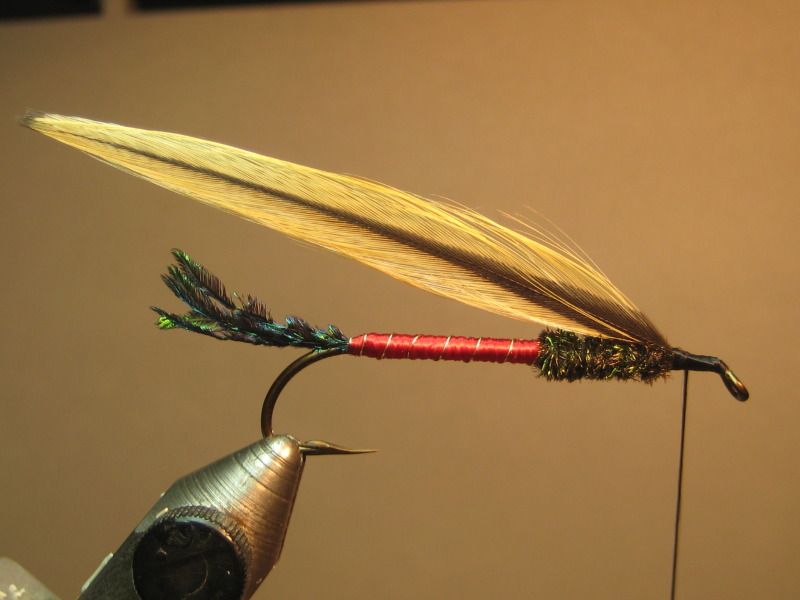
The area which is screaming out for some attention is the abdomen. Fix that and the entire streamer will look much better.

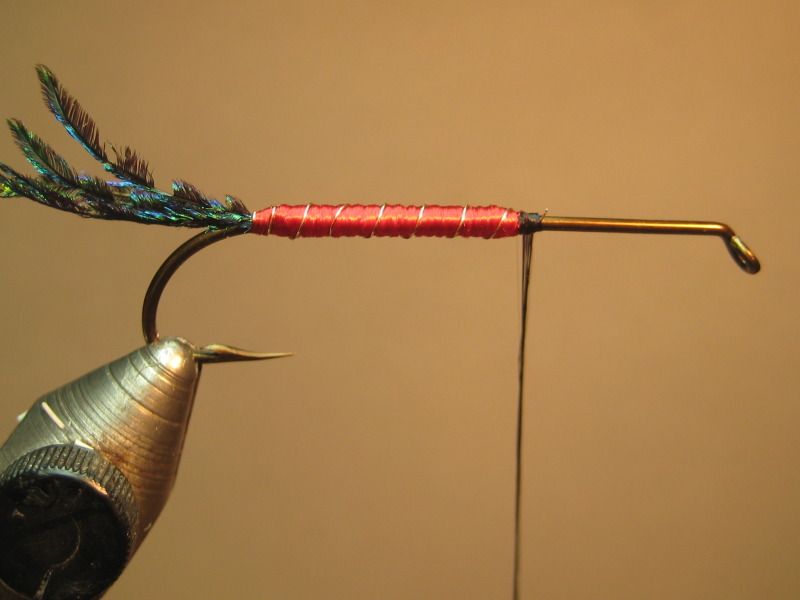
The ribbing is not even, but I know you can fix that yourself easily enough. It is the floss part where the big improvements can be made.

Here is a text I wrote, many moons ago, on the subject:

===

There are no secrets to a ‘perfect’ floss body, but there are quite a few things to keep in mind for the process of getting close :wink:

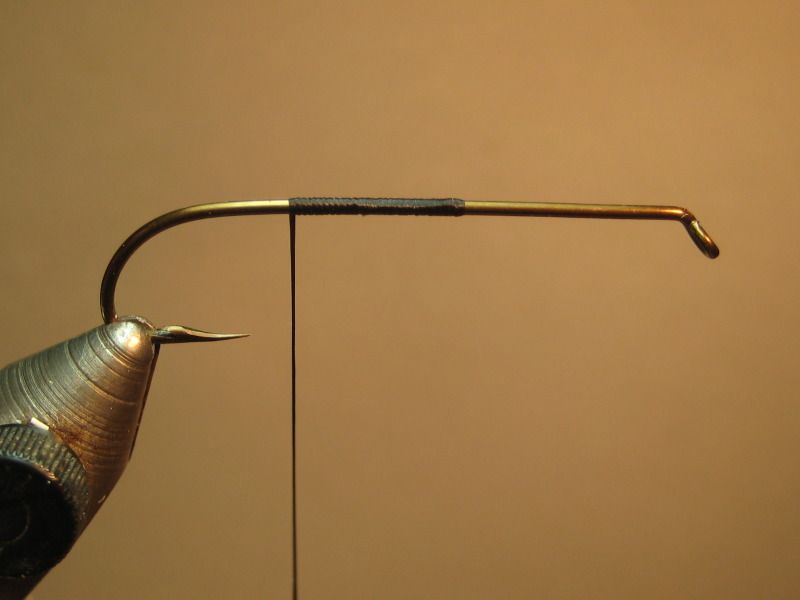
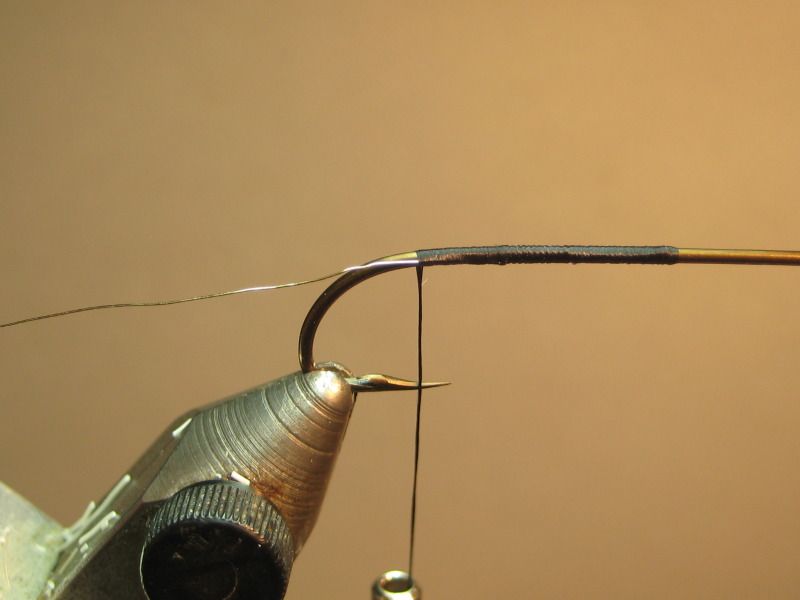
First and foremost, the underbody has to be level! Without this your ship has already sunk before it has touched the water.

Floss is easily soiled and frayed. Maintain dry, clean and ‘soft’ hands. Or wear silk glove liners when handling/wrapping floss. (Some of the finest classic salmonfly dressers do, so do not feel you are a wimp. Just wear 'm!)

Floss comes in single and multi-strand. Always wrap single strand, even if that means separating the four strand version.

As you wrap the floss, take care to avoid any twisting of the strands.

Make an even number of layers of floss, Usually two, but you could do more. I.e. start close to the eye of the fly and wrap towards the bend, and then back up. This avoids the lump, which invariably marks the start
of a single layer floss approach.

Make sure the floss body is “butted” at the bend of the hook by another material to stop the strands from sliding beyond the point you want the floss section to end.

Floss consists of multiple filaments. This is bad news and good news. The bad news is that the filaments have the tendency to slide over one another. The good thing is that the filaments have the tendency to slide over one another :wink:

Floss bodies need to be wrapped with consistent and fairly firm pressure. When wrapping you try to make the body as even and level as possible. The fine-tuning comes next!

If you wrap the floss too tight, the filaments will not budge and the fine-tuning process (or more precisely the burnishing process) will fail as the individual strands will not move…

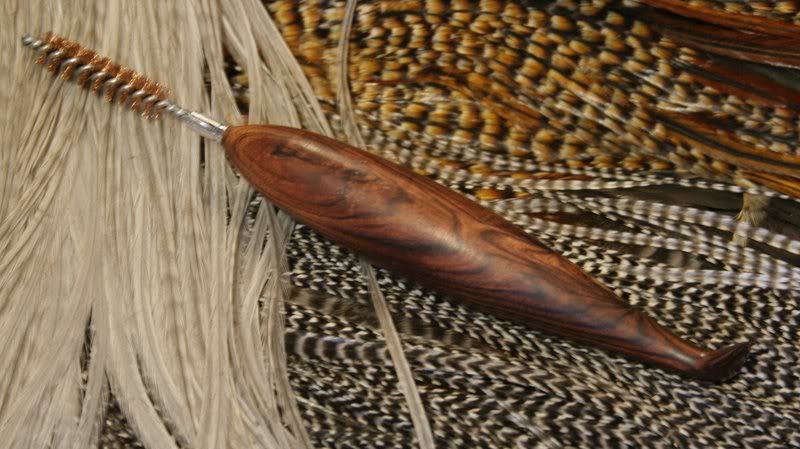
Use a burnishing tool to ‘rub’ the last imperfections away, to smooth out any minor lumps or level any small depressions. Please note this is a fine-tuning exercise, the very last step. It will not work its magic if the starting point is severely flawed to start with!

===

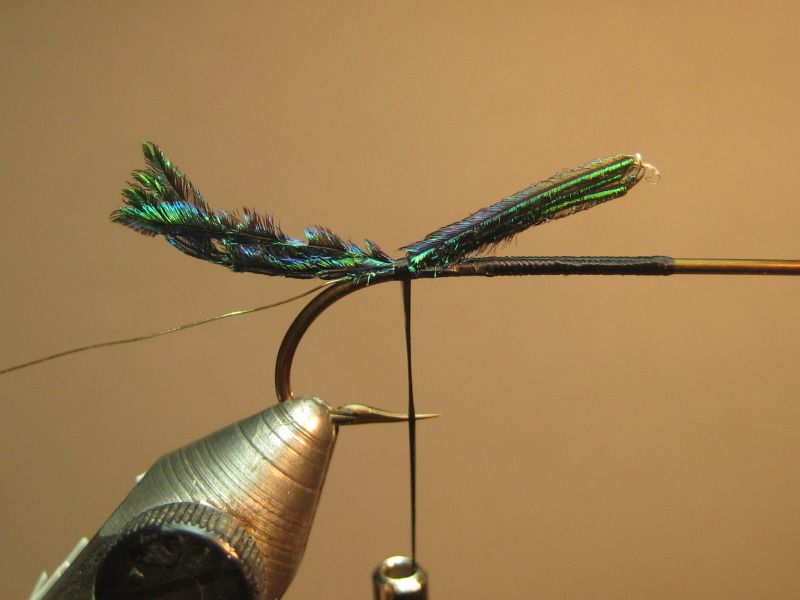
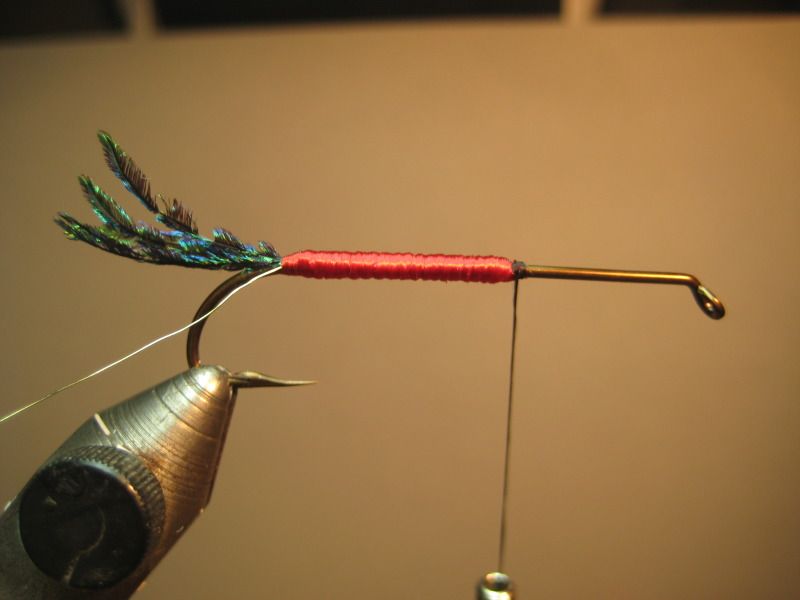
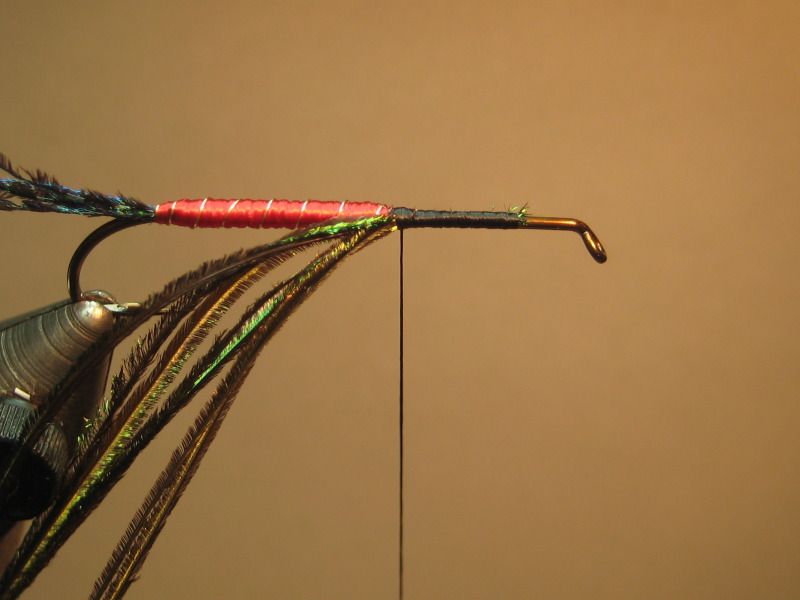
When you look at the relevant steps before you started wrapping the floss, note that the underbody is not level. The tailing material does extend all the way to the thorax so that is good, and it looks like you kept that on top of the shank = level top. The ribbing material does not run all the way to the thorax from what I can see. Either that or you did not manage to keep the wire in a straight line. Same with the floss you tied in. It looks like it runs all the way to the thorax, though I cannot be fully certain, but in any case it did not run straight. Note the dent in top a little bit up from the tail. I would recommend you tie it in at the thorax point, run it down to the bend and back up again, not the single layer you have.

All this may sound very pedantic, but floss bodies and tinsel bodies - they are totally unforgiving. If you do not manage to keep the underbody completely level, you paint yourself into a corner.

Once you have the underbody level, refer back to the floss comments above. Get yourself a burnishing tool. A very decent burnishing tool, at little expense, is a smoothly polished straight glass rod.

Cheers,
Hans W

Hans,

I believe I will print this off and put it on my tying table. Thanks so much for the advice and, again, it’s very good to see you back here.

Regards,
Scott

Hans -

You say: "Make an even number of layers of floss, Usually two, but you could do more. I.e. start close to the eye of the fly and wrap towards the bend, and then back up. This avoids the lump, which invariably marks the start of a single layer floss approach.

Make sure the floss body is “butted” at the bend of the hook by another material to stop the strands from sliding beyond the point you want the floss section to end."

How do you butt the floss at the bend of the hook in a fly like this? – do anything other than the previously tied in tail feathers?

(I also agree with Scott that’s it’s nice to see you back.)

John

John,

The wire rib used in this pattern is all the “butting” needed to prevent the floss from slipping past this rib tie-in point.

Cheers,
Hans W

Scott, it takes the ultrakeen eye of presentation tiers like Hans to give such excellent and kind-hearted critique. In contrast, and in comparison with my own tying, I was noticing how very precise and excellent your proportions are…and I thought the floss bodies were exceedingly excellent, and even that the taper you created on the second would be hard to improve on. I can see the merit of Hans suggestions (who wouldn’t?), and they are excellent tips for everyone.

I guess my point being just that you do an excellent job, so keep posting these SBS’s. And something else I heard just yesterday, “The most beautiful things in the world can quickly become ugly if viewed closely enough.” :smiley:

Dave,

Skill and attention to detail set tyers like Hans apart; he plays a game with which I am not familiar.

Regards,
Scott

ps - never would have used floss if I could have come up with a spool of red Uni-Stretch :wink: (but then I wouldn’t have learned how to tie it properly, either)

Just so there is absolutely no misunderstanding - Scott’s streamer, and the other SBS’s from him I have seen show excellent tying as well as presentation. Doing proper floss work is among the most tricky things to get ‘right’.

I would be very disappointed if my suggestions on the subject today would discourage Scott, or anyone else, from posting fly images or step by steps. I love seeing them, and I am far from alone in this.

I am looking forward to your next ones, Scott.

Cheers,
Hans W

Hans,

It’s kinda like Eric Clapton stopping to listen to my garage band playing and offering pointers. Please do.

Regards,
Scott

Exactly. :smiley:
No disrespect intended by me towards anyone. My only intentions were to compliment Scott’s work, and also Hans’ skill. You are both great examples of sharing, helping, and teaching your fellow fly crafters. Kudos!

I too look at Scott’s flies and say wow that’s nice. But put that in combination with Han’s critique and tips and I have to say wow again. Thanks Scott for the SBS and thanks Hans for the tip. You guys make a great team.

Beaver

I turn these and either thread the end for a (rifle bore cleaning) brush or glue in a piece of ivory shaped like a flat iron with pointed edge top to use as burnishers. The tail end is used and the more they are used the better they work. The ivory ones come into their own on rod guide wrappings.

Hap, Love that tool, how much are they, and do they come with the three saddles? The best material for a burnisher is haematite, The one I had was the tool used for laying gold leaf (I used to do some fairly serious calligraphy). Unfortunately mine was stolen years ago with a large number of pens etc. Now I use the ceramic tube of one of my bobbin holders.

Having watched Paul Little lay his floss bodies, as close to perfection as you will find, all he does is what Hans has described, with incredible attention to the details. He would have no problem spending 3 or 4 hours getting it right in his eyes. Even to the point where he will use extra floss so that the parts of it he handles do not end up wound onto the fly. I’ve even been present when he and other classic salmon fly tiers have had an in depth discussion of the best kind of gloves to wear when handling floss. More trouble than I’d go to but the results are amazing.

Cheers,
C.

Wow… great thread!

I have been tying full-dress Atlantics for many years and get a little rigid about how my floss looks, too…

The hackles are from Denny, the cree is his dun-based color and actually is a full skin…

PM sent on the burnishers.
art

Reading this makes perfect sense

when you see the quality of workmanship in this

beautifully crafted.

Regards,
Scott

Thank you!