Spool Carousle

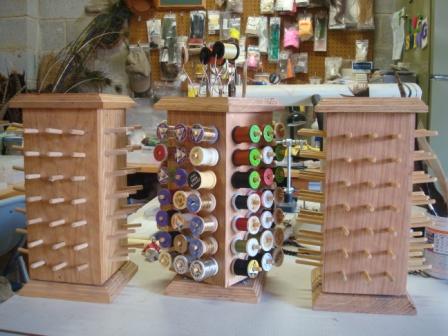
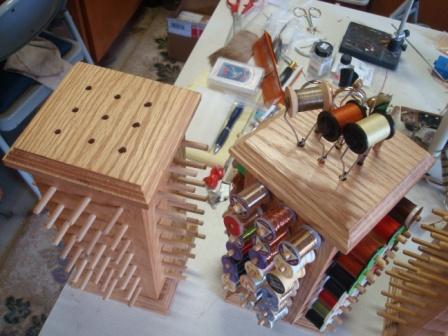
Here are a few pics of a new spool carousle that I dessigned and built. They hold 82 spools, plus there is room for a few attachements on the top.

I have made 5 so far, gave two to a couple of friends that I taught how to tie whom graduated from the All Thumbs Fly Tying Class, and the next 2 are for a couple of guys that are retiring after 35+ years in education.

They look really nice. Good job.
Dennis

Nice work Prof. I like the bobbin holes on top. Good thinking. Jim

Very nice!
Doug

Very, very nice. Thanks for sharing.

Very nice indeed. What did you use (and where did you find) to allow the top section to rotate? Very well thought out design.

I see one big problem with it, now I am going to have go to my R&D department and build me one. R&D (Rob and Duplicate)

Very nice wood work. I second REE’s question on how and where did you get the revolving apperatus for the spool holders?
I like.
Jim

The revolving base is a 4 x 4 lazy susan carousel that I buy at the local hardware store. It cost around $5.00.

FYI – This is where I get the lazy susans i’ve used to build several fly tying carousel items. The 3" & 4" are perfect for these types of projects.

www.rockler.com/product.cfm?page=2273&filter=lazy%20susan

Dennis

A hinged top (and perhaps internal dividers) would create a bit of storage and not increase the footprint. Looks tall enough to slot necks etc. Just a thought.

Professor:

How did you line up the holes for the spool post?

I have an Incra Jig and I was thinking that would work. But I was wondering if you had a simpler method.

Greg

I printed a full scale pattern of my hole layout and taped it to the side, centered punched them and then setup my drill press table to 10 degrees. My drill press table tilts, so setting the angle is pretty easy. Then I attach a guide strip to the table so all I have to do is slide the piece along the rail drill 7 holes, flip the box drill 7 holes … Then I readjust the guide for the next group. It take about 5 to 10 minutes to drill the 84 holes.

I do have the complete drawings done in AutoCad.

Professor,

Very impressive! Compact, yet efficient. I like that you utilized the top as well.

Ah! That clears it up. An Incra Jig would probably be overkill. Sounds like an accurate layout works just fine.

Your project really makes me want to get back out to the shop. You can see some of my woodworking here :
http://www.gbguitars.com/

Dru,

Not to hijack this thread but those Dulcimers are just beautiful. Love the spruce and purpleheart.

man i love all this talk of woodworking!!! maybe we need everyone to post pics of theirs shops!

Professor,

In case you hadn’t noticed there are a bunch of wood butchers hereabouts that also tie and fling flies. Your in good company.

REE

I like it because it takes up less room than the multi level one I have.
My problem, I don’t have wood working tools and if you saw the work bench I built you would know why I never bought tools.
bob.

Hi Professor,

Very nice job. Clean, neat and efficient! I was thinking about the same thing that Gordo7 mentioned concerning interior storage. My thought was a hinged top with storage for dubbing boxes. Seems like you might be able to fit 2 levels with three boxes each. Just a suggestion for an already impressive display of carpentry skill. 8T :slight_smile: