Sometimes adding a touch or two to an old
fly is all it takes to get another fly that
works just as well or better than the first.
This is especially true if you are targeting
another type of fish than the first fly was
designed for. This particular fly is one of
those cases.
First tied for the Idaho Fish-In, it was designed
to catch cutthroat trout who were looking for
something big and didn’t have a lot of time to
make up their mind. Then, I tried them on
bluegills, and found out that bluegills love
them. I haven’t tried them on anything else,
but I would bet on other fish liking them as
well.
This fly is nothing more than a Shwapf fly tied
with a different body. The body consists of
orange punch yarn twisted (with the help of Magic
Tools) with a stiff antron material to create a
two-toned, rough body. The look of the body
could be anything from a caddis, to a stonefly,
to a beetle. The hair gives enough movement and
floatation to keep the fly attractive while it
moves in or on the water.
I doubt I need to talk anymore about the specifics
of the fly or how it is used. However, I do need
to show you how it is tied. So, without any further
delays, here it is.
Scwapf Beetle Materials:
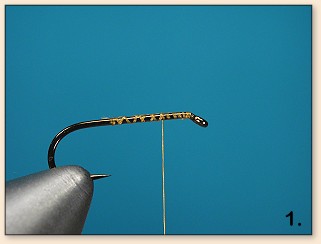
- Hook: Any standard dry fly hook. I’m
using a size 12 Mustad 94840 dry fly hook.- Tail: None.
- Body: A twisted strand of orange punch
embroidery yarn and black antron.- Thread: 6/0 - Orange monocord.
- Back and Wing: Red squirrel tail fibers.
Tying steps Scwapf Beetle:
- Start the thread.
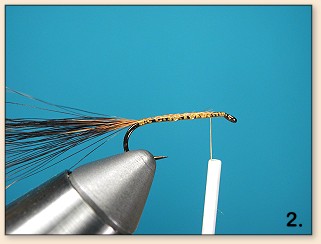
- Add a few dozen hairs from a fox
squirrel tail, tied in by the tips.
- Add a loop of punch embroidery yarn by tying
the open ends to the hook.

- Select some dark (in this case black) antron
fibers and lay them across the largest table of
a Magic Tools set.
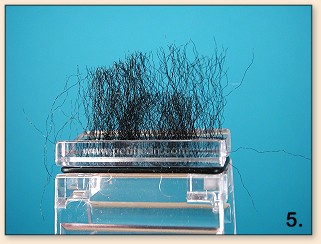
- Push them down into the table with a wire.
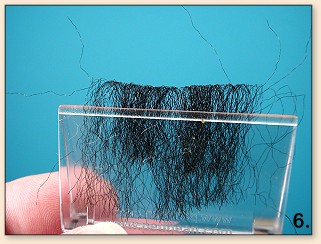
- Now, clamp the ends of the fibers and remove
them from the table.
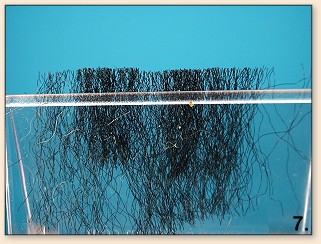
- Then clip the loop from the fibers.
- Place the fibers between the strands that
form the punch embroidery yarn loop.
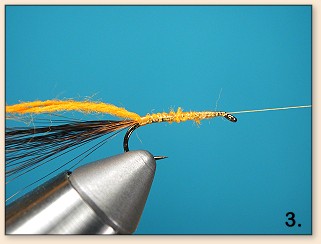
- Then twist the fibers and yarn into a heavy
chenille. I like to use a rotary vise for this
and the next few steps since it is much easier
to control.
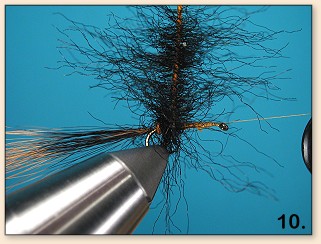
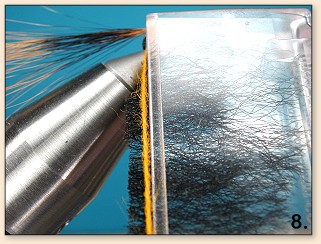
- Wrap the “chenille” around the hook, paying
attention to not wrapping down too many of the
fibers.
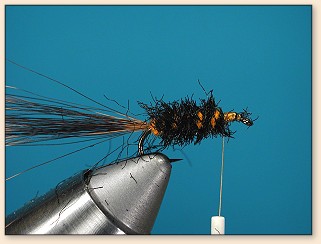
- Wrap it forward leaving enough room for a head.

- Then, tie the yarn off and start the head area.
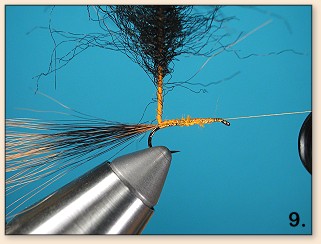
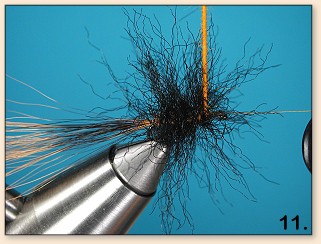
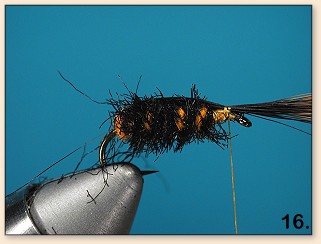
- Now, start trimming the fibers close to the body.
- Rotate the vise or hook so you can trim
it all the way around the hook.
- Leave the body hackles fairly coarse and rough.
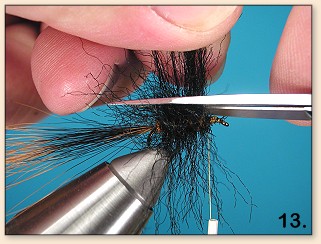
- Then, pull the hair over the top of the
hook, and tie it down behind the hook eye.
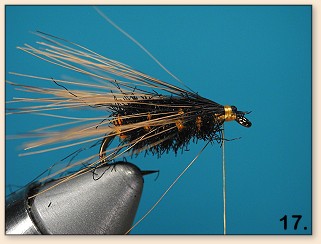
- Next, flare the hair back over the body
and tie it down behind the hook eye.
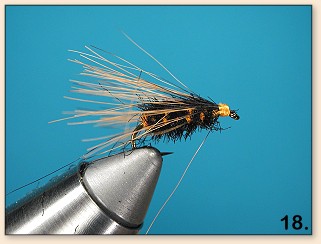
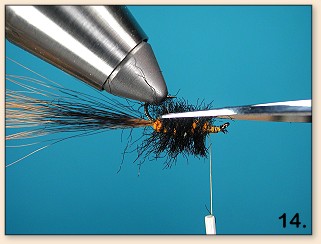
- Then, whip finish and cut the thread.
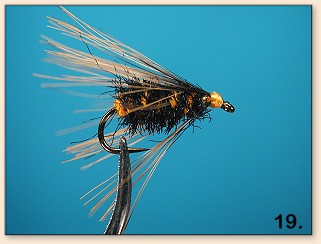
- Finally, remove the fly from the vise and
even up the hair at the back of the fly. Your
final fly should look something like this.
I doubt you’ll have any problems if you try
to expand on this idea. I think you’ll find
it is an easy fly to tie, and one the fish
will go after without hesitation. Well, at
least cutthroat trout and bluegills do.~ AC
Originally published June 7, 2004 on Fly Anglers Online by Al Campbell.