It is completely up to you. Most will put rod weight (5/6) on it at a minimum. And a “built by” line might be nice if you want to.
Cant see from the pic…but did you grind the foot of that guide to get a nice smooth slope for the thread to crawl up it?
Personally…I’d wrap about 50% LESS wrap leading up to the guide foot. You only need 5-7 good wraps there. ( Again…I cant count them from the pic)
As far as more ON the foot…there’s no need to go further than the start of the bend ( Tangency point). Wrap up on the curve dont do any good whatsoever.
It looks like your getting there though. Good luck
John,
Looking very good. Your wraps look great in my book, especially for a first timer.
…I’ll have to disagree with this comment. You may only need 5-7 wraps in front of the guide feet, but as you proceed down the blank the diameter of the blank will decrease dramatically while the length of the guide feet will stay relatively the same. From an aesthetic point of view I think the wraps tend to look disproportionate if you dont also decrease their length to go along with the decreasing blank diameter. If you start the stripping guide with only a very short wrap in front by the time you get to the tip (if you also make the wraps shorter as you go down the blank), you would need to start directly on the guide foot.
To each their own I suppose but I think the way you have it in the photo is perfect.
Yonks
The feet never stayed the same length on the double footed guides I used?? They are relative to the size of the guide itself ( the hole in it…even though their is no actual hole) and thusly the wrap length of say a #1 guide is shorter in length than one for a #6 for example. So…in the end the guide wraps do exactly as you state…they get shorter as the diameter of the blank gets smaller and the guides get smaller. A #1 is nowhere close to the same size ( length) as say a #5
The 5 wraps are whats needed to make sure the wrap is bound down fully
EDIT: I think you didnt understand my post…? The 5 wraps prior to making contact with the guide…applys to ALL guides. 5 min before the stripper…5 before the foot of a guide midway up the blank…5 in front of the very last guide foot…
Dont worry. I fully understood your post. However for an average rod length of 9 ft you would have at least 8 or 9 snake guides. Dont know about the rest of the builders, but I dont start at a 5 and end with a 1. Maybe size 5 down to size 3…or maybe a little smaller for a lighter weight rod. So there are multiple guides of the same size on any given rod. Either way the decrease in blank diameter far outpaces any shortening in guide feet length at least with the varieties I have tried.
It really doesnt matter. Just one guys thoughts on aesthetics.
Dont want to hi-jack this thread so I am out.
Yonks
Just now put the last coat of finish on my rod…It’s curing in the turner…Cobalt Blue wraps w/Scarlet trim wraps at the butt, ferrule and tip… black snakes and reel seat. I used silver ink for the inscription, because nothing else showed up hardly at all over the high gloss black blank.
Rod looks very nice… I’ll post photos next day or so…ModocDan
I’m gonna string it up with a 4wt line I have & toss a few loops this weekend just for drill. ![]()
![]()
…By the way, John R. … What you got going there looks first rate to me! Keep building rods, and you’ll learn more every time…You’ll go far!
Hummm … “Rod Swap” … for some reason that sounds vaguely familiar. Not sure why … lemme see …
Just put thr final coat of finish on my swap rod. 4-6 hours in the turner, an overnight cure, and I will be ready to sew up the bag. How is everyone else doing?
Brad
Final finish coat on and turning. Will let cure all week and package up next weekend.
Yeowzaaa! There goes that thump up side the head again … S’pose I should figure out why??
how cool is this? a fly rod swap! what a great idea! i wish i could build rods. i really look forward to seeing the pix of the finished rods. great site.
-mike
Bit of a setback here on the home front. My wife has run into some medical issues, and I’ll be at the doctor’s this week a bit with her. I’ll be sure to be done in time, though.
Procastinating!!! - Lots been going on- I’ll get her finished up though!!!
Brannon
First coat is turning even as we speak. A few final details and bag and it’s outta’ here.
Just out of curiosity … how long does it take for the finish to cure when the temperature is 50*?
Until it’s hard. :lol:
I’d bring it to a warmer location if I could. It should set, after turning for a few hours, enough that you can take it off the turner and bring it in to finish curing.
Leave the remnants of the mixed finish where you can check it every now and then. Just touch a finger tip to the contents of the cup, shallow pan, whatever it is that you use, and see how hard it is. It takes the stuff in the cup longer to cure, for me, than the wraps take. I turn until the contents of the cup are hard. They might still be a tad sticky, but hard. At that point, you could bring the rod in to a warmer room to let it finish curing.
Quite often, the wraps are not sticky, but I leave the rod out of a rod sock or anything for another 24 hours or so anyway.
In other words …SUMMER!!!
Those temps are in my basement, with the space heater, at my building table!!
Will have to bring the rod upstairs (where it’s a pretty even 65*) to finish curing.
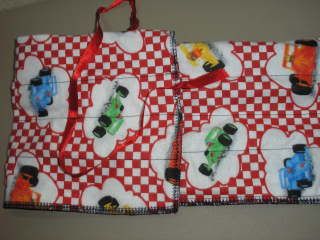
Noticed that a few folks mentioned sewing up their own rod socks. What is your preferred material for making rod socks?
I usually use flannel. There are a lot of nice plain flannels out there, but I tend to lean towards the patterns (imagine that!!![]() ).
).
Thanks Betty.