The DH1 (Diving Hopper 1)
By Johnny Irvin
I have spent a lot of time observing the panfish and
bass in the waters of Central Texas. Using top water,
nymphs and streamers I have noticed different patterns
the fish themselves follow. Now I do have to admit,
my favorite action is top water, however I have caught
many a good panfish using nymphs as well as bass on
streamers.
During this last summer while fishing on the Llano, I was
using hoppers, specifically the EZ-hoppers created by Peter
Frailey. These hoppers were catching a lot of fish and I
would go through at least five or six a day as the bream
and bass would chew on them pretty good. It was during
this time I was noticing that while the hopper was on the
surface moving down with the current, the bream would hit
it repeatedly until the hook was set or it escaped the
bream to reach the end of the drift. As I was stripping
it back, it was totally ignored by all fish until the
currents caught the hopper in a particular fashion and
it was pulled under. It was at this moment in almost
each cast that the bass would take it. Most of the time
it was Spotted Bass that took the hopper.
Now this got the wheels turning in my head. I departed
from my tried and true drift and strip technique and began
to experiment. I would cast downstream and when stripping
the hopper back in I would try to get it to submerge. Just
about each time I could get it submerged, the bass would do
a hit and run, it was great! The rest of the day I used
some sink putty from Orvis to keep the hopper down, but
it limited me to using a surface fly as a sinking terrestrial.
The bream pretty much would not touch it.
When I got home that night I started looking through all
the books and web sites for something that could meet all
techniques as well as attract both bream and bass. After
a long intensive search I could not find anything that
would suit my goal. So I looked at several hopper
patterns along with "diver" patterns, considered the
various materials available and after several trials and
errors the Diving Hopper One (DH1) was born. Why the
"One," it's the first fly I have created and believe to
be unique. Besides, it sounds good.
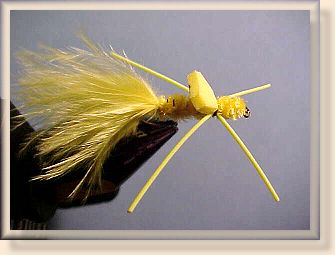
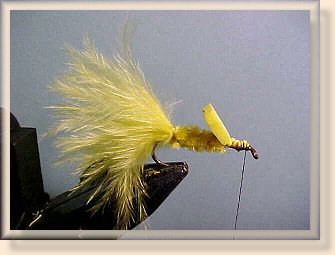
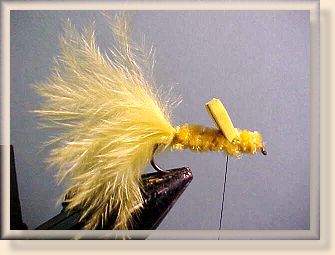
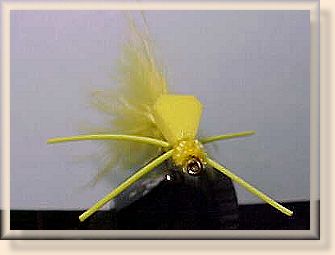
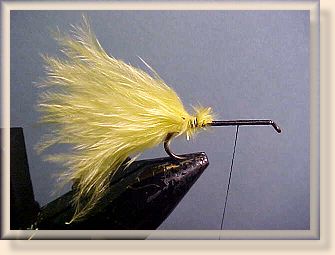
The fly reacts well in moving water. The tail acts as
an attractant, the chenille body provides a tougher body
material that can take the repeated strikes of bass, the
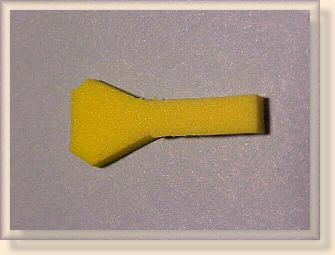
legs to simulate that of a terrestrial, the collar provides
buoyancy and a surface plane to dive the hopper. By varying
the size and angle of the collar, the hopper will react in
different ways from slipping quietly below the surface up
to becoming a noisy popper. Be aware that if the collar
is not perpendicular to the hook, it will cause the fly
to spin underwater and your tippet will only last a couple
of casts before it becomes a tangled mess.
[Publishers Note: I can think of several TROUT streams where
I'd love to float this through just ahead of that log jam, just
so it catches in the swirl and back-eddy!]
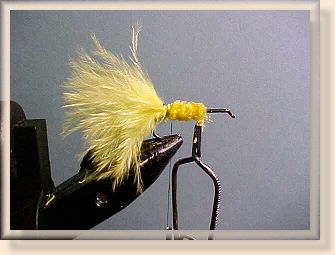
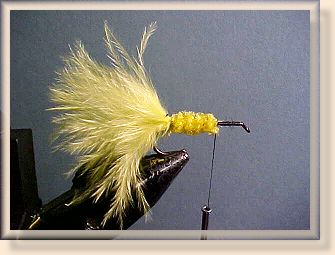
Materials: DH1 (Diving Hopper 1)
Tying Steps:
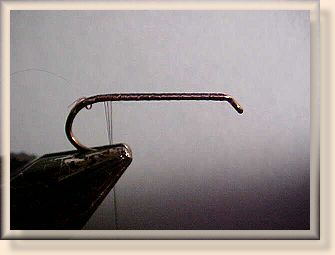
1. Lay a bed of thread.
2. Tie in Marabou tail.
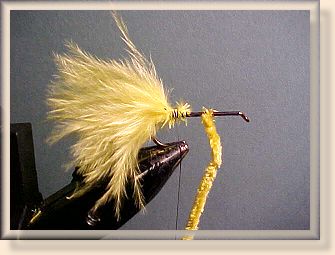
3. Tie in Chenille starting about 1/3 of shank length from eye.
|