 |
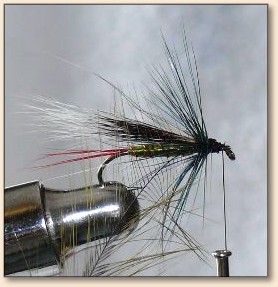
 Bluenose Squirrel TailFly and photos by Jeff Hamm, New Zealand |
|
|
Materials:
Thread: Black Tail: Red feather fibres Body: Olive floss Rib: Copper wire (thickish) Wing: Grey Squirrel tail Hackle: One olive over one blue hen hackle.
Method: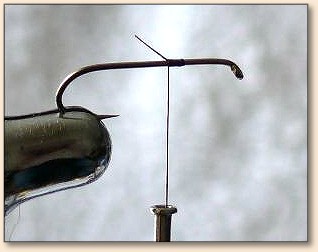 Step 1: Tie on thread. I leave a fair distance from the eye for streamers, especially hair-wings. I find this works as a landmark and helps prevent crowding of the eye.
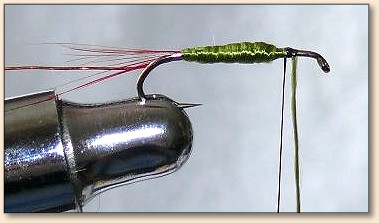
 Step 2: Tie in the copper wire. I try to keep the wire along the bottom of the shank, especially at the tail end. This way the first wrap starts from the bottom of the fly and it looks neater (to the fisherman, the fish probably don't care).
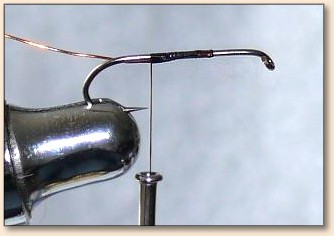
 Step 3: Tie in the tail. I like the tail fairly wispy on this fly. The length is not quite the length of the shaft of the hook. I leave the fibres along the shaft to add a bit of bulk since I want to build a tapered body in the end.
 Step 4: Tie in the floss at the rear, then bring the tying thread forward.
 Step 5: Build a tapered body with the floss. When you tie off the floss, bring it slightly forward of the taper and tie off (easier and neater). If you are tying a wingless version, then bring the body farther along the shank so the taper is about where the black thread is now.
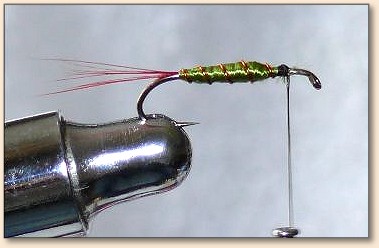 Step 6: Wrap the rib. Again, bring the rib forward of the taper, then tie off and break the wire. To prevent dulling your scissors, just press the wire to the shaft with a thumbnail and wiggle the wire until it breaks. It will break where you're pressing on it.
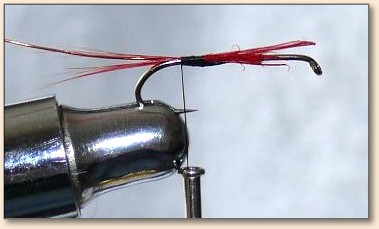
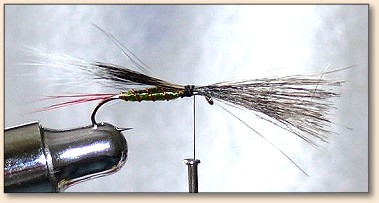 Step 7: Tie in the squirrel tail. The white tips should extend to about the length of the tail. Personally, I don't stack the hairs on squirrel tail wings. I like the uneven look, and I think it gives them more action this way. Regardless, when I tie on I put one wrap around the hair only (not including the shaft of the hook) to bind the hairs into a bundle, then I tie on the bundle by wrapping on the original tie. The wing should be tied in to follow the slope of the taper, but still sit low along the body. The most common error on squirrel tail wings is to use too much hair. Like most things fly related, less is more here.
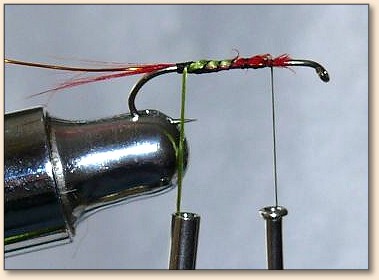
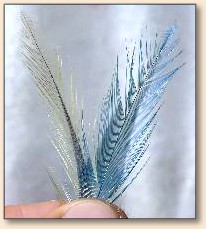 Step 8: Select your hackles, one blue and one olive.
 Step 9: Tie in the blue hackle and form a collar.
 Step 10: Tie the olive feather in front of the blue hackle.
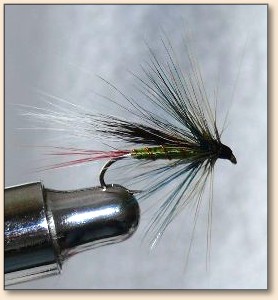 Step 11: Form the olive collar in front of the blue collar, form a head, whip finish, and cement. Here's a version of the wingless version, or just the Bluenose . 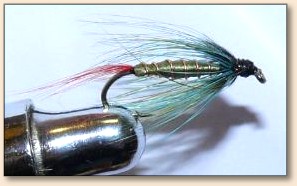 For more great flies, check out: Beginning Fly Tying, Intermediate Fly Tying and Advanced Fly Tying.
|