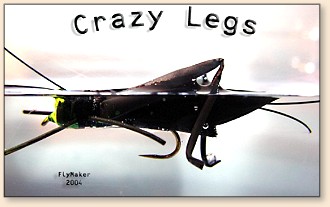
1. Start out by cutting a 2-½ inch length of
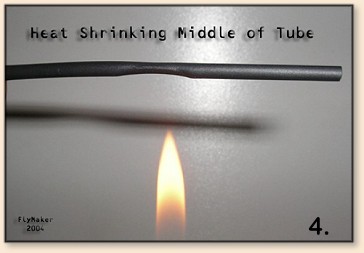
1/16" diameter black shrink tubing. Hold the
shrink tubing by one end and center it over a
flame until it begins to deform as shown. Work
well above the visible portion of the flame. Move
the tubing laterally to shrink about an inch of
the piece of tubing. This is done in a matter of
seconds. Don't rotate the shrink tubing. You want
the resultant tapered shape formed by heating it
from the underside-only. A little experimentation
will be required to master this technique. Practice
makes perfect.
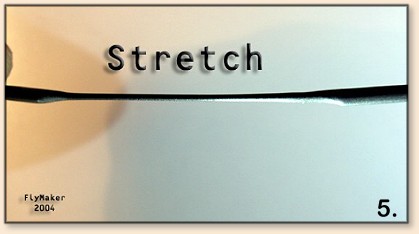
2. Next quickly grip both ends of the tubing
and carefully stretch the softened tubing and
elongate it about one more inch in length. The
tubing will "neck-down" as shown. Don't pull too
hard or stretch it too far. Perform the stretching
and move quickly to the next step without allowing
the tubing cool off substantially.

3. Working quickly, orient and bend the
pre-stretched tubing into an arch as depicted.
Match-up the base of the legs evenly at the
tapered sections. Proceed along to the next
step with vigor.

4. Using the pliers, clamp, apply tension
and then crimp a flat spot in the middle of
the arch. This creates the footpad for both
legs. If you have worked quickly enough, the
tubing is still warm enough to seal and be
crimped flat. If, on the other hand, the
tubing has cooled, simply touch the flame
lightly to the area momentarily. Then immediately
re-crimp the footpad portion of the arched
tubing to achieve a flattened cross-section
profile. Eventually you'll gain enough speed
with this process to be able to heat, stretch,
bend, and crimp the legs a semi-continuous
operation. It takes a little planning and
some practice.
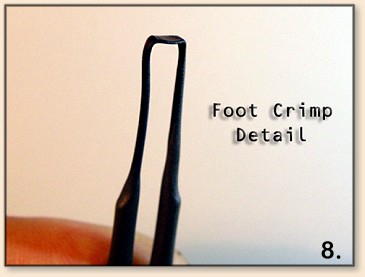
The above image shows the properly flattened
footpad area that will become the Crazy Legs
feet. Note that the bend was made with the
heated, flame-shaped portion of the tubing
positioned on the outside of the bend.
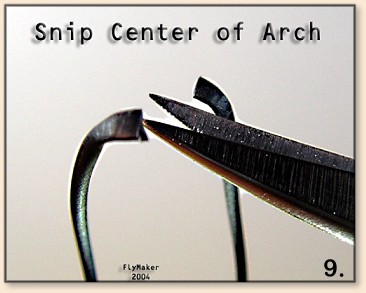
5. Separate the two "Crazy Legs" by snipping
the flattened portion of the tubing through
the center using sharp scissors.
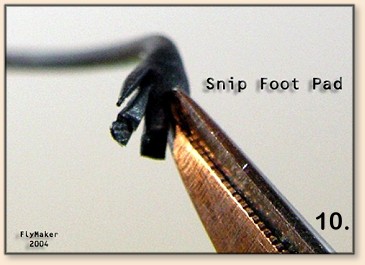
6. Optional - Snip the foot pads longitudinally
one or two times to create toes. It helps to have
sharp, serrated scissors and to also use a magnifier
to help accomplish this optional detail task.

7. Using your fingers, orient and fold the
tubing just behind the area where it necks-down
to form the knee. Once you have it formed
correctly, hold it steady and lightly touch a
flame to the folded elbow. It only takes a touch
of heat to make this bend stay put. If too much
heat is applied, the leg will wilt. Brush the
elbow with flame and adjust the shape and amount
of bend in the lower leg until you get the desired
result. Hold it in shape until cooled. I try to
mimic the high angle of a hopper's legs at rest.
The legs can also be made with less of an angle.
The style of the leg that you make will depend
on the insect you are imitating.

8. Heat the open end of the upper leg. Shrink
it back until the length is sized to lower leg's
dimensions.
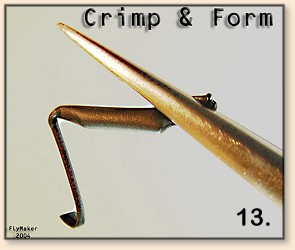
9. While the leg is still hot, quickly crimp
the end of the leg to seal and shape it. Put a
flat on it that will allow it to be tied-in along
the side of your fly. Cant, or angle the flat
area upwards and also: either inwards, or outwards
in order to make either left or right-hand legs.
If you don't angle the legs inwards/outwards at
the appropriate angles to create dedicated "left"
and "right" legs, the legs will flare out from
the sides of the fly when tied-in. This unwanted
configuration would likely cause your fly to be
hard to cast effectively. Recap: The motions to
perform the last heat forming operations are: 1)
Pinch the end of the tube flat, 2) tilt it upwards
slightly at a moderate angle, and 3) toe the flap
inwards towards you (Left Leg), or outwards away
from you slightly (Right Leg). Hold the formed leg
in the final position for a few seconds until the
tubing has cooled and is heat-set. Trim any excess
material from the flattened ends of the legs. You
need only a short "flat" on the end of the Crazy
Leg in order to effectively bind it to the fly body
when you are tying your flies.
The above image shows the completed, left "Electric
Cricket" leg.

