Fly Of The Week

Previous Flies
Fly Tying Terms

Elk Dragon
By Gretchen and Al Beatty

Gretchen brought this pattern to life based on a panic attack. Not hers, it was Al's! He was guiding on a farm pond near their home and was experiencing a real tough day while another guide on the same water was having a great day. After an hour of frustration, Al asked the other group what fly they were using. The response was, "A hair-wing dragonfly" but they never did show it to him. Al called Gretchen on the cell phone and asked her to tie him a couple of hair-wing dragonflies and bring them to him as soon as possible.

She went to the tying table where she was working on an order of Elk Hair Humpies. Using what was close at hand, in short order she assembled the pattern you see here; a combination of foam, elk hair, and plastic bead chain. Two hours later Gretchen delivered several to Al and saved the day.

She was the hero, but it cost him dearly later. She seems to remember a steak dinner; he remembers several steak dinners. No matter what the pay-off, the real point is Gretchen tied a fly that fit the need using materials lying right in front of her. You can too!

Materials for Elk Dragon:

    Hook: Dry fly, size 8.

    Thread: Blue.

    Tail: Elk, tied extended-body style.

    Body: Blue closed-cell foam.

    Wings: Elk, tied spent style.

    Eyes: Black plastic bead chain.

    Head: Trimmed foam.

Tying Instructions:

Step 1

    1. Tie a thread base that covers the front half of the shank. Leaving the thread hanging in the center of the hook.

    Step 2

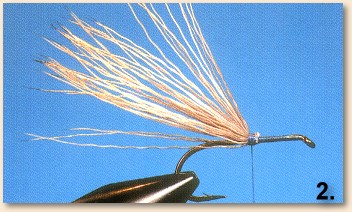
    2. Select, clean, and stack a small clump of elk hair. Tie it on with the tips pointing to the rear of the hook. The fibers should be twice as long as the complete hook. Trim any excess hair ends.

    Step 3

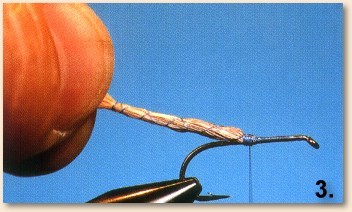
    3. Wrap the thread out on the elk hair (forming the extended body) until you are close to the tips. Then wrap back to the hook. Use open spirals when completing this part of the operation. It is easier to hold the hair fibers with the left hand keeping them under tension while wrapping the thread with the right hand.

    Step 4

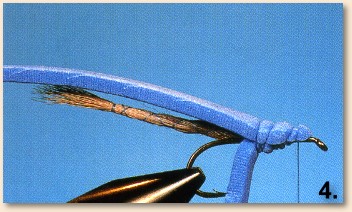
    4. Cut two strips of foam that are as wide as the distance of the hook gape and trim a point on each. Bind them to the front part of the hook with one on top and the other on the bottom.

    Step 5

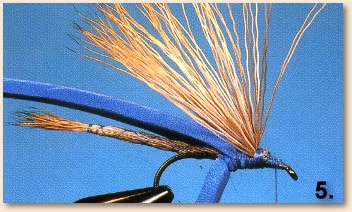
    5. Select, clean, and stack a clump of hair about twice as big as the unit you used for the tail in Step Two. Bind this clump to the top of the shank and trim the excess ends.

    Step 6

    6. Cut two connected beads from a section of plastic bead chain. Tie them on the hooks slightly back of the hook eye. Pull the bottom foam forward and bind it to the bottom of the hook just behind the hook eye. Trim away the excess bottom section of foam.

    Step 7

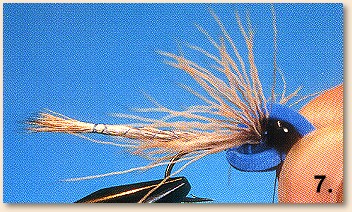
    7. Divide the clump of elk hair located on top of the hook into two segments. Pull the top foam up, over, and through the hair segments.

    Step 8

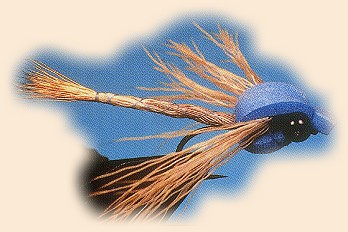
    8. Bind the top foam to the hook at the eye and trim the excess to form the head. Whip finish, trim the thread, and apply head cement. ~ Al and Gretchen

Credits: This fly is just one of hundreds of innovative flies in Al and Gretchen's book Innovative Flies and Techniques published by Frank Amato Publications.

For more great flies, check out: Beginning Fly Tying, Intermediate Fly Tying and Advanced Fly Tying.