 |
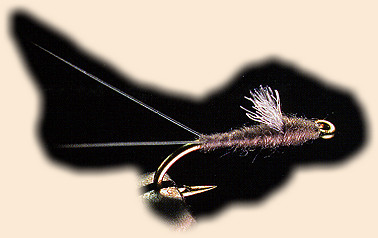 RS2 |
|
|
RS2 materials
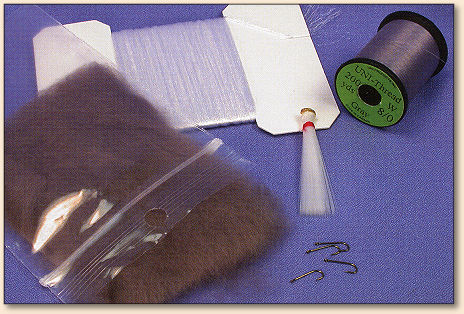
Thread: Gray 8/0 Urn-Thread. Tail: White Mayfly Tails, Microfibbets, or other synthetic tailing fibers Abdomen:Gray Super Fine. Wing: Bright white Antron Thorax: Gray Super Fine.
Method for the RS2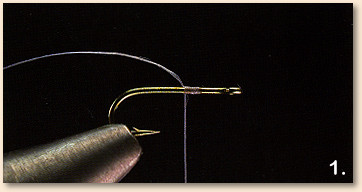 1 . Attach the thread at the 75 percent point on the hook, leaving a long tag end.
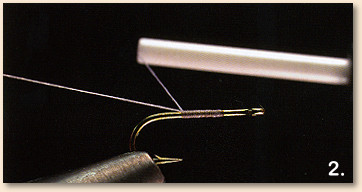 2. Wrap back over the tag end toward the hook bend, taking care to keep the tag end along the top of the hook by lifting it slightly toward you.
 3. Thread torque should pull the tag to the top of the shank.
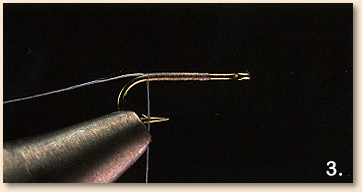
 4. Select two fibers from the bundle of tailing material and even the tips. Measure these against the hook shank so that they are a full hook-length long and grasp them at this point with your material hand. The tapered ends should be in your fingertips with the butt ends sticking out toward the hook eye.
 5. Place the tailing fibers along the top of the shank at the bend at an angle that points the butt ends at your thread-hand-side shoulder.
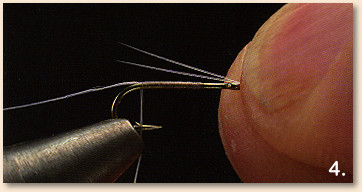
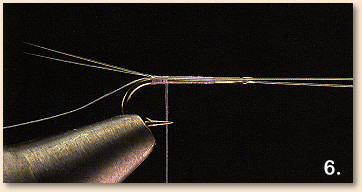 6. Wrap the thread up and over the tail fibers, allowing the thread torque to twist the tail fibers to the top of the hook shank. Make another two turns of thread over the butt ends of the tail up to the hook point.
 7. Press your thumbnail up under the tails to lift and splay them out.
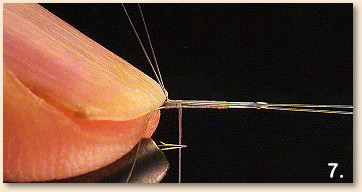
 8. The tails should be separated and on top of the hook. Make sure the tails are not crossed up or tied down on one side of the hook shank. If the tails are off to one side, splitting them will become much more difficult.
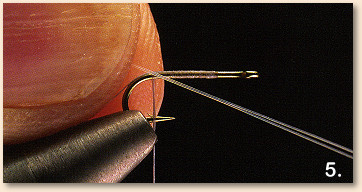
 9. Lift the tag end of the thread that was hanging off the hook bend up between the tails.
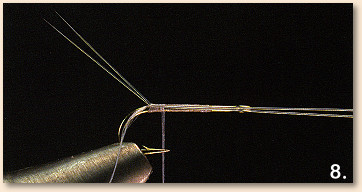
 10. Draw the tag end tight, allowing it to push the tails apart. You may need to maneuver the tag to the left or right side of the hook to manipulate the tail fibers so they are split evenly. Tie the tag end down at the hook point with a turn or two of thread. All the thread turns are traveling forward one in front of the other to eliminate bulk at the rear of the fly.
 11 . The tails should be split at about a 30-degree angle to each other and be slightly elevated.
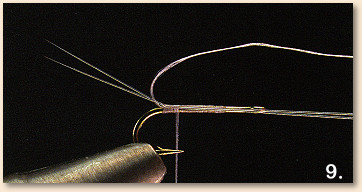
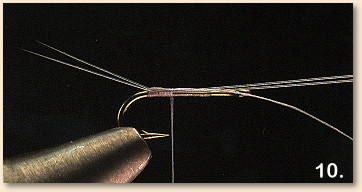
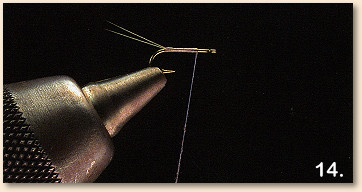
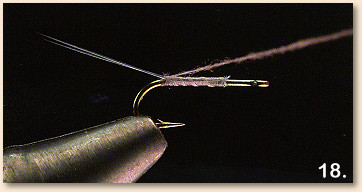
 12. Continue wrapping the working thread forward to the 75 percent point, one turn in front of the other.
 13. Clip the tag end of the thread and the tail butt ends.
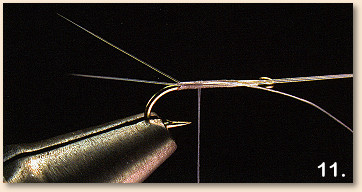
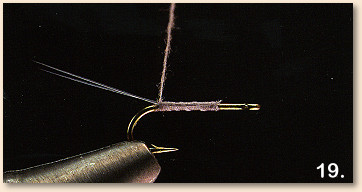
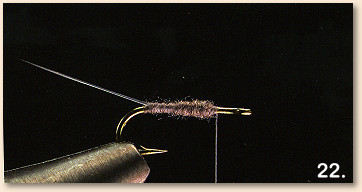
 14. Dub the thread with a thin, slightly tapered strand of gray dubbing. There should be one half to 1 inch of bare thread between the top of the dubbing strand and the hook shank.
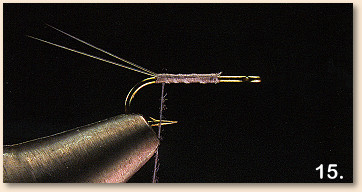 15. Use this bare thread to work back over the shank to the hook bend. Notice the widely spaced spiraling wraps of thread from the front to the back of the hook.
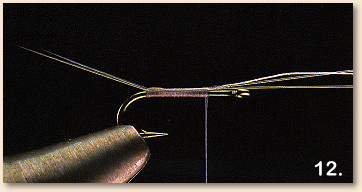
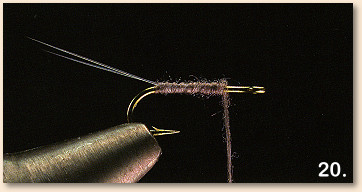
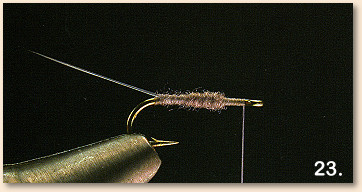
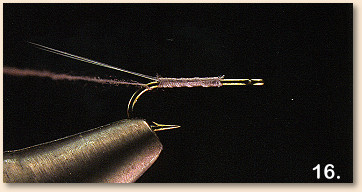 16. Place the first, slender turn of dubbing under the tails by wrapping around the shank just as you normally would…
 17. but wrap the dubbing under and behind the tails.
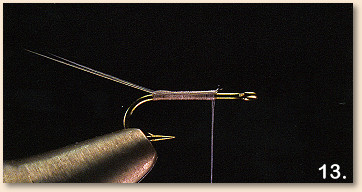
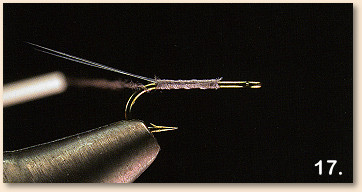
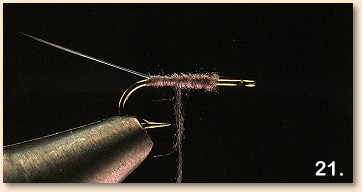
 18. Draw the dubbed thread forward as you come around the backside of the hook shank, pulling the first turn of dubbing up against the base of the tails. This turn should prop the tails up and cover the tag end of the thread that you used to split the tails. Once the dubbing is tight against the tails, drop the bobbin to bring the thread under the hook shank in front of the base of the tails.
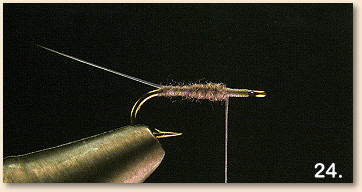
 19. Make the next turn straight up over the top of the shank at the front edge of the tails. A thin strand of dubbing is required for the slightly tapered body.
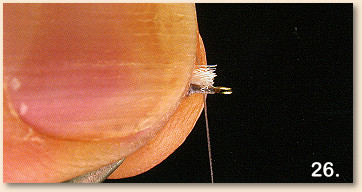
 20. Wrap the dubbing forward in a single layer to the 75 percent point on the shank. The trick to making a slightly tapered body such as this with a single, thin layer of dubbing lies in the angle of the first few turns. I wrap the first three turns of dubbing at a dramatic angle toward the front of the shank, almost spiraling the thread forward. About halfway up the body, I start to make the wraps more perpendicular to the shank, allowing the dubbing to bulk up.
 21 . Wrap the remaining dubbing back over the front half of the abdomen, creating a second thin layer of dubbing.
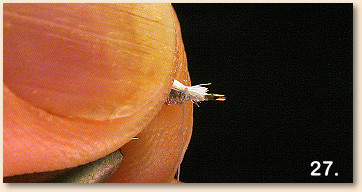
 22. Move the last of the dubbing forward from the midpoint of the abdomen to the 75 percent point by making two spiraling turns forward. Strive for an even taper with no lumps, bumps, or gaps. End with the bare thread at the front edge of the abdomen on bare shank.
 23. Wrap a smooth, flat thread base up to the hook eye.
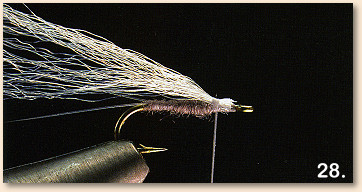
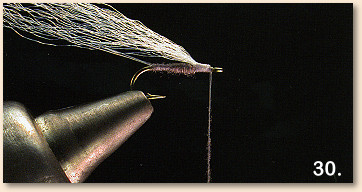
 24. Wrap back to the front edge of the abdomen to cover the shank with a thread base for the wing to adhere to.
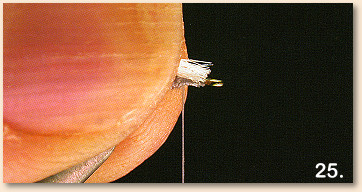 25. Pick up the Antron wing blank you prepared at the beginning and clip the loose ends square. Hold the loose ends of the Antron between your thumb and forefinger of your material hand as close to the tips as you can. Place the yarn flush against the top of the hook shank with the stub ends facing forward. You do not want any space between the Antron and the hook shank. They should be touching, and the thread should be hanging directly at the front edge of the dubbed abdomen. I always use an entire strand of Antron yarn for the wing, rather than thinning it down for smaller flies. Fewer fibers don't form the same wing profile, and besides, the Antron compresses well on the hook and creates little bulk.
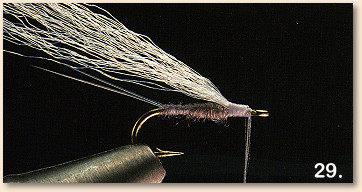
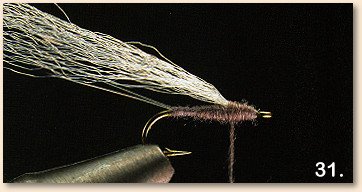
 26. Bring the working thread up above the hook and push the bobbin tube toward the hook bend, sliding a length of thread in between your fingertips on the near side of the Antron. Drop the bobbin over the far side of the hook, but keep tension on the thread loop in your fingertips so it doesn't draw tight just yet. You should have a loop of thread up and over the material inside your fingertips. This is the beginning of a pinch wrap and allows you to tie the Antron down onto the top of the shank without the thread twisting it to the far side.
 27. Draw the bobbin straight down, closing the loop within your fingertips so it catches the Antron against the top of the hook shank. Do this whole maneuver one more time before letting go of the yarn. It takes two turns like this to make a complete thread revolution around the hook to lock things down.
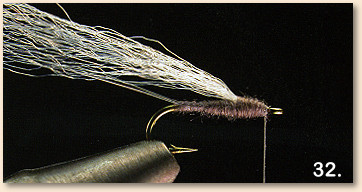
 28. The loose ends of the Antron should be well behind the hook eye. If they are not, pull the butt ends to shorten the ends so they are.
 29. Wrap forward over the ends of the Antron up to the hook eye. Let the thread hang in the index point.
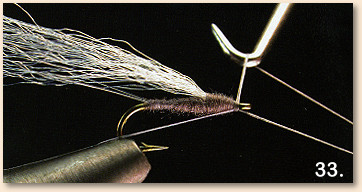
 30. Twist a bit more dubbing onto the thread.
 31 . Begin wrapping the dubbing from the back edge of the index point up to the base of the wing. Wrapping the dubbing up the slope from the front to the back of the hook prevents the dubbing from sliding down the hill you created with the butt ends of the wing.
 32. Wrap the remaining dubbing forward to the back edge of the index point, ending with bare thread behind the hook eye, so that you have a descending taper with the thickest point at the base of the wing. Overall, the whole fly should look like an elongated teardrop when viewed from the bottom, with no seam or gap at the wing.
 33. Whip-finish and clip the thread.
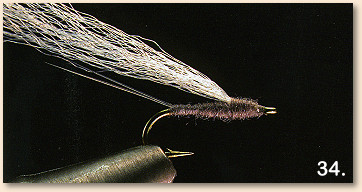 34. The wing is now ready for trimming.
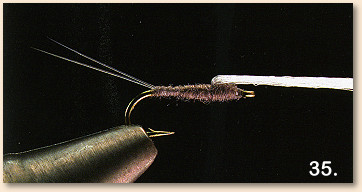 35. Pull the wing straight forward over the hook eye.
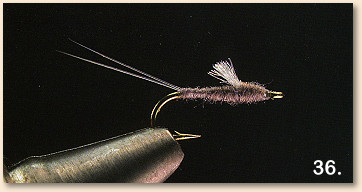 36. Clip it straight across at the back edge of the hook eye.
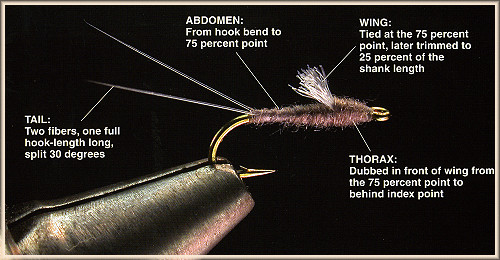
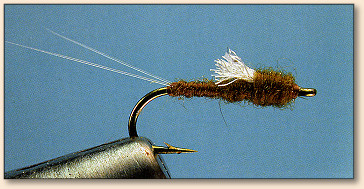
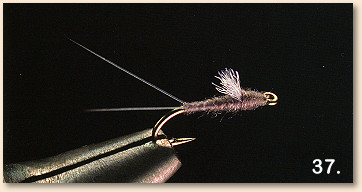 37. Another view of the finished fly. Pattern Variations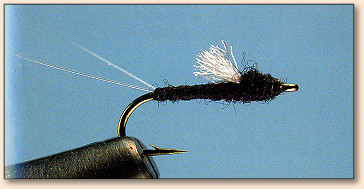 BLACK RS2
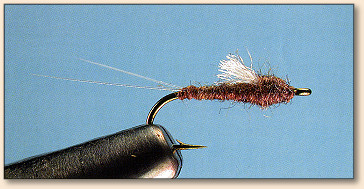 BROWN RS2
 MERCURY RS2
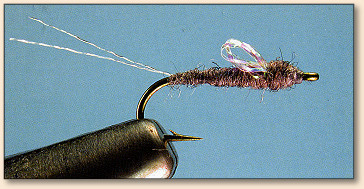
 OLIVE RS2
 SPARKLE WING RS2 Credits: From Charlie Craven's Basic Fly Tying By Charlie Craven. Published by Headwater Books. For more great flies, check out: Beginning Fly Tying, Intermediate Fly Tying and Advanced Fly Tying.
|