Fly Of The Week

Previous Flies
Fly Tying Terms

Blue-Winged Olive, Parachute
By Brad Befus and John Berryman

Blue-Winged Olive is the name given by fly fishers to a variety of the members of the Baetis and Pseudocloeon famlies of mayfies. All members of these favorite trout foods, and depending on the specific species, can be active during any of the nonsnowy months (and even some of the snowy ones). Virtually and "standard" dry-fly pattern can be tied as a "parachute" fly - there are parachute Adams, parachute blue duns, parachute Cahills, etc.

Tied properly, the horizontal hackle floats the fly well and permits it to sit on the film in a relatively flat attitude. At times, when the trout are very spooky (or wise), or when you're fishing an especially still pool, a stealthy arrival and proper appearance on the water can be very important.

You'll need the following materials to tie the parachute Blue-Winged Olive:

Materials List: parachute Blue-Winter Olive

    Hook: Dry-fly, size 12-20.

    Hackle: Blue-dun dry fly.

    Dubbing: Olive beaver or superfine fur.

    Wing/Post: White Z-lon.

Tying the parachute Blue-Winter Olive

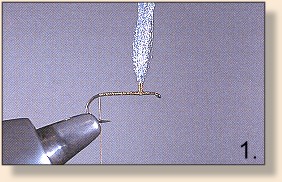
    1. ...form a Z-lon wing post that is one shank length high.

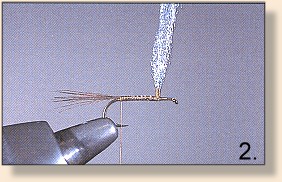
    2. Wrap thread back to the starting point. Select a large dun hackle feather, and prepare it for use as tailing materials...Tear about twenty fibers (more for a larger hook, less for a smaller one) free, stack or otherwise even the tips, and tie in a tail one shank length long.

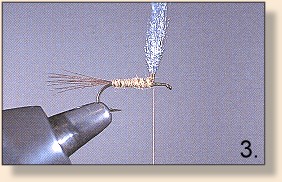
    3. Dub olive fur onto the thread, forming a tapered "rope"...Wrap the dubbing forward, to the wing post.

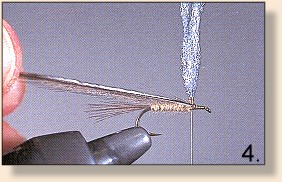
    4. Using the gape of the hook as a gauge, select one dun hackle feather one gape wide. Tie in by the butt at the wing post.

    5. Now, dub a bit more beaver or superfine fur onto the tying thread. The intent this time is to reverse the taper of the dubbing, making it thicker where the thread meets the hook, and thinner as the dubbing goes down the thread. In addition, you want the taper to be more abrupt.

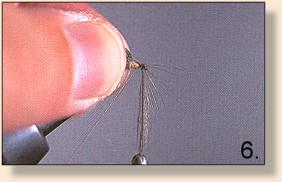
    6. Wrap a few turns of the dubbing behind the post, beginning to form the thorax. Release the bobbin, letting the thread hang, and wrap the hackle around the wing post.

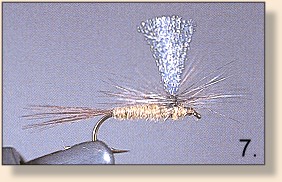
    7. Hold the hackle tip with your right hand, grasp the bobbin with your left hand, and bring the dubbing forward, under the horizontal hackle fibers and over the tip of the hackle feather, securing the feather to the shank of the hook with three to four wraps and forming a cone-shaped head.

    8. Make a few wraps at the index point to secure things, whip finish, and cement. Also put a dab of cement on the post, letting it seep into the wing wraps - it's a worthwhile bit of insurance.

Parachute-style flies cause many tyers fits, and this is a shame, because they definitely form a part of any well-equipped fly box. (Practice!) After the fly is tied, you have a decision to make about the wing post. Some tyers leave them long, imitating an upright wing. Others trim them a bit, and still others trim them a lot. I tend to leave mine long because the white wing post hleps me see the fly. Besides, you can always make a long post shorter at the water's edge, but making a short post longer is quite a bit tougher. ~ Brad & John

Credits: From Successful Fly Tying by Brad Befus and John Berryman, published by Pruett Publishing.


For more great flies, check out: Beginning Fly Tying, Intermediate Fly Tying and Advanced Fly Tying.