Fly Of The Week

Previous Flies
Fly Tying Terms

MSA Hopper
By Loren Williams

The MSA Hopper was designed this summer out of necessity. My interest and involvement with FIPS-Mouche regulated competition fly-fishing has required a shift in my angling attention. Staunch regulations have forced me to learn a broad array of new techniques, requiring me to rethink my choice of patterns. This has created a rebirth in my excitement of fly-fishing.

One technique I have been forced to work on is the "dry-dropper" approach. Now, dropping a nymph off of a dry fly is nothing new to us in the States. But when you are restricted from knotting the dropper off of the bend of the hook, or knotting it around the tippet so that it slides to the eye of the dry fly, then some new aspects come into play. Furthermore, when the flies you are dropping can weight .5 grams or more and might be attached to a dropper 5 or 6 feet in length, typical tactics get tossed.

I needed to create a pattern that could support heavy dropper flies; be seen from a great distance in very rough water, under various lighting conditions, was expected to catch fish; and was durable and easy to tie. The fly also needed to be slender enough that it could be cast with a long dropper and rather fine tippet. The MSA Hopper was born out of this search.

When we think of indicator dries we often jump to the side of foam patterns and "Hopper/dropper" rigs. I did that at first. My problem with foam was that in order to create a pattern that would float well enough I needed to go into the construction business. When I tried limiting the amount of foam to avoid layering and gluing, I sacrificed floatation since much of the buoyancy got lost with thread compression. I also felt limited with fly size. Smallish patterns were not well-suited to foam. Left scratching my head, I began to rethink what attributes make a fly float.

Obviously, the inherent buoyancy of the tying material is a factor, as we see with foam. But the other factor, and one I feel to be more important and dependable, is the surface area of the fly relative to the mass of the hook. This is how hackled patterns float, this is also how no-hackles float. They spread the footprint of the fly across a broad surface area. So, the MSA (Maximum Surface Area) Hopper is a throwback to old-school thinking, but using more contemporary tying ideas and materials. The thing floats like no tomorrow on the many hundreds of stiff hackle barbs and guard hairs that compose its chassis. It's accent features do not take away from floatation and they add greatly to its visibility and fish-catching triggers. It can be tied with ease using proper material selection, and it can be built on a broad size range of hooks to suit variable dropper sizes and water types. Its appearance roughly mimics popular and proven western patterns like the Stimulator and Amy's Ant. Color combinations are endless if the tier so chooses to use this pattern to match a hatch.

Materials for the MSA Hopper:

Materials

    Hook: Mustad Signature C53S #6-#12

    Abdomen: Hare's-mask dubbing

    Rib: Grizzly dyed yellow saddle hackle.

    Wing: Yellow deer hair accented with pearl Krystal Flash.

    Legs: Rubber hackle.

    Thorax: Hare's-mask dubbing thickly palmered with coachman brown saddle hackle.

Tying Instructions for the MSA Hopper:

    Materials

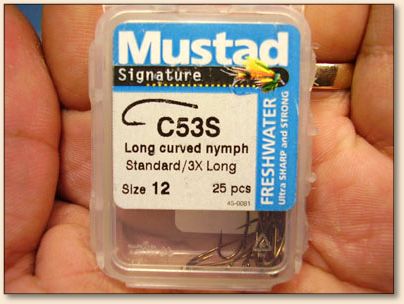
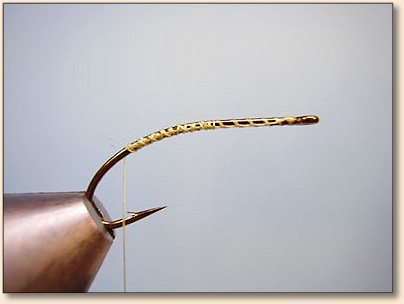
    1. Mount a Mustad C53S in your vise jaws and attach your tying thread. Advance the thread to the rear of the hook just above the barb.

    Materials

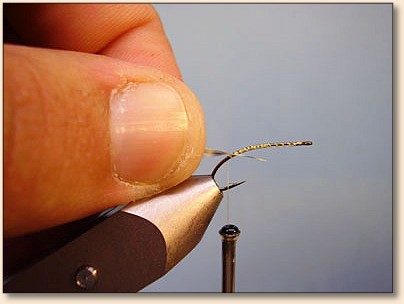
    2. Select a greatly undersized premium grizzly dyed yellow saddle hackle. The hackle should be smaller than the hook gap. Strip the barbs from the end of the stem and secure it at the point where your thread is hanging.

    Materials

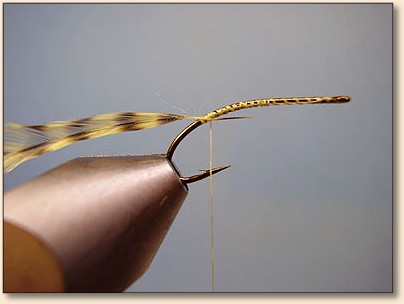
    3. After securing the saddle, continue to bind the stem to the hook as you advance the thread to a point about 2/3 of the way forward.

    Materials

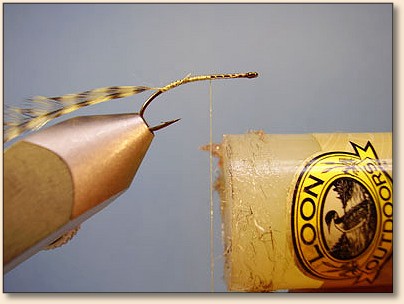
    4. Apply a tacky dubbing wax to your thread.

    Materials

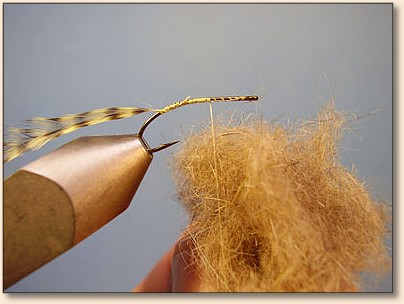
    5. Touch-dub a nice blend of hare's-mask to your thread. I prefer to blend my own dubbing, and I'm sure to run it through a coffee grinder to "fluff" it up before touch dubbing. You just want to very lightly touch the mass of dubbing to the waxed thread--you want an even blend of guards and underfur.

    Materials

    6. Once the thread has been dubbed, spin it counter-clockwise (for righties) to boost durability and to give it a nice uniform distribution.

    Materials

    7. Dub back to the saddle, then forward again to the 2/3 mark.

    Materials

    8. Now, with very tight and closely spaced wraps, palmer the saddle forward to the 2/3 mark. It is important to use a premium feather with great length so that you can palmer with your fingers to achieve tight wraps. Get as many wraps as you can. I prefer to wrap with the barb curvature forward as this utilizes the natural composition of the feather and makes for a stronger fly whose barbs will not lay back. Secure the hackle with two tight thread wraps and clip the excess.

    Step 8

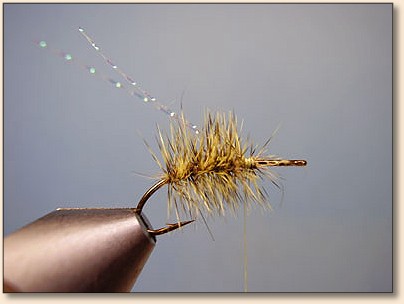
    9. Secure one strand of pearl Krystal Flash to the top of the hook just ahead of the hackle. Take a few wraps of thread forward.

    Materials

    10. Next, fold back the front section of Krystal Flash to the rear and bind it there with several tight thread wraps. Trim it to length (about 1 1/2 hook lengths). This method prevents the flash from pulling out.

    Materials

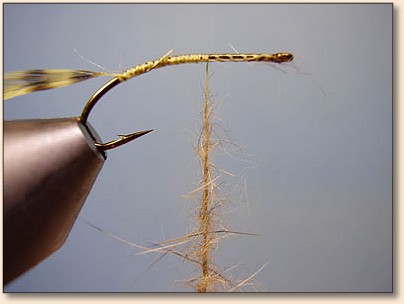
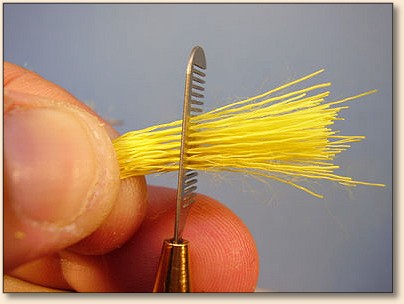
    11. Select, cut, and remove a small bundle of yellow deer hair. There is no need to overdose the size of the hair bundle as it does little for buoyancy. And it's purpose is to mimic a wing and to provide visibility to the angler. Grasp the 
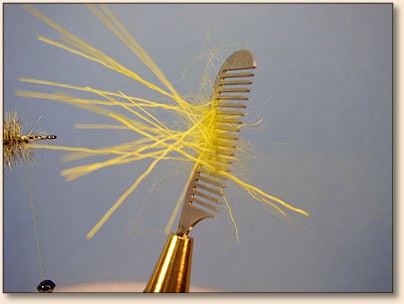
bundle by the tips and run a fur comb (shown is a comb from Wasatch Tools) through the base of the hair to remove underfur and shorts.

    Materials

    12. This is what will come out. Discard.

    Materials

    13. Stack the bundle of hair to even the tips.

    Materials

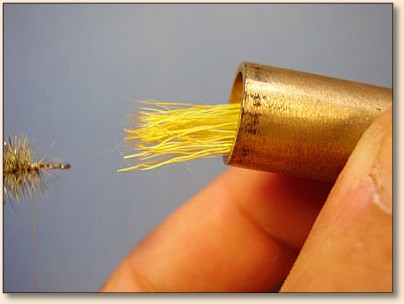
    14. Measure, with the tips to the rear, for length and clip the excess butt ends. Length should be about 1.5 to 1.75 hook lengths.

    Materials

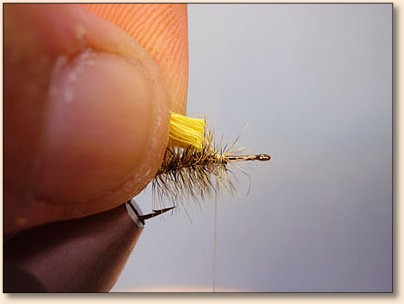
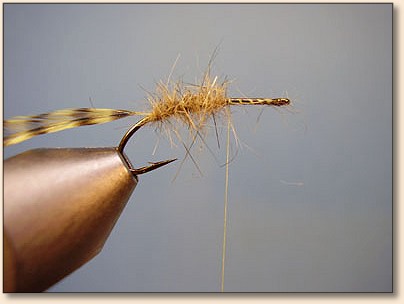
    15. Secure the bundle immediately in front of the abdomen with several tight thread wraps.

    Materials

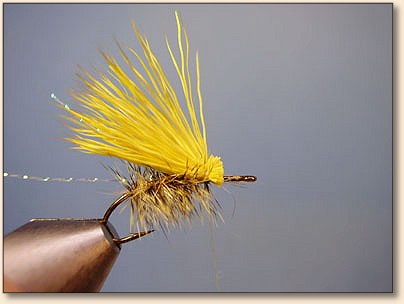
    16. Smooth the butt ends with thread and build a nice taper for the abdomen.

    Materials

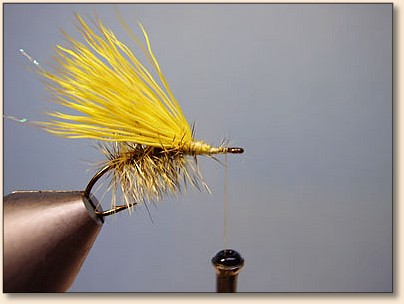
    17. Mount the rubber hackle on the near side of the hook. I begin at the front and bind to the rear. I also leave the legs long at this point. I bind the legs back to the start of the abdomen.

    Materials

    18. Repeat for the far side.

    Materials

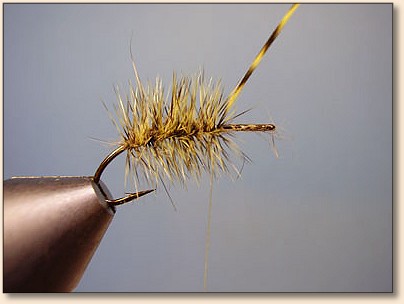
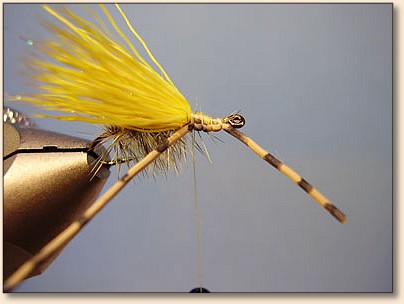
    19. Select an undersized grizzly dyed coachman brown saddle. Strip the barbs from the end and secure at the rear of the thorax section. Size the hackle to be just larger than the abdomen hackle--or just barely larger than the hook gap.

    Materials

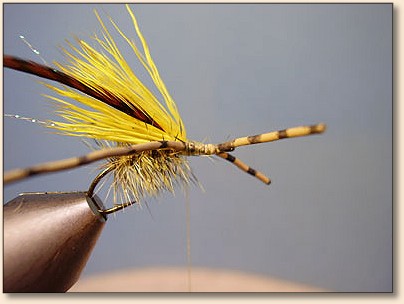
    20. Touch dub some hare's-mask and build the thorax underbody.

    Materials

    21. Dubbed thorax.

    Materials

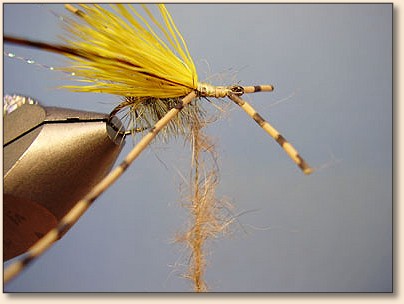
    22. Palmer the coachman saddle up to the front legs with tight and close wraps.

    Materials

    23. Reverse palmer back to the abdomen, again using tight and close wraps.

    Materials

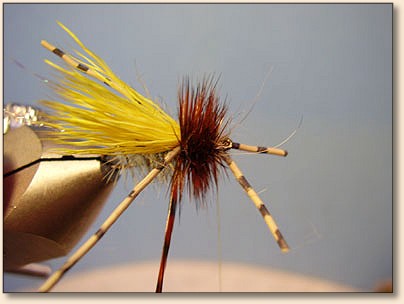
    24. Then palmer back to the front legs. This will build an extremely dense hackled thorax with hundreds of stiff hackle barbs acting as tiny outriggers. The dark color offers a good visual for glared waters as well as a stark contrast that I feel triggers strikes.

    Materials

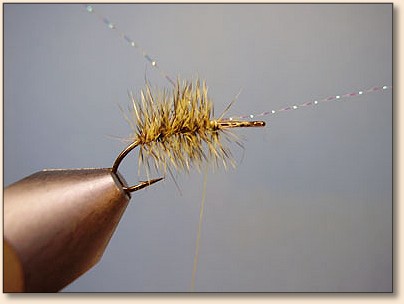
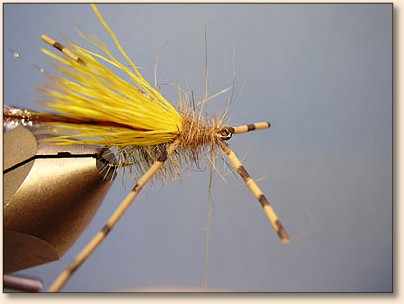
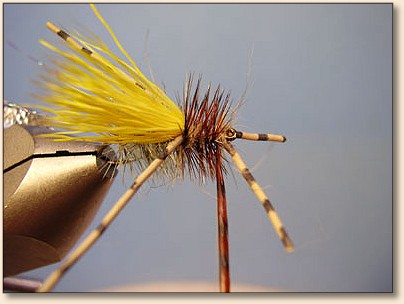
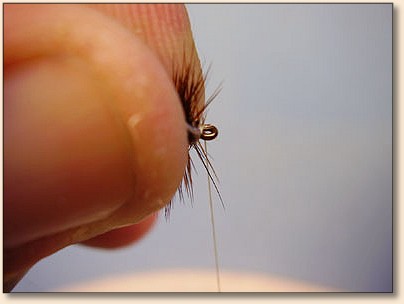
    25. Secure the hackle behind the front legs with two very tight wraps of thread.

    Materials

    26. Clip the excess hackle.

    Materials

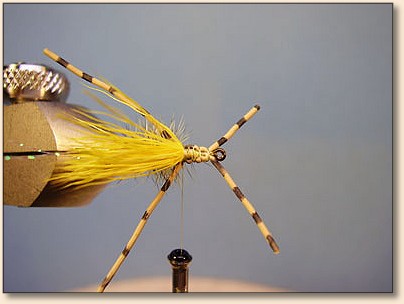
    27. Next, with force, pull back the hackle barbs and rubber legs to expose the hook eye. Build a small head that keeps the barbs out of the way; whip and snip.

    Materials

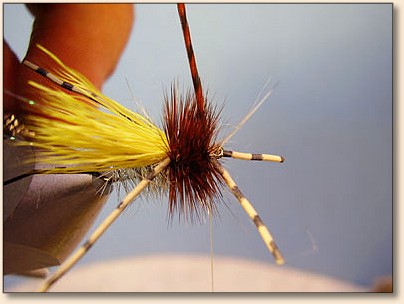
    28. The final step will be to trim the legs. I cut the rear legs to be just a tad longer than the wing; the front legs are just long enough to provide some stability and action. If they are too long they get in the way of knotting the fly to the dropper tippet. This fly is tied to the tag end of a triple surgeons knot.

    Note: The fly was removed from the vise for effect only as it is easier to see the leg proportions sans vise.

    Materials

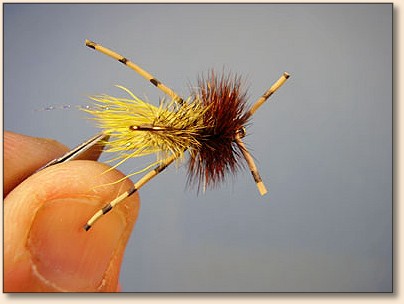
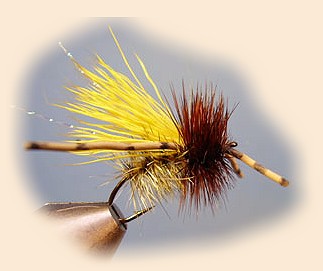
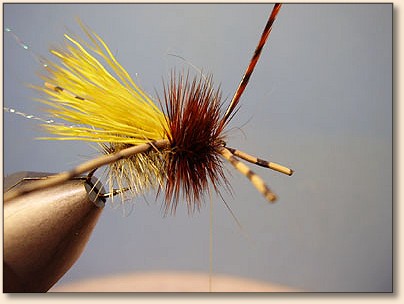
    29. A completed MSA Hopper!

    Materials

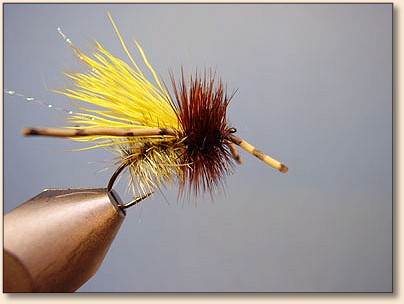
    30. Top view. Notice the contrast as well as the bright wing. This fly will be visible under various conditions. ~ LW

About Loren Williams: This fly is from Mustad Prostaffer Loren Williams and comes to us via Jeff Pierce (Dr. Fish) at Mustad. Loren was the official tier for Team USA (fly fishing) last year. His website is flyguysoutfitting.com. Loren is a full time commercial fly tier and guide. According to Dr. Fish, "When it comes to Great Lakes Trout and Salmon, he takes the high road and uses traditional fly-fishing techniques, not the chuck and duck flossing that many guides do. He's top notch!" ~ DLB

For more great flies, check out: Beginning Fly Tying, Intermediate Fly Tying and Advanced Fly Tying.