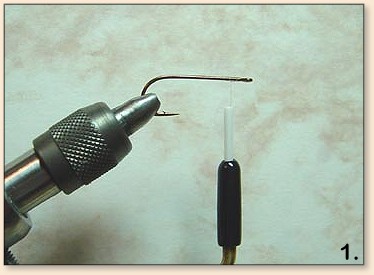
1. Start behind the eye and wrap a base of
thread covering one third of the tying length.
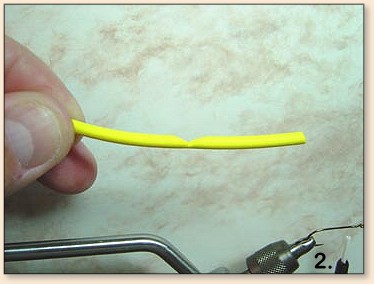
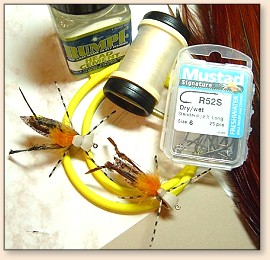
2. Cut a length of foam (about 2" for a size 6)
and notch it at the center. This will help to
keep the foam from bowing out when doubled over.
I have used yellow here but also often use white
or light brown and color it with the Prismacolor
markers to "match the hatch."
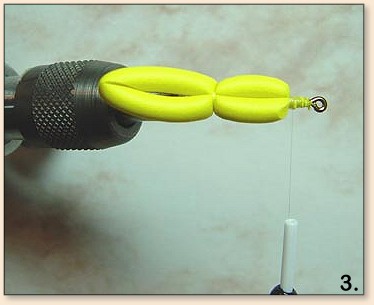
3. Double the foam over and secure it to the hook
shank three sixteenths of an inch behind the eye.
Also be sure to secure the foam to the hook just
forward of where the bend starts.
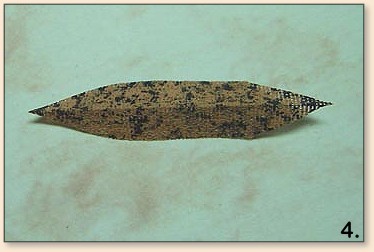
4. Trim a piece of winging material to form the
wing. It should be wide enough to cover the body
completely at the widest point. Fold it over to
form a crease down the center.

5. Tie in the winging material so that it
overhangs the foam body slightly. Take care
to secure it as straight as possible to keep
the fly from twisting when cast.
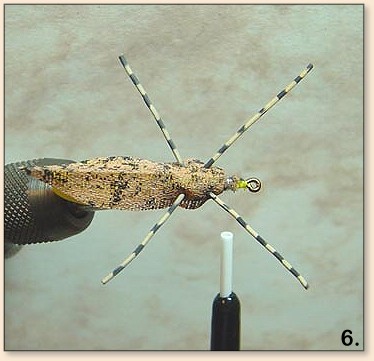
6. Thread some rubber legging material through
a needle. Run the needle through the body at an
angle to form the front leg on one side and the
middle leg on the other side. Repeat this process
so the 2 front and 2 middle legs are in place.
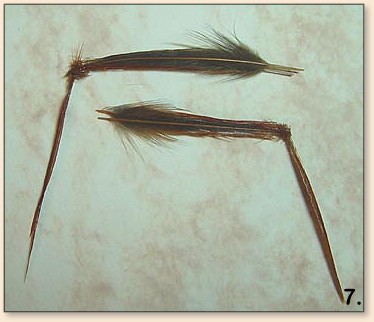
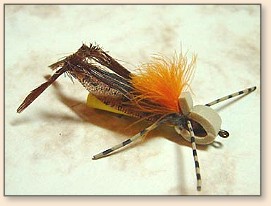
7. Get 6 hackles of medium stiffness that are
at least 3 inches in length. I like a dark ginger
with a black centerline. Take off the hackles and
simply tie an overhand knot. As you tighten the
knot adjust the position of the feathers so that
they are the correct shape when tightened. Once
the proper shape is attained, coat the legs lightly
with some head cement for added durability.
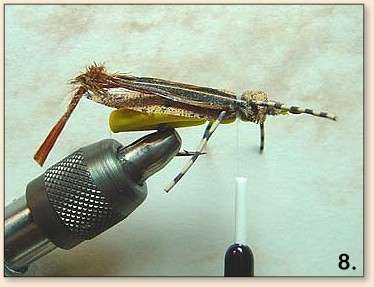
8. Secure one of the "leaper" legs in between the
front two pairs of legs. Tie it in at a slight
upward angle. The length should have the elbow
extend out to the area between where the foam body
ends and the wing ends. Once one leg is set, tie
in the other. Do your best to keep the legs as
straight (up & down) as possible. If one leg is
angled outward too far it will act as a propeller
and cause the fly to spin.

9. Tie in a flag of CDC on top, between the first
and second set of legs. This is simply to help
you see the fly better.
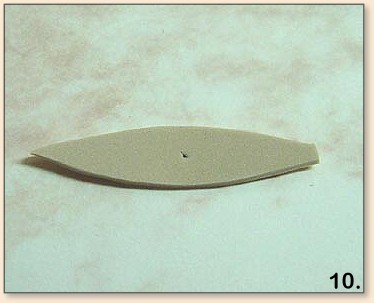
10. Trim a piece of sheet foam so it is as wide
as the fly body and tapers at each end. Poke a
hole in the center of the foam so that the eye
of the hook will pass through it.
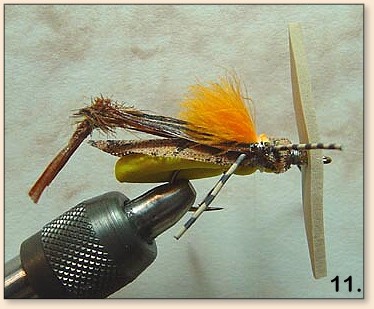
11. Slide the eye of the hook through the sheet foam.
12. Fold over the sheet foam and secure it
between the first and second set of legs. The
tag end of the foam on the underside of the fly
should be trimmed as closely as possible. The
tag on the top of the fly should be trimmed to
allow the foam to overlap the CDC slightly.
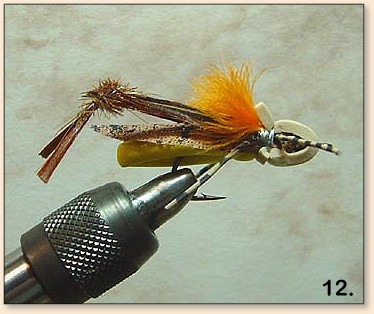
Whip-finish the fly and apply some head cement.