Sometimes I tie it on a heavier wire hook for bigger
fish. I've had reports from customers all over saying
how it is the "crack cocaine" for trout. Wonderful!
I've tried different colors and sizes and found size
14 in the amber (tan) and olive to be the best colors.
Coming up with a name was just trying to find something
that people could remember and if humor helped out,
so be it. Pupa is pronounced 'pewpa' as far as I know,
but a lot of people call them 'poopa', hence the name,
easy to remember. Having the poopah in The Fly Shop's
catalog helps with people's familiarity with the fly
and when fishermen try it, there's no going back to
other caddis imitations." ~ Tim Fox, creator of the Poopah.
Materials List: Fox's Poopah
Hook: TMC 2312,2302, 12-14-16.
Thread: 8/0 to match body.
Body: Vernille, olive, tan, ribbed over.
Legs: Partridge.
Throax/head: Ostrich herl.
Antennae: Wood duck.
Tying the Poopah
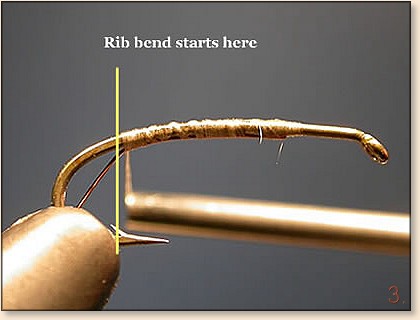
1. Tye in the wire rib on the underside of the
hook to a point between the hook point an barb.
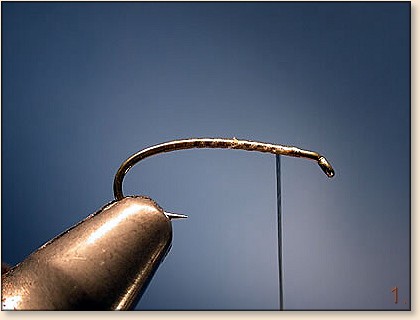
2. This point on the hook shank, like for most ties, is the end of the
body,start of the tail and the beginning of the rib wraps. For a vast
number of ties, this point is crucial in the maintenance of proportion
through out.
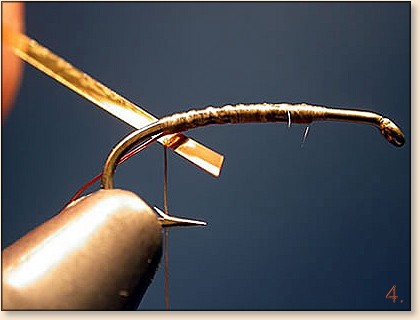
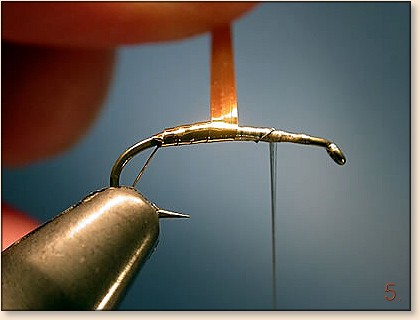
3. The tinsel is tied in at the end merge of the rib and thread. Tie in gold side
up (facing tier).The tinsel wraps will be in a "normal" direction, the tinsel
will be bent or kinked at the tie in point and brought under the hook
toward the tier and advanced forward to the thorax area. The first turn
over the top should cover the tie in point.
4. The wraps are evenly spaced and firmly laid down.
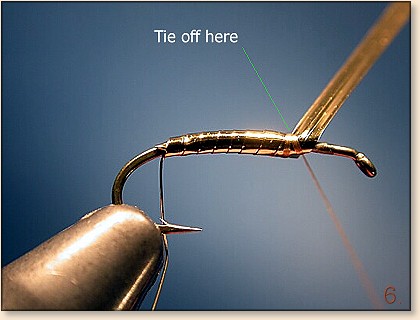
5. Bind the tinsel at the thorax area as
shown above. Don't be shy, wrap it good.
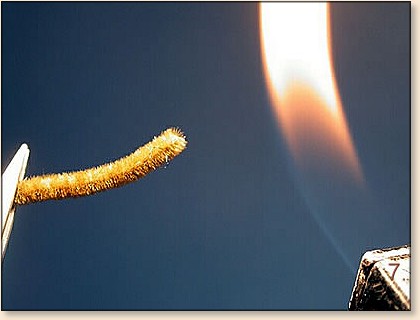
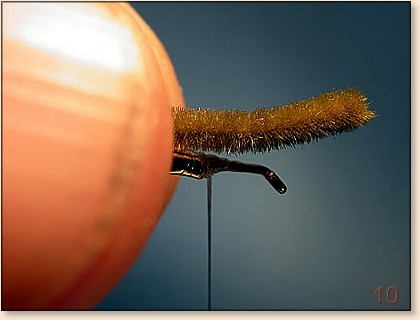
6. Cut a short piece of micro chenille, this is medium, draw the chenille
toward the flame...Not the other way around! It will not take much to
singe the chenille. Do this before you tye it onto the hook! It's a good idea
to make a bunch ahead of time, plus you won't incinerate the finished bug
if you try this step at the end.
7. The finished burn, again it does not
take much heat to do this.
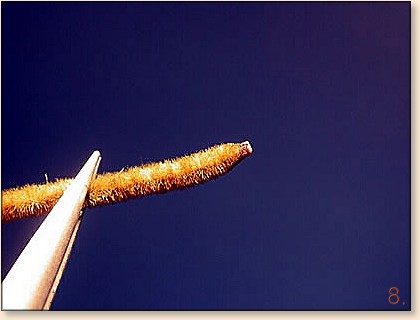
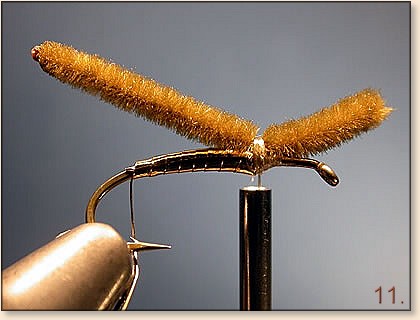
8. With your right thumb and index finger pinch
the chenille and measure it on the hook. You want
the "burnt" end to extend a bit past the bend.
9. Switch hands and again,pinch the chenille in
place. Note the thread is already in position to
tye in the chenille at the thorax.

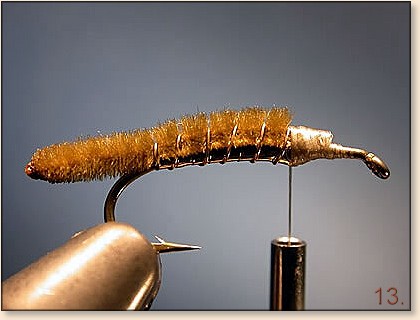
10. Looking at the body after I did this I would
say it is a bit long...but hey, I'm easy. Remember
to trim the chenille at an angle. Avoid square or right
angle cutting.
11. Here the ribbing is about half done. Five
to six turns is plenty. Maintain good pressure on the
wire. I have made the chenille body a bit longer
than Tim Fox', the flys originator, usually does...
for no other reason than that's the way it turned
out. I don't think it makes a huge difference to the
fish, but this is one place you could experiment.
ery little is chiseled in stone when tying flies.
12. Completed rib. Flatten the cut end of the wire
and cover the cut end with thread. Head cement here
is not out of the question.

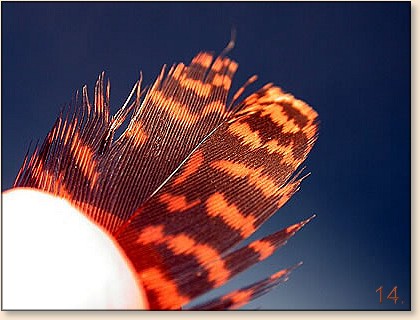
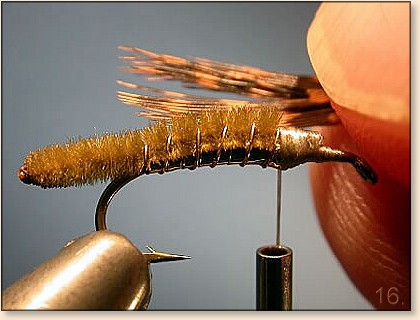
13. I used Grouse on this fly which is only to say
that one could use just about any "webby" feather as
the beard/legs. Partridge, Pheasant, Grouse, they all
will work.
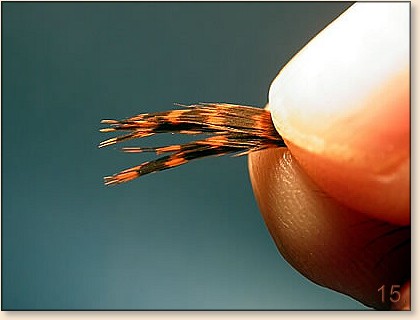
14. Gather the tips into as dense a bunch as possible.
15. Measure the "beard" or legs from the "backside"
of the fly. The thread torque will bring the fibers
under the thorax and into position as legs. You
can place the legs in position first but the thread
will tend to bring the fibers up and onto the top
of the thorax area.
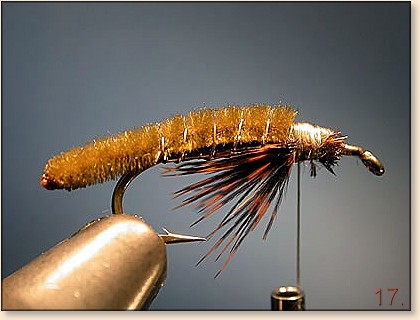
16. Legs/beard are in place, bind well.
17. This is the center line stem of a wood duck
flank with the barbs slipped back. Snip this end
piece out and save for tailing if you like.
18. After the center stem is removed, you can,
with a bit of effort, manipulate one barb free
from each side of the center stem. These will
form the horns.

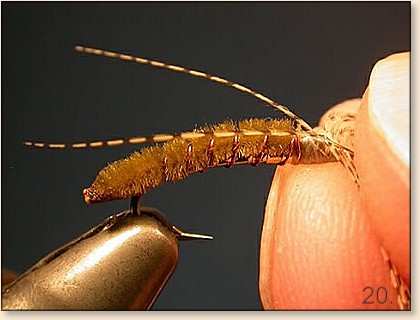
19. Place the "horns" on top of the thorax area.
Align the "crotch" of the fibers
at the back end of the thorax area.

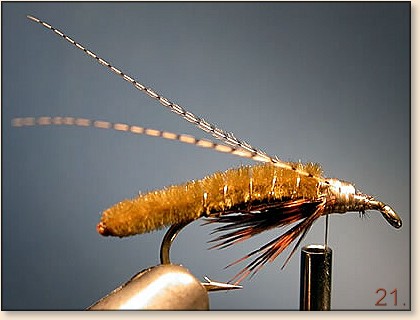
20. Here the antennae are tied in.
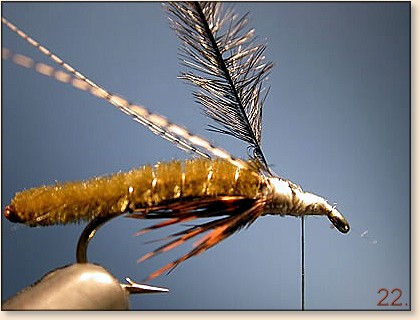
21. Tye in the ostrich herl like you would a dry
fly hackle. If possible align the herl so the natural
curve of the feather faces toward the bend of the
hook.
22. By aligning the herl curve side back the barbules
"point" back when wrapped. This allows for a more dense
collar or head.
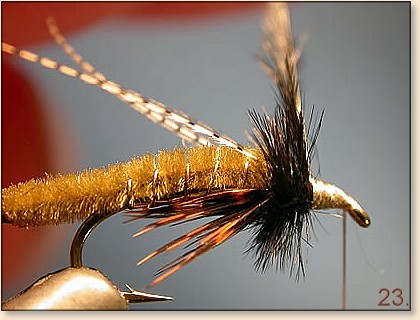
23. Tie off the ostrich and finish the head and
you're done!
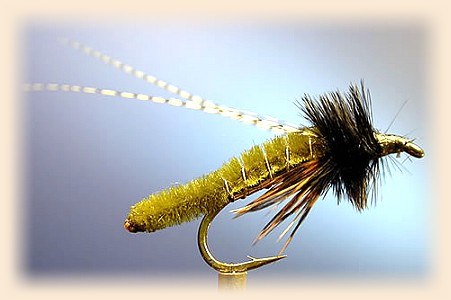
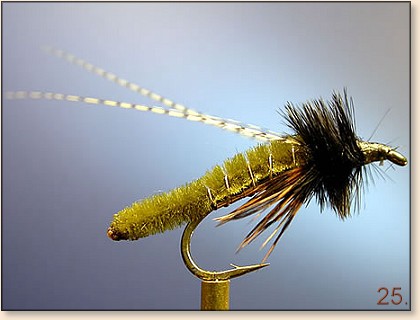
24. Finished fly.
About Harry:
Harry Mason is the owner of
www.troutflies.com which has wonderful flies, and excellent tutorials.
Harry is also a Sponsor of FAOL. Thanks Harry!