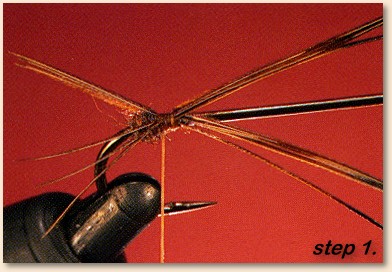
1. Start the thread at the bend. Dub the thread and build a small
dubbing ball there. Tie in a bunch of three or four pheasant-tail
fibers on each side of the ball the result should be split tails.
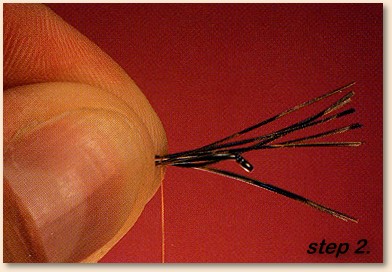
2. Slide your fingers up the shank as you spiral the thread tightly
up the pheasant butts and shank. Stop at three-quarters up the shank.
Trim the butts.
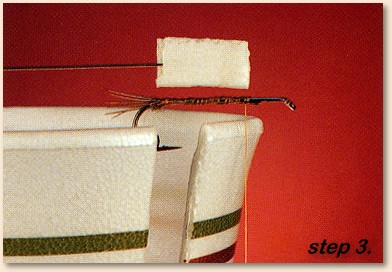
3. Snip a rectangular section from a foam cup as shown. The section
should be long enough to reach from just ahead of the split tails to
three quarters up the shank. The width of the section should allow it
to wrap completely around the shank.
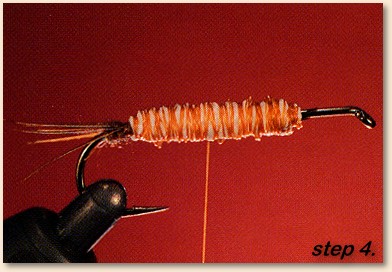
4. Wrap the section around the shank. Secure it with plenty of tight
thread-turns. The thread-turns will compress the foam, so use the
tightness of the turns and their placement to shape it. The foam
should taper at its very ends and should be reduced somewhat
throughout remember that leaving the foam overthick will make the
fly's body overthick, but that too much compression will reduce
buoyancy. Actually, this is easy enough to judge. If you are in
doubt, check these photographs.
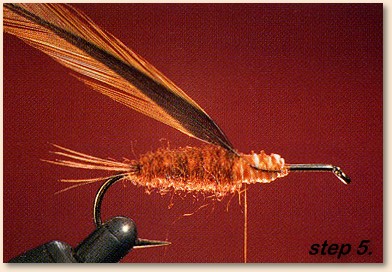
5. Dub halfway up the shank, and then tie in a hackle. Trim the
hackle's stem.
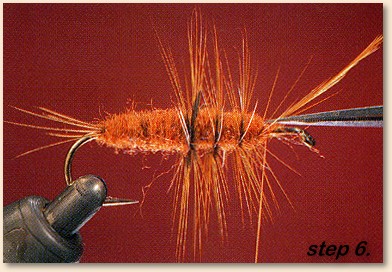
6. Dub to the front of the foam and then palmer the hackle forward
in three to five turns. Secure the hackle's tip with thread, and
then trim the tip.
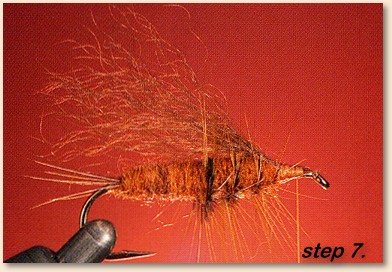
7. Trim out the hackle fibers atop the thorax leaving a "V." Cut,
comb, and stack a bunch of calf-tail fibers. Tie in the fibers as
a wing that extends to the edge of the hook's bend or slightly
beyond. Trim the fiber butts and cover them with tight thread-turns.
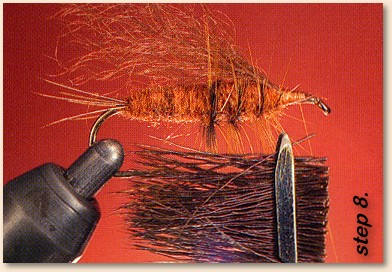
8. Advance the thread to just behind the eye. Snip, comb, and stack
a bunch of elk hair. Hold the hair along the hook with the hairs'
tips at the bend. Trim the hairs' butts to a straight edge at the
eye's tip.
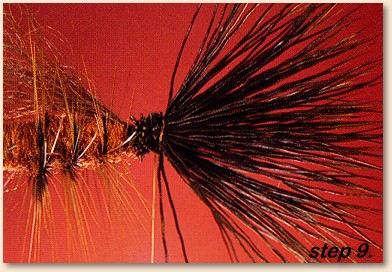
9. Work the cut ends of the butts down around the shank at the eye,
tips projecting off the eye. Take two light thread-turns around the
butts, and then pull the thread tight. Trim the butts and bind them
with thread.

10. Wind the thread to just ahead of the body. Stroke back the hair
and secure it with a tight thread-collar. This creates a bullet head.
The thread should be tight enough to cause the hair tips to flair.
Whip finish the thread around the collar and trim the thread.

11. Turn the Salmonrod upside down and trim away hackles and hair
tips from its underside. Add cement to the thread collar to complete
the Salmonrod.
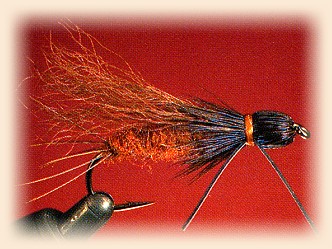
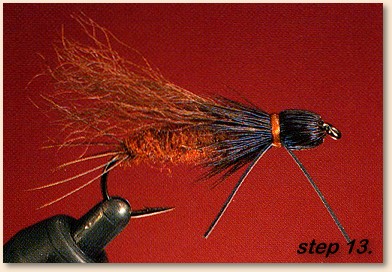
13. Trim the rubber-strand legs to length to complete this version
of the Salmonrod. Here it is, completed. Note that this hair collar
is short. A short collar is an option for both the standard and
rubber-leg versions of both the Salmonrod and Goldenrod. The
short hairs do not compete with hackle or rubber-strands in
suggesting legs.
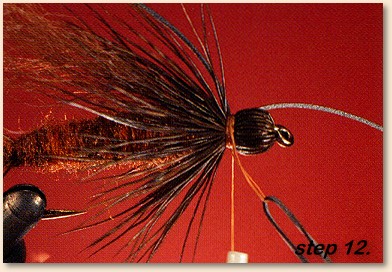
12. Rod's newest, still-experimental version of the Salmonrod
features rubber-strand legs. To tie it, omit the hackle. When
wrapping the thread collar, loop a fine-diametered section of
rubber-strand over the thread and then slide that strand down
to one side of the bullet head. Add a few tight thread-turns
and then add another section of rubber-strand on the other side
of the bullet head. Whip finish the thread, trim it, trim the
underside collar hairs, add cement to the thread collar. The
strands should be dark-brown or black. ~ Skip Morris