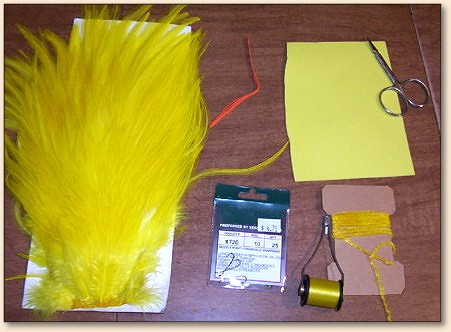
Hook: Daiichi 1720 size 10.
Thread: Choice of color 6/0
(yellow is my personal favorite).
Body Extension and underbody: 2mm craft foam (color
to match thread).
Body: Medium chenille (color to match foam).
Hackle: Saddle Hackle (color to match body).
Head: excess foam doubled over.
Legs: 1 strand medium rubber legs on
each side (color that has a sharp contrast to the body).
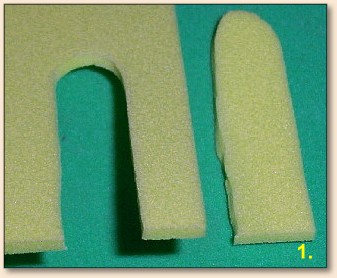
1. Cut a piece of foam about 1.5 times
the length of the entire hook. Be sure
to round the edge of the foam as what is
in the picture, this will serve as your
extended body segment.
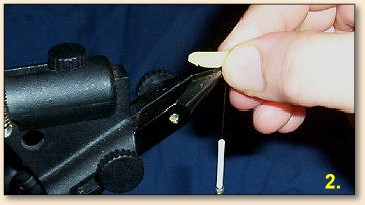
2. Debarb the hook (if desired) and insert
into the vise. Lay a base wraps from the
hook eye to directly above the barbed area.
Pinch the foam in your fingers as in the
picture, (the rounded edge should extend
past the bend of the hook by at least a
hook gap) Make about 3 to 4 semi firm wraps
of thread over the foam and hook shank to
secure it there.
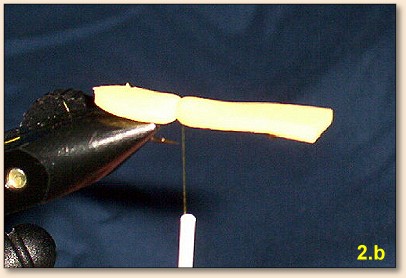
This is how the extended body looks tied in.
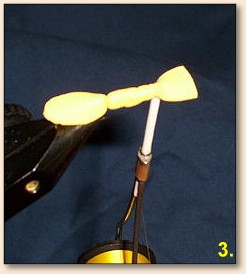
3. Wrap the thread back up the hook shank
(use moderate tension to avoid cutting the
foam) to a point about 1 hook eye distance
from the eye of the hook. Be sure to leave
the excess foam hanging out over the eye,
it will later form the head of the hopper.
4. Wrap the thread back to the original
tie-in point of the foam and tie in the
body chenille. (It helps to strip away
about 1/16 of an inch of the chenille to
expose the core. This makes the chenille
very easy to tie in and keeps from having
a "bump" at the start of the body).

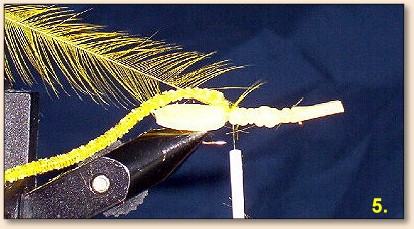
5. Stroke the fibers of the saddle hackle
rearward to get them at right angles for
the stem. Tie the hackle in by the tip
right in front of the chenille body.
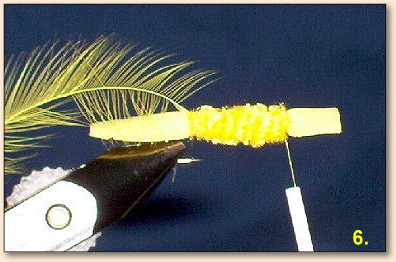
6. Hold the hackle up out of the way
and wrap a tight chenille body up the
hook shank to the point where the
underbody stops. Make 4 to 5 wraps of
thread to secure the body and clip off
the excess.
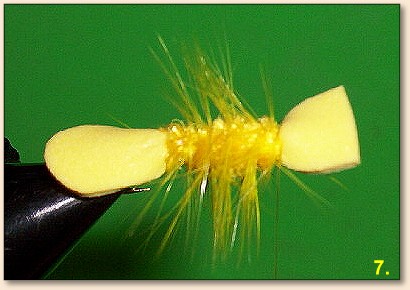
7. Palmer the hackle through chenille
to the end of the body. Keep the wraps
fairly close to each other to give a nice
buggy look to the fly. Make 4 to 5 turns
of thread over the tie off point to secure
the hackle. Clip off the excess hackle.
(It is a good idea to add a half hitch knot
here to avoid anything coming loose).
8. Fold the excess foam hanging over the
eye of the hook back toward the hook bend.
Catch the foam at the tie off point with 2
wraps of thread to keep it there. Once the
head is properly positioned make 2 more wraps
of thread to secure it. Clip the excess foam
to where the "tag" of the head ends slightly
behind the tie-off point.

9. Fold one strand of the rubber legs
material over the thread and place the
fold on the near side of the hook. Make
3 to 4 wraps of thread to secure it to
the side of the hook. (if the legs try
to slide just slide them back into position
and add a semi tight wrap of thread until
they are secure). Repeat the process on
the far side of the hook.

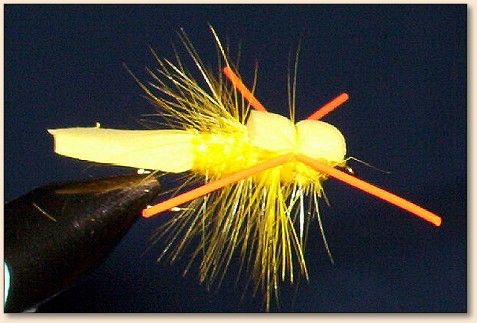
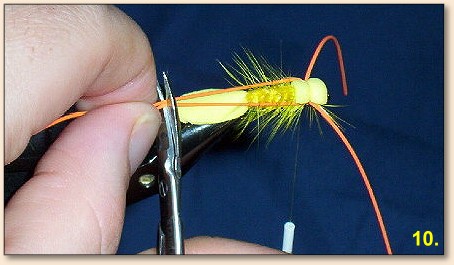
10. Once the legs are tied in and secure
you need to measure them for length. I like
to gently pull (and I do mean gently or else
the rubber will stretch and the legs will
become too short) the legs to the end of
the foam body. Clip the back legs at that
point. Once that is done match the legs
all up together by holding them above the
fly. Clip the front legs slightly shorter
than the rear legs to give the fly a "hopper"
look.
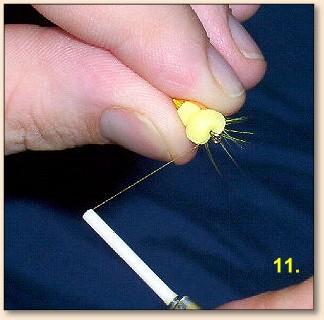
11. Pass the thread under the hook shank
to the hook eye. Make a dozen or so wraps
to form foundation to tie the thread off.
Whip finish (be sure to keep the legs out
of the way) and clip the thread. Add a
drop of head cement to add durability to
the fly. Clip away any stray hackle around
the head area of the hopper.
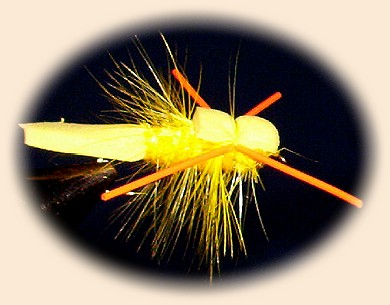
Here is a side view of the finished fly.
Note the nice extended body as well as
the fat head, I think the produce a great
silhouette of a grasshopper.