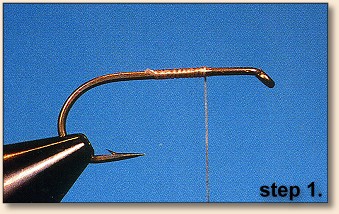
1. Apply a base wrap of thread starting about 1/4 of the way
back from the eye of the hook, wrap part way to the end of the
shank, and then back to the starting point. Leave the bobbin
at this location.
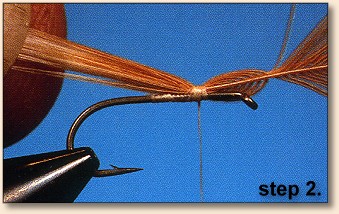
2. The wings and tail are formed out of the feather fibers.
To accomplish this, select two feathers that have fibers about
the same length. We find using the large hackles on the big
end of the cape works really well for this purpose. Place
the two feathers together so their natural curves oppose each
other. Trim off the large ends of the stems. The wings/tail
are formed from the swept-back fibers. The fibers are swept back
on a length of stem that is shorter than the hook shank. Measure
the hackle stems (shorter) comparing them to the hook shank.
Sweep back the fibers and tie them on the hook (very short
capturing stem and fibers) with three snug thread turns as
illustrated.
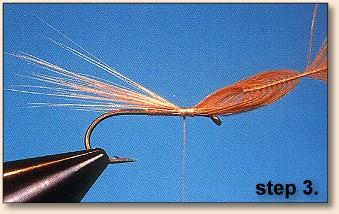
3. Now, pull forward on the feathers with enough pressure
to slip them part way from under the thread. (Not all the
way or you'll have to start over.) Pull the feathers out so
they are equal in length to the hook shank. Slipping the
fibers forward keep the swept-back fibers aligned with each
other. The newly-formed wings should be as long as the hook
shank and the hackle stems should be short enough so they are
not tied to the shank, in essence they are a looped wing.
This makes the wings flexible so the fly will not spin while
you are casting. Secure the wings with four or five more
turns of thread to anchor them in place.
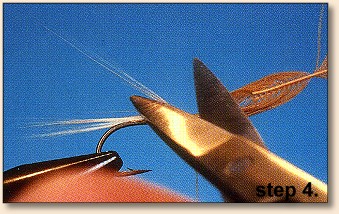
4. To form the tail we trim out the fibers that are either too
long or too short. Whether you eliminate short or long fibers
is determined by the size of hook on which you are tying your
fly. We like a tail that is slightly longer than the hook shank.
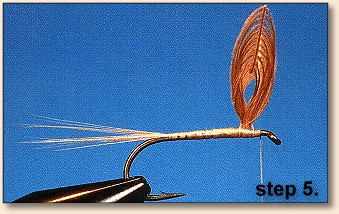
5. Wind the thread to the back of the hook while binding the
tail into position, them wrap forward to the wings. Place several
turns of thread directly in front of the wings to force them to
stand up. Divide the wings with a couple of criss-cross thread
wraps then trim the excess feathers. (We usually place them in
a clothespin where they will be ready for the next fly. You can
usually construct several sets of wings from two feathers.)
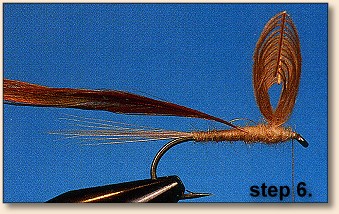
6. Apply dubbing wax to your thread and then touch the clump of
dubbing to the waxed thread to evenly distribute the material
along the thread. Twist your thumb and forefinger in one direction
only around the fur-covered thread. This single-direction motion
will form a short section of natural fur yarn that you then apply
to the hook to form the body. Attach the hackle behind wings.
We like dubbing under our hackle to represent a thorax and
have done so with the illustration.
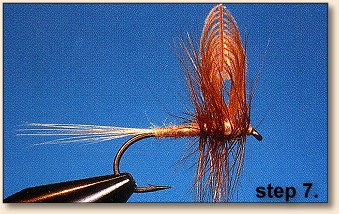
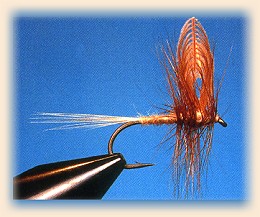
7. Wrap the hackle, whip finish and trim the thread/feathers
as needed. The completed fly should look similar to the one
illustrated. Remember, you can make the Quick 'N EZY and
color combination you wish. ~ Al & Gretchen Beatty