I was out floating in my favorite hole when I meet
the nicest fellow fly fisherman. Rather than fish
during a hatch, we floated out in the water for
thirty minutes talking. Our conversation came
around to what we were using during the mid-morning
hatch. He showed me his Green Drake extended body
and photo of the 26" Brown he caught the previous
day with it. I didn't have one in my box so he very
kindly offered me one of his flies. Well needless to
say I went home and that night tied some up. I've not
caught that nice a Brown yet, but it does work wonders
for the hatch on my favorite lake. This fly tied on a
size #14.
Materials List: Green Drake, extended body
Hook: TMC 5212 10-14.
Thread: Olive 6/0.
Tail: Moose Mane, 3 hairs black.
Body: Deer Hair, Olive/ Gudebrod EZ Dub small.
Rib: Tying thread.
Hackle: Grizzly.
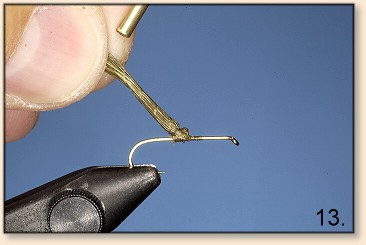
Tying the Green Drake, extended body
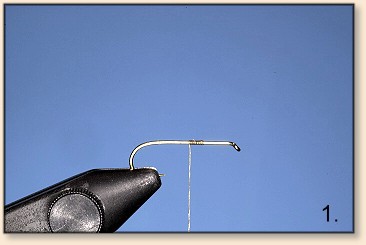
1. We start with our traditional tie in but
you don't want to wrap back very far and you
want to make sure the wraps are tight! You
want to start tying in material half way on
the shank so stop there with your tie in.
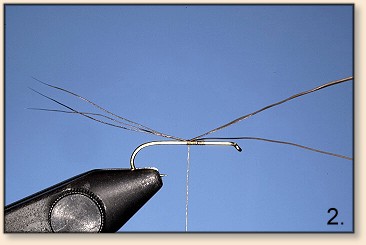
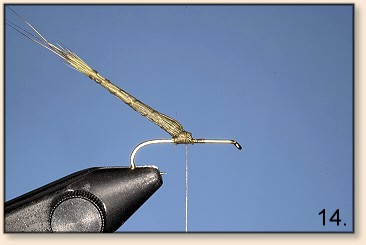
2. Tie in the Moose mane next. It's length needs
to be longer than the finished extended body which
you've not tied in yet. Personally, I look at the
mane and tie it in at the length that looks right.
You can find varying formulas how long it should
be in other recipes, most common is twice the length
of the shank. Once the mane is tied in, clip off excess.
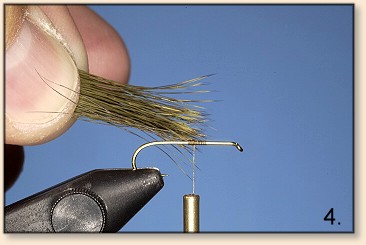
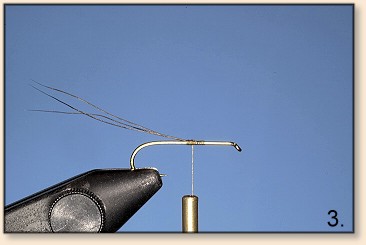
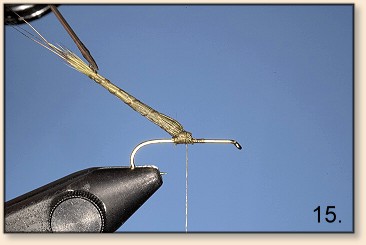
3. The deer hair comes in next. It is tied in in
the direction you see because it is folded back
over itself to create the extended body. The way
measure it for length is how you see here. You
can see the Moose mane against my thumbnail. I
leave just a little of the mane showing when
figuring my pinch point which becomes my tie
in point. Once that is determined, place the
prepared deer hair (it's been combed out and
stacked) on the shank and make two semi-tight
wraps around the stack. Once done, only slightly
work the stack around the shank but don't completely
encircle the shank. Now make a couple more tight
wraps and cinch down on the deer hair.
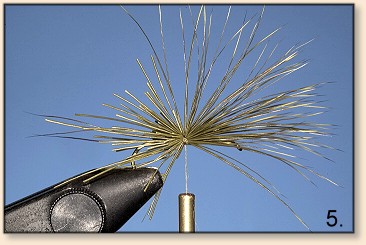
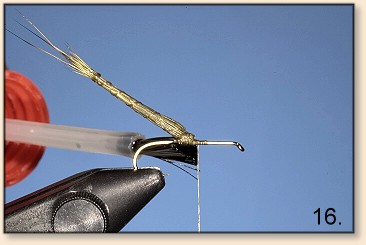
4. With care, trim the excess hair at the rear
of the tie in. Use care not to cut the Moose mane
even though you can tie in some mane if you do by
accident. Once excess is removed, tie down the
bundle ends down tight!

5. With the hair tied on, brush the hairs back.
Don't try to do it with one push, take time to
carefully fold the hair back on itself. I make
many pull backs on the hair to get it back into
a smooth unit. This makes a big difference in
actually wrapping the extension.
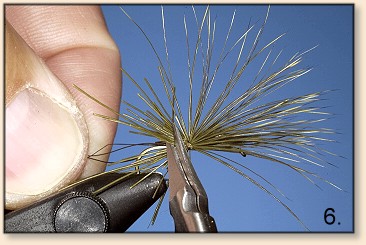
6. Once you've got the hair all pulled back,
wrap the hair just behind were the fold in the
hair is on the shank. Make these wraps pretty
tight. Next, this is important, wrapping the
thread in the same direction as you've been
doing everything else, makes two warps on the
extension itself right at its base. This starts
to form the hair extension and makes the rest
of the extension wrapping a lot easier!
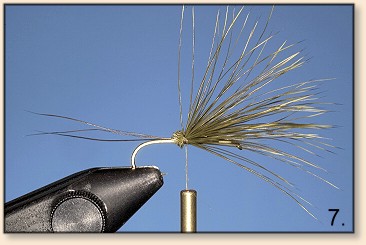
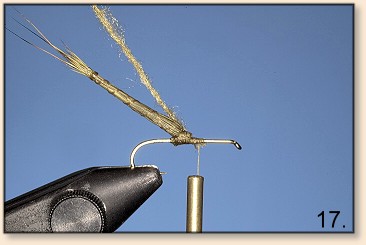
7. Now wrap up and down the extended body. Take
your time and don't rush it. You'll have to move
your left hand a little, let go of the bodkin and
hold the wraps with your finger tips to get the
right looking segments. When you've gotten to the
top of the extended body on the first pass, remember
to first leave enough loose hair to finish off the
tail and then make a couple of circular wraps at that
point before wrapping back down the extension. All
the wraps except these tips wraps are not real tight.
Wrap back down the extended body and take the thread
to right in front of the deer hair. Flaring out the
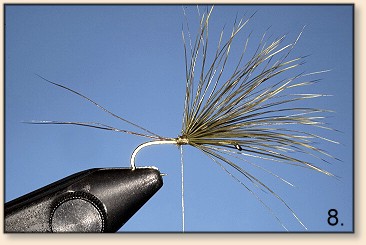
deer hair at the tip gives it its finished look.
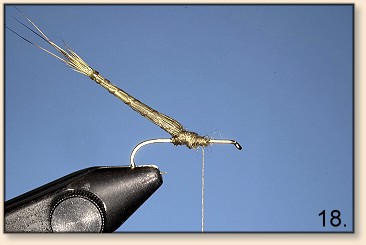
8. I now secure my wraps with a little head cement
and Krazy glue. I place a drop of head cement on
the last two wraps on the extended body, the wraps
that go around a couple of times. I do that because
I've found that my big finger can easily pull these
wraps off when I'm tying the fly onto the tippet.
The head cement prevents this. The Krazy glue keeps
the extended body in place on the shank better then
excess wrapping.
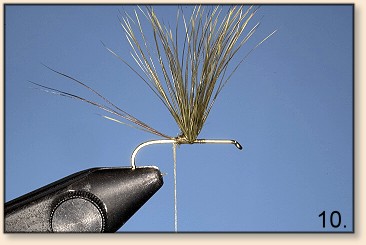
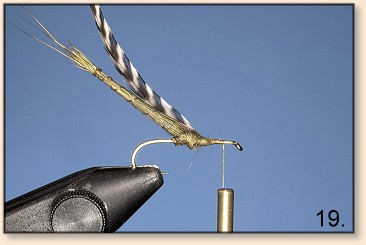
9. It only takes a couple of wraps of the dubbing
to finish off the body that was started with the deer
hair. A simple, clean taper is all that is required.
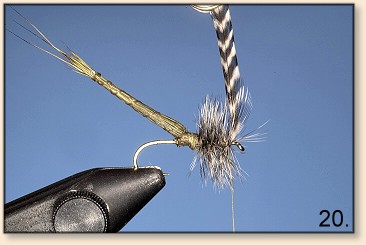

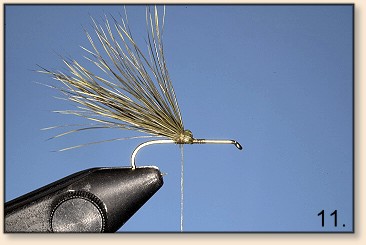
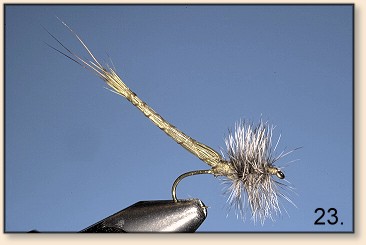
10. Tie in your grizzly hackle, advance the thread
to the eye of the hook, wrap the hackle and then tie
it off and make the head. I've found that the trout
in my favorite hole like a little more bushy than
not hackle, found that out by making a couple
variations. I suggest you do the same.
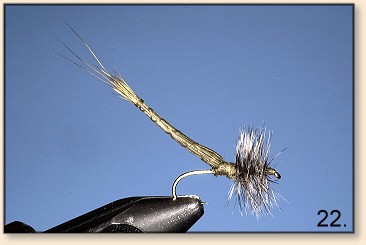
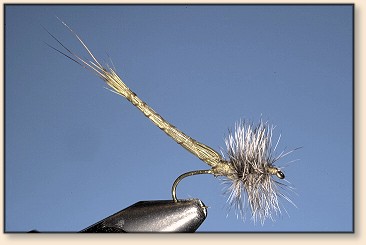
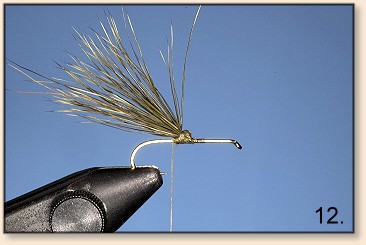
11. And with that, the Green Drake extended body
is complete. This cool looking fly might scare off
some but once you tie one, you'll find you can whip
them out pretty darn fast!
Photographic note:
Photos captured by Nikon D1H, 60f2.8AF Micro with
SB-29s flash on Lexar digital film. ~ Moose
About Moose:
 Moose is a professional wildlife photographer, and
obviously a fine fly tyer, who lives in Mammoth Lakes,
CA. He has an extensive website to furnish wildlife
photographers with information to make the most of
their photographic pursuits. You will
find it at: www.moose395.net/
Moose is a professional wildlife photographer, and
obviously a fine fly tyer, who lives in Mammoth Lakes,
CA. He has an extensive website to furnish wildlife
photographers with information to make the most of
their photographic pursuits. You will
find it at: www.moose395.net/