Fly Of The Week

Previous Flies
Fly Tying Terms

R.A.G. Fly
By Terry Hayden, Victoria, Australia

If it wasn't for Rich Lewis and his connection to friend Terry Hayden, we may not have found this unique fly. Rich talked Terry into sending it.

The R.A.G. Fly (Rough As Guts) is a pattern that is very simple to make and the most effective bait fish fly that I have used. It is a distortion of a fly called the "Shaggy Dog," which was developed by Peter Coulson in Melbourne and so far, I have caught 27 species on this version, including Queenfish, Barramundi, Longtail Tuna, Coral Trout, Mangrove Jack, Golden Trevally and GT's.

It works whilst sinking as well as when being stripped due to the fact that the fibres pulse as the fly sinks. It is best used with a fast sinking line, which enables it to be fished at any chosen depth.

I make the fly on 2/0 & 4/0 "34007" Mustad hooks mainly, but there is no reason that it cannot be made bigger or smaller.

Materials: R.A.G. Fly

    Hook: 2/0 & 4/0 "34007" Mustad shown.

    Tail, body and wing: White Tiewell "Belly Shine" US version use Angel Hair.

    Eyes: Stick on.

Tying Instructions: R.A.G.

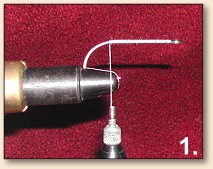
    1. Bind some thread the length of the shank of the hook to the bend.

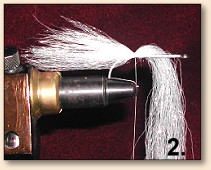
    2. Select a full length of White Tiewell "Belly Shine" the required thickness to make the fly. I make them almost exclusively in white but have used gold and green quite successfully.

    Stagger the end of the material by laying it on the bench and pulling the ends, so that it is no longer square. Place it on the bend to the required tail length and wind the thread around the hook three times loosely and then pull tight allowing the material to settle around the hook.

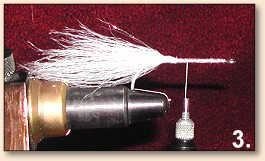
    3. Bind in and cut off the "Bellyshine". Whip finish at this stage. Wind the thread forward a third of the way along the shank.

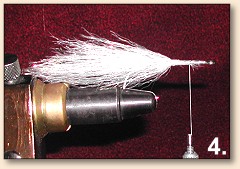
    4. Reverse the "Bellyshine" so that you have the other staggered end of the material and repeat the above process ensuring that the material is shorter than the previous lay and all the way around the hook. Bind in and whip finish again.

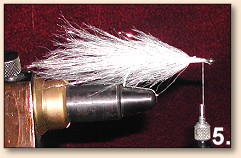
    5. Move along the hook again and repeat process.

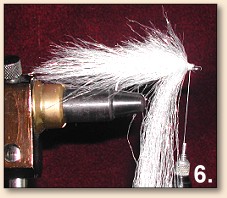
    6. Wind the thread to the eye of the hook and this time tie the material on the top of the hook at the required length. Separate the material and pull it under the eye and tie off.

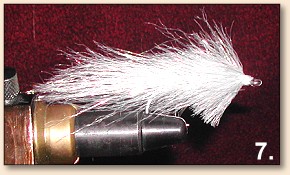
    7. Cut material off and finish the binding and then cut the thread.

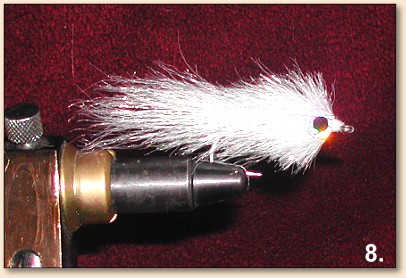
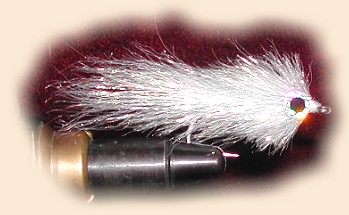
    8. Trim the fly to shape with a pair of scissors. Fit flat stick on eyes. Epoxy over the eyes with a couple of layers of epoxy.

NOTE: It is important to lay three sections of fibre along the hook to maintain the shape. If you only do 2 sections, then the fly will look very sparse in the center.

If you are not happy with a plain white fly, then purchase a permanent Texta (permanent markers) in green, black, blue and red and you will be able to change the fly to suit fishing conditions, but I have found that it is unnecessary to use them 99% of the time. ~ Terry Hayden

About Terry:

Terry is a man of many talents, with a great enthusiam for fishing, both fresh and saltwater. He is the owner (and only employee) of Hayden Fly Reels. Check out his website at: www.flyreels.com.au ~ dlb


For more great flies, check out: Beginning Fly Tying, Intermediate Fly Tying and Advanced Fly Tying.