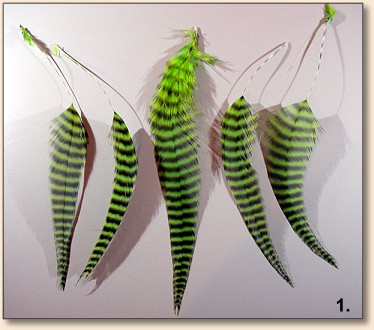
Step One. Select three (3) each left curving and
three (3) each right curving grizzly hackles
from your patch. Strip the excess barbs and
fuzz from the stems. Trim the stems and leave
at least an inch of stem to lash down to the
hook.

Step One (1A) Stack the matched hackle sets
together and make two wings. Next, place the
two matched wings together with both cupped
sides of the hackle sets facing inwards. This
produces a full hackle wing that will be self
supporting.
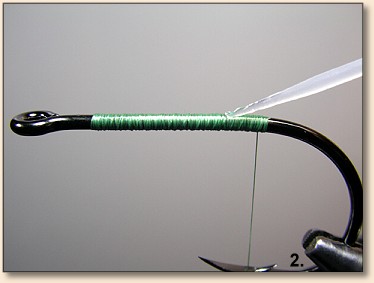
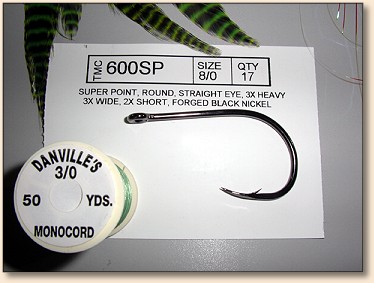
Step Two (2) Start the green Monocord thread
and advance it to just ahead of the hook bend.
Build a solid thread base on the hook shank.
Leave the thread at the hook bend. Wet the
thread base liberally with cyanoacrylate adhesive
(CA) and allow the CA to dry.
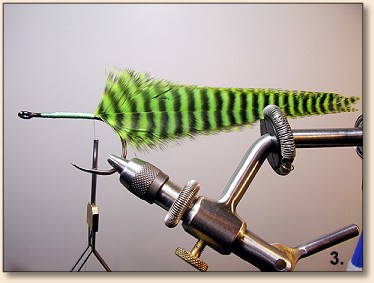
Step Three (3) Locate the wing on top of the
hook shaft and secure with several courses of
thread. Add a light coating of CA to the thread
wraps. Secure the tips of the hackles in a vise
mounted spring clamp as shown above.
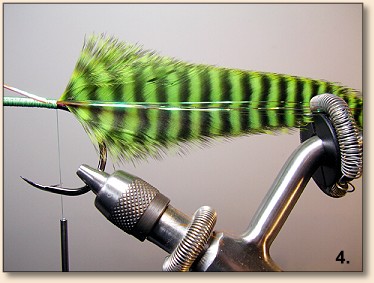
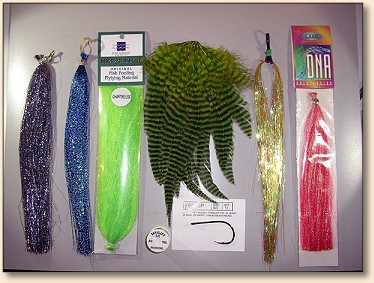
Step Four (4) Secure four(4) or more full-length
Mirror Flash strands immediately in front of the
hackles and secure the tips of the strands in the
spring clamp. Fold the forward facing half of the
Mirror flash bunch rearwards and then bind them
down with the Monocord. Roll the fly over and
add matching flash strands on the opposite side.
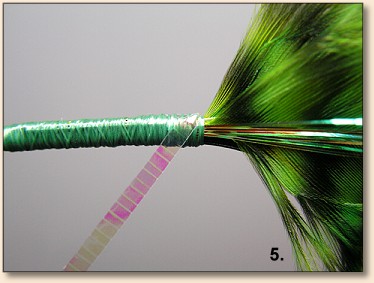
Step Five (5) Start a single strand of the Pearl
Lateral Line at the base of the wing.
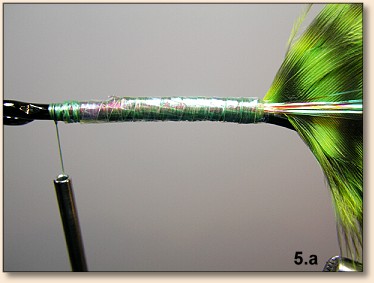
Step 5A Wind the Lateral Line stand forward
and secure with a few thread wraps and a hitch
or two.
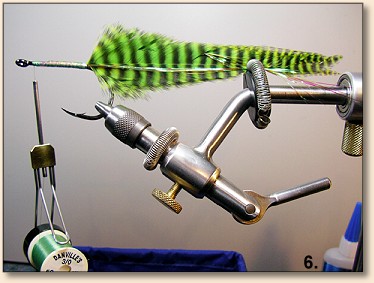
Step Six (6) Coat the lateral Line wraps with
UV Knot sense, or your favorite alternative
coating, such as epoxy, and insure that this
coating is fully cured. At this point you've
got a vise full of fly!
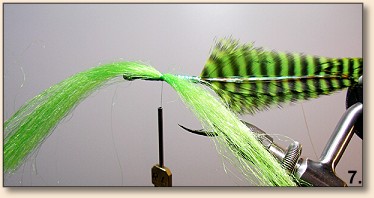
Step Seven (7) Build the fly's collar by
tying-in a good sized bunch of "Mirror Image"
fiber on the side of the fly about half way
in between the wing and the eye of the hook.

Step 7A Add a matching bunch of "Mirror Image"
collar material to the opposite side of the Deceiver.
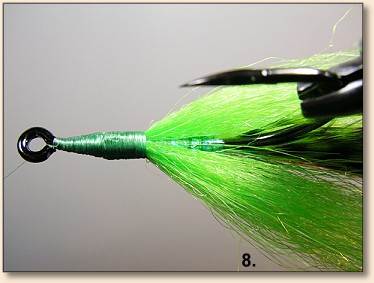
Step Eight (8) Fold the "Mirror Image" bunches
rearwards and back along the sides of the fly.
Build a tapered thread head forward towards the
hook eye.
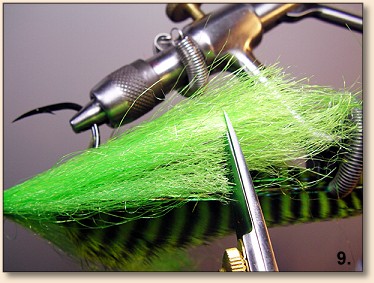
Step Nine (9) Trim the collars so that they
are extending well past the hook. This gives
the fly a full baitfish profile.
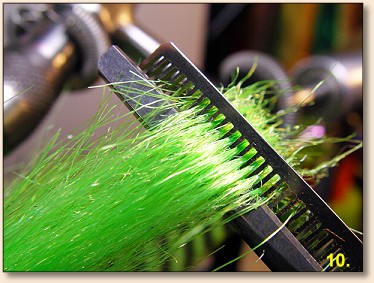
Step Ten (10) Blend the collars into the wings
using tapering scissors. This important step
shapes the fly into a baitfish shape.
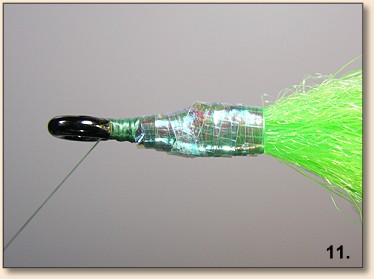
Step Eleven (11) Add a layer of the pearl lateral
line over the head and secure with thread at the
hook eye.
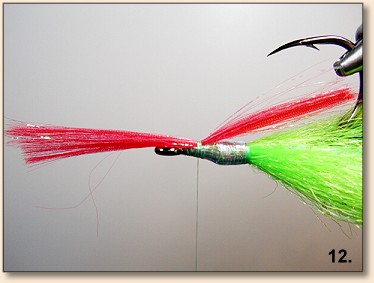
Step Twelve (12) Add a medium sized bunch of red
"Holo-Fusion," as shown above, to the underside
of the head. This particular hook has a wide gap
and will accept a large full beard. This bright
"full beard" adds bulk to the fly's profile and
suggests bleeding gills. Fold over the forward
facing "Holo-Fusion" fibers and bind the beard
down. Blend the wraps forward into the tapered
head of the fly.
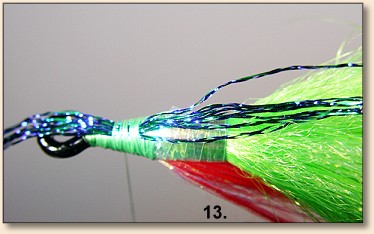
Step Thirteen (13) Create the Overwing by adding
six (6) strands of Blue-Green "Reflections" as
shown. Fold-back the forward facing strands and
bind them down. Tie-off and trim the thread.
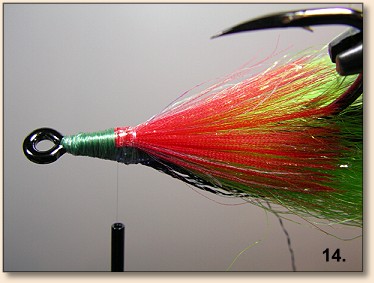
Step Fourteen (14) Switch-over to the clear
nylon tying thread. Rotate the fly in the vise
and splay-out the beard using your thumb. Secure
the beard with the clear thread. Turn the fly
over again and add three strands of Graphite
"Sparkleflash" fibers. Double those back along
the top of the Overwing and secure it with the
clear nylon thread. Add a few drops of CA to the
thread and allow the adhesive to wick into head;
yet avoid wicking CA into the body of the fly.
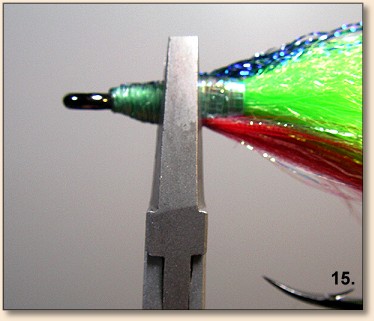
Step Fifteen (15) Flatten the head of the fly
using the smooth faced flat nosed pliers.
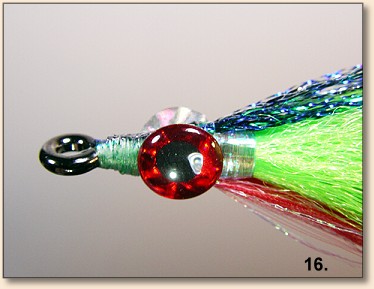
Step Sixteen (16) Place the adhesive backed 3D
dome eyes on the sides of the flattened head.
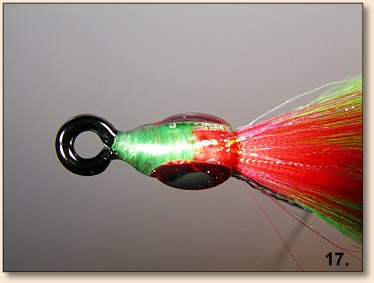
Step Seventeen (17) Add UV Knot Sense or other
your coating of choice, such as five minute epoxy,
on the top of the head. Prevent the head from
becoming too fat and out of proportion by applying
the coating between the 3D dome eyes only. Avoid
applying the liquid coating over the eyes themselves.
Cure the coating on the upper side of the fly head.
Next, rotate the fly 180 degrees and fill the space
between the eyes on the underside of the fly's head
(shown above). Cure the liquid coating fully.

Step Eighteen (18) Apply a thin uniform coating
of Sally Hanson's Hard As Nails acrylic nail polish
over the entire fly head and both eyes. Carefully
coat the exposed pearl lateral line wraps right
behind the eye as well. Allow coating to dry.
Apply second coat to head.

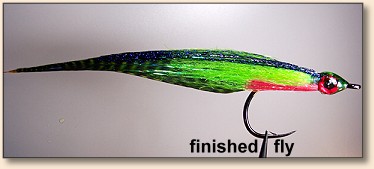
Completed Fly: This size 8/0 Deluxe Mako Deceiver
is a formidable fly.