
 |
|
Waker Wulff (Hair Hackle)
|
|
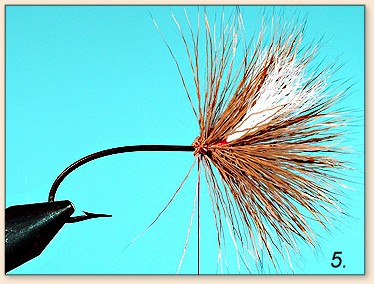
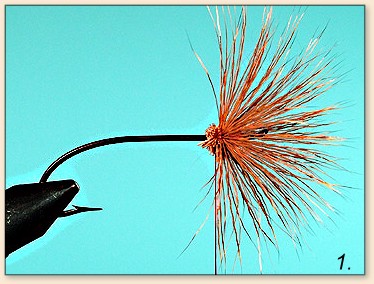 Step 1: Mount the hook in the vise and place several thread wraps directly behind the eye to lock the loop to the shank. Select, clean, and stack a clump of deer hair. Place the clump on the hook (tips forward) and anchor it with three snug but not tight thread wraps. Trim the butt end of the hair bundle then spin the hair around the shank.
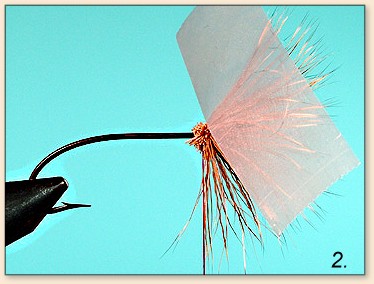 Step 2: This step is critical to constructing this fly with a minimum of frustration. Take a strip of scotch tape about two-inches long and stick it to your pant leg. Remove it from the pant leg and place it over the bundle of hair from Step one. It separates the deer hair from the calf tail used in the next step. The reason you stick the tape to your pants before putting it on the hook is to remove most of the tackiness. If you don't do that you will end up tearing a good portion of the hair clump from the hook when you remove the tape.
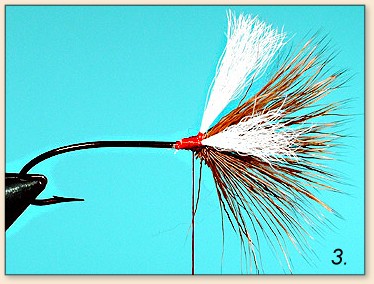 Step 3: Select a clump of calf tail hair and remove the under fur/short fibers. Even the tips in a stacker then tie them on the hook directly behind the hair placed in Step 1. Trim the waste end then wrap over them with the thread. Divide the calf hair into two bundles then crisscross wrap between them. Wind a couple of thread turns around each bundle to set the wings in position. Remove the tape placed in the last Step (2).
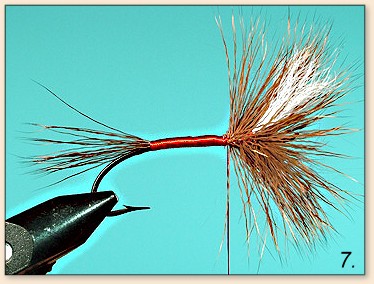
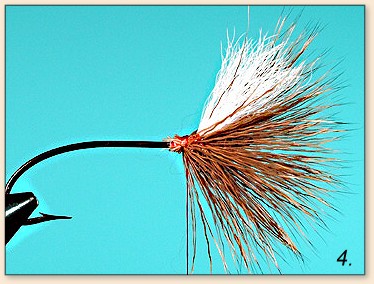 Step 4 & 4A: Select, clean, and stack a clump of hair about half as big as the one placed in Step 1. Tie it on the under side of the hook with enough thread tension to flare it in place and trim any waste ends.  Notice the clump is positioned in the center (4A) of the thread-covered area behind the wings.
 Step 5: Repeat the process from the previous Step but this time tie the clump of hair on top of the hook. Notice the hair slipped back (5A) a bit from the one placed in Step four. 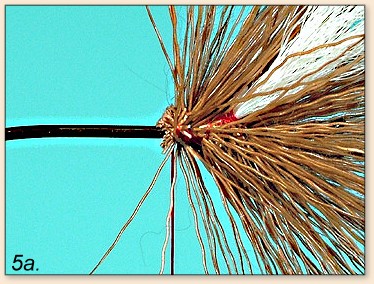 Don't worry about it; when we bind the tail into position it will push those fibers into place.
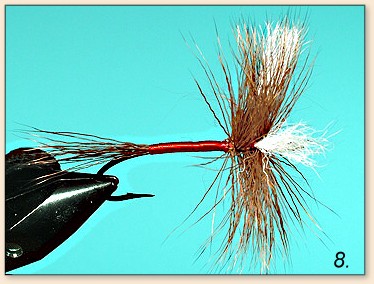
 Step 6: Select a clump of moose hair and clean out the under fur then even the tips in a hair stacker. Measure the stacked hair clump so it is equal to one and one-half times the length of hook shank. Trim off the remainder. Set the trimmed ends tight against the deer hair butts remaining from the previous step and bind them to the hook with several very tight wraps. Now start wrapping toward the end of the shank with snug (not real tight) wraps. About every eight turns spin the bobbin to remove the twists in the floss and hand turn the bobbin when you need more slack. Do not pull on the bobbin to gain the slack. Look carefully, Al purposely pulled on the bobbin one time while constructing the body. Can you see where he did it? When you reach the end of the shank start wrapping back to meet the hackle.
 Step 7: When you reach the hackle, be sure to cover wrap the trimmed deer hair ends if you have not already done so. At this point you have a decision; you can work the thread through the hackle/wing assembly or you can whip-finish and reattach it in front of the first hair application. On the illustrated fly, Al tied off the thread and reattached near the hook eye.
 Step 8: Stroke the hair fibers back so they stand up straight then wrap a thread damn tight against the hair to force the fibers to remain upright. Whip-finish the thread and trim it from the hook.
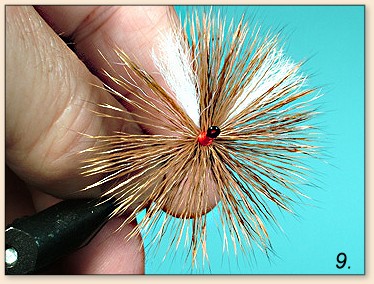 Step 9: We like to tip the fly up and place several applications of glue around the base of the hackle.
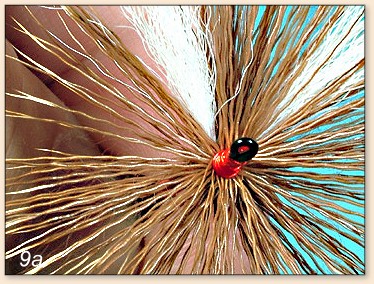 You may as well glue the head (9A) during this process as well. We keep the glue we use on hair hackle flies thinned to the consistency of water so it will flow through out the complete hair assembly.
|
|
|
|
|