
 |
|
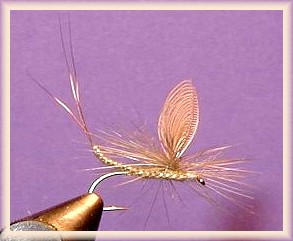
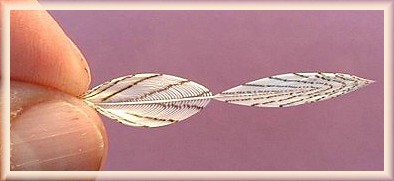
Wally Wing
|
|
3. Keep the feather wet while doing the final grooming before
mounting to the hook shank. When brushing the feather's barbs
back against its stalk be careful to have them all stacked side
by side in their natural sequence against stalk. Looks like one
end of a little canoe in your fingers.
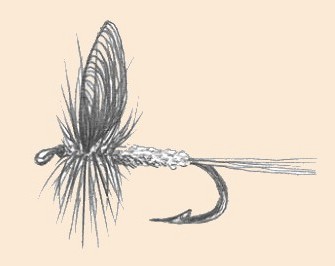
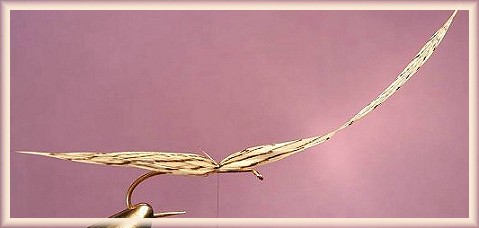
 4. Now mount the feather to the top to the hook shank and clip off feather's butt for a gentle slope to ward the flies' tail. Important where we mount the wing on the shank, if it's mounted too far forward the wing will imbalance the fly and it will land nose down. Mount the wing back from the eye at a point about the one third of the shank length.
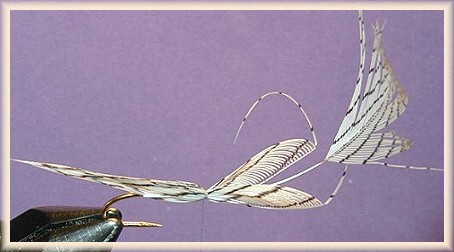
 5. Take a bottom barb in your fingers from the "V" at the tip of the mounted feather. Any side to start with. Gently pull down along the stalk toward the butt of the feather. Peel the barbs off the stalk right down to the tying thread. Repeat for the other wing on your side of the fly.
|
|
6. Cut off the excess feather barbs that point out toward the
bend behind the wing. Clipping out the husk of the remaining
centre stalk depends on the size of feather I'm using. Some
birds have a thicker feather stalk than others and these are
good to pull back between the wings and secure there. This
aids in separating the wing when standing. When tying a smaller
fly, say under a 16, the feather selected has a very small
diameter stalk and doesn't really aid in separating the wing
in this case. A figure 8 thru the wing with tying thread when
I'm making a spent wing or going to use a Water Walker style
of hackle works well to separate the wings.
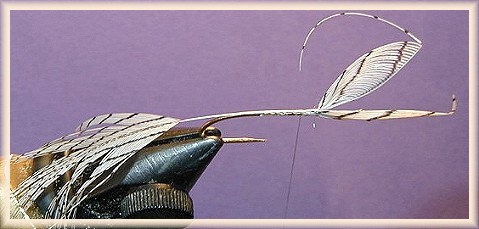 7. Clip off the barbs that are sticking out on the top of your wings. Or if the wings are too tall, clip off the top few barbs of the wing to bring it down to the right proportions, (hook shank length). Pull out extra barbs after adjusting wing size. For a better-balanced fly separate the wings further with the aid of finger pressure between them. 8. Stand up the wings together and secure in that position with a couple of loops of thread around the base.
 9. Over the years I found that if I use a very small drop of "Crazy Glue" at the base or the tye-in point and allow the glue ever so slightly to seep up into the wing base and dry. I can then separate the wing by merely pushing it apart with a bodkin at first and then if needed my finger. The glue dries very quickly and adds strength and a little stiffness to the wing at its weakest point. The end point or tips of individual feather barbs on small feathers can be very frail, and these ends at the tye-in point are most likely to be the first to break after a fish strikes. The glue gives us a fish or two more life in the fly. The glue also helps provide a wing post that I can tye parachutes onto without using a gallows tool and without using excessive thread wraps.
10. Now for the rest of your dressing (start with the tail), and those wings are great posts for parachute style hackling. ~ Wally Lutz
|
|
|