
 |
|
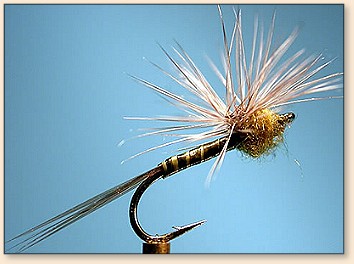
Biot Hackle Stacker
|
|
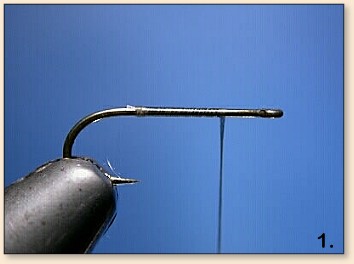 1. Once again a good thread base is a must.
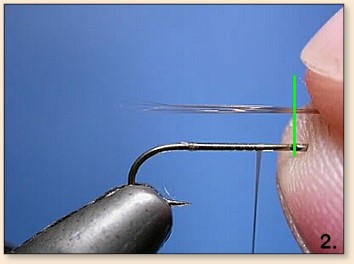 2. Tail fibers are the length of the hook shank...in general. I am using Micro Fibetts here for tails.
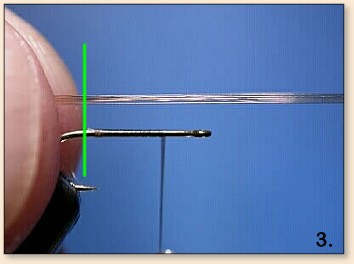 3. The length of material pinched between my left thumb and index finger is the proper tail length. The line is at the same point as in the prior step (2) I have just switched finger grips, right to left.
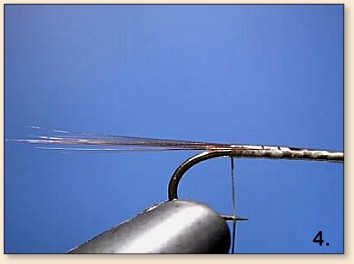 4. Tie in fibers directly on top of the hook shank. Wrap a smooth "under body" of thread.
 5. The biot is tied in tip first. The further up the biot you tie in the wider the segmentations will be at the start of the body wraps. Trim the tip here and cover with thread.
 6. This biot is tied in with the concave side tied in facing away from the tier. It will wrap with a smooth surface.
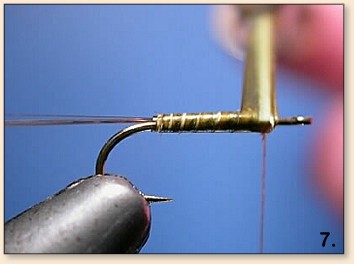 7. Wrap the biot forward in overlapping wraps to the thorax area.
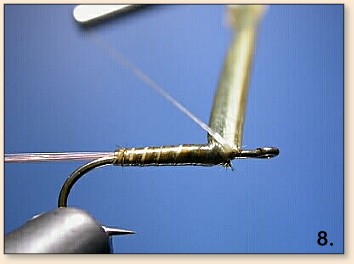 8. Tie off the biot at the thorax with several tight wraps as shown,wrapping the biot from right to left, over the cut to be cut. Trim the butt end of the biot and cover with thread.
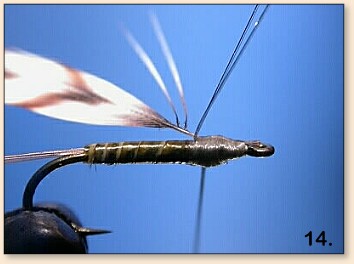
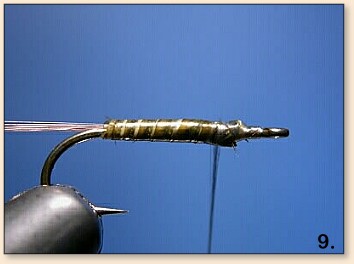 9. Completed biot body.
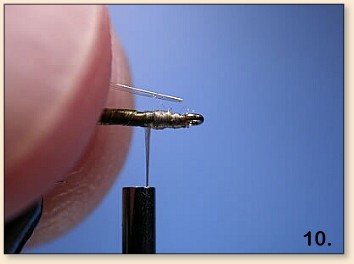 10. Here are the tag ends of a 3 inch loop made of 7x tippet material. Tye these in well and add a drop of cement to the tie in area.
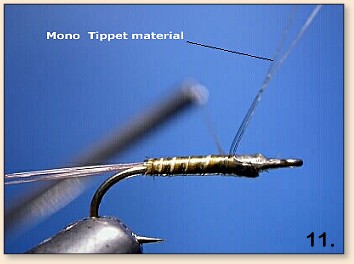 11. Note the size of the thorax approximately a third of the body. Place one or two wraps of thread behind the Mono to prop it up a bit.
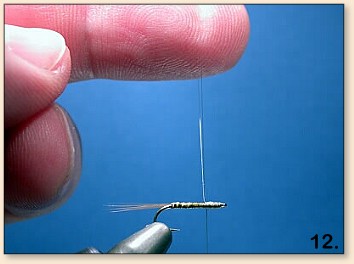 12. The completed mono loop. Try and make it short. Note the position of my left index finger, it's within the loop and maintaining a constant pressure upward. This creates a vertical post, if you will, for the hackle to be wrapped around. Until the hackle is tied off, you must maintain this venticle pressure, otherwise the parachute will collapse. The hackle will be handed from your right hand to your left so a short loop here makes that task a bit easier.
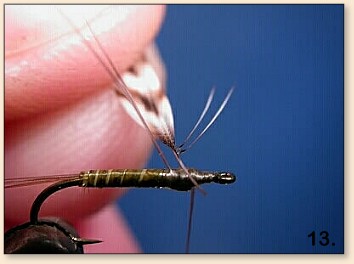 13. Tie in a saddle hackle as you would for a parachute style hackle. The Mono is the post this time. Tie in the hackle on the "away" side of the Mono. We will wrap the hackle counterclockwise, right to left.
 14. Note the hackle is on the backside of the Mono.
 15. Attach a hackle pier of sorts. This will give you something to "palm" as you transfer and wrap the hackle around the Mono post. One can wrap the hackle by transferring the hackle, fingers to fingers, but of you miss a transfer the hackle will unwind. With the added weight of the pliers a missed transfer does not mean the whole parachute wrap comes undone, the piers will just drop, holding the previous wraps in place.
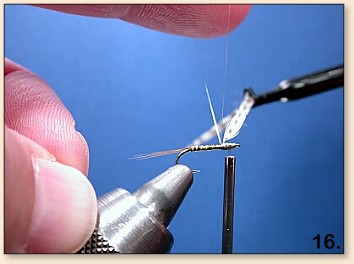 16. Begin the parachute with wraps going up the mono post. At this point above, grab the pliers with your right hand and continue the wrap around the base heading up the post.
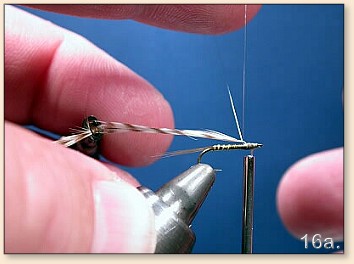 16a. The transfer is from the right hand to the left. You can "grab" the hackle pliers by squeezing it between your fingers and palm.
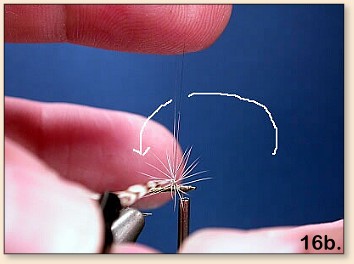 16b. Keeping tension on the hackle, I am retrieving the pliers with my right hand bring the hackle around once again from right to left. Note the position of the thread; directly in front of the "post."
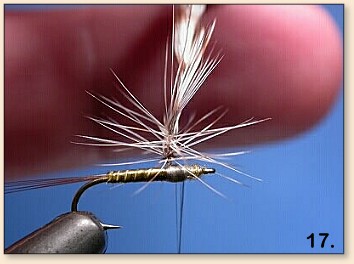 17. Advance up the post the same distance as the thorax area is wide. Then wrap the hackle back down the post.
 18. The hackle is wrapped back down and ends up next to and in front of the post for tye off. Note the tension on the hook.
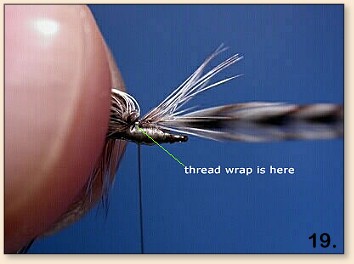 19. Stroke all the fibers and the post back from the tie off area with your left thumb and index finger as as shown. Tye off the hackle at the post (Mono).
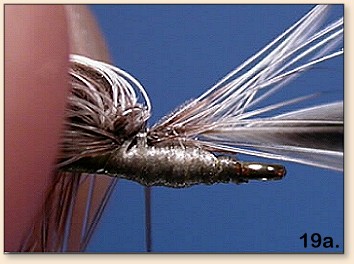 19a. Close up the first wrap of the tie off.
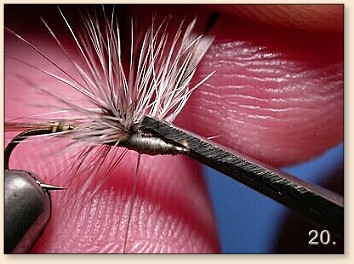 20. Trim as close as possible and cover the cut end with thread.
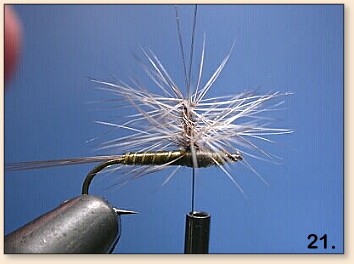 21. Completed stacked hackle. We can now apply some dubbing to create a thorax "ball."
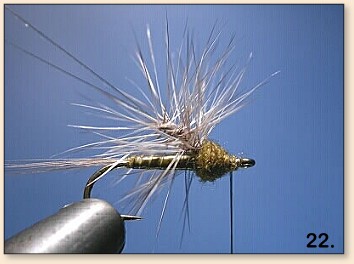 22. The thorax "ball" is in place with a bit of room at the eye for a tye off. Use very fine dubbing and make the "ball" very tight.
 23. Again, sweep the hackle back and pull the Mono post forward over the tye in area behind the eye.
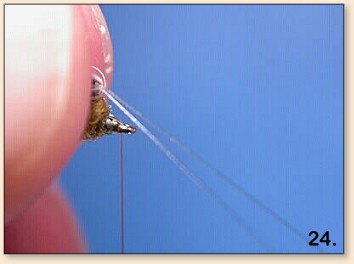 24. A "pinch" capture would be one way to bind in the mono. If you're lucky you can capture the mono with a thread wrap. Once you have bound down the mono, pull the loop to your right to tighten the hackle on top of the thorax ball.
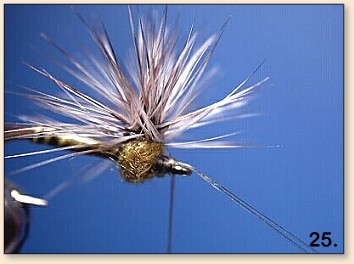 25. Keep the pressure firm on the mono loop while tying it off. You should fold the mono back and wrap over the fold for added strength. Trim,whip and cement and you're done.
 26. A Hackle Stacker with a biot body. ~ HM (bones)
|
|
|