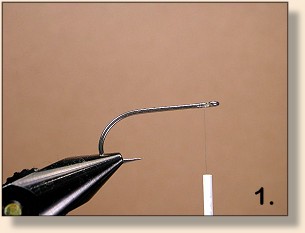
Fly Of The Week
Spread Fly
Previous Flies
Fly Tying Terms

Spread Fly
Flies and Photos by Al Campbell, Field Editor FAOL

In my opinion, Bob Popovics is one of the best saltwater fly tiers and fly designers of all time. His flies have ruined the day for many saltwater fish, especially stripers. A few of his saltwater designs have also ruined the day for a few freshwater fish. I guess some things remain constant when they concern fishing and the predator/prey concept.

One idea or method of tying Bob shows in his book Pop Fleyes, is a way to squish flat the head of an epoxy fly to give the body depth like a real minnow or fish might have. I call this an idea or method rather than a pattern, because the method can be used on many patterns to create the same effect.

If you fish for predatory saltwater fish, you need to learn this method of tying. If you fish for predatory freshwater fish, you also need to learn this method of tying. A lot of baitfish have a deep profile, and this is the best and easiest method I have seen to create that look.

Another concept I gained from reading Bob's book is the importance of eyes on baitfish patterns. In fact, the name of the book Pop Fleyes is designed to point out the importance of eyes on baitfish patterns. He could have called it Pop Flies, but that wouldn't have made the point as well as his creative name does.

For those of you who like fishing for pike and bass who feed on small crappies and bluegills, this is the fly tying method you have been waiting for. You saltwater guys should already be using this method, but just in case you missed it, here's your chance. You don't want to pass up this opportunity to increase your catch count.

This pattern is called a Spread Fly, but like I said before, it's more of a style or method of tying than a pattern. Like many of the great patterns, a change of materials and colors will produce a different fly, but the tying steps remain the same. As a bonus, this is an easy method to learn. Who could complain about a thing like that?

*Tying Note - Before you mix your epoxy, you'll need a small cup of Kodak Photo-Flo solution to wet your fingers with. Although this solution can be thinned with water, I found a straight-from-the-bottle solution to work best. The purpose of Photo-Flo in fly tying is to wet the fingers so the epoxy won't stick to them.

Materials: Spread Fly

  • Hook:  Standard length stainless; or for freshwater, Mustad 3366.

  • Thread:  Fine monofilament.

  • Body:  Super Hair, Ultra Hair or any of the other fairly stiff synthetic hairs on the market.

  • Head:  Devcon 5-minute epoxy.

  • Eyes:   Holographic or prismatic stick-on.

  • Non-stick solution:  Kodak Photo-Flo (available in photo shops).

Tying Steps:

1. Start the thread, keeping it at the front of the hook near the eye.

2. Attach a small bunch of synthetic hair to the hook right behind the hook eye. Trim any loose or long fibers as you tie.

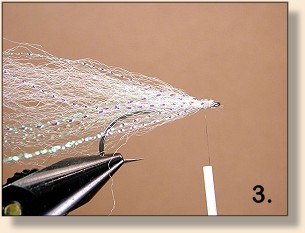
3. Add a few strands of crystal flash or holographic flash.

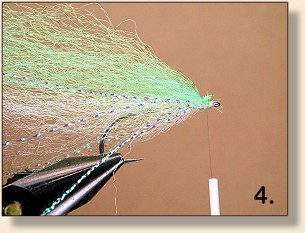
4. Add a second (darker) color of synthetic hair as desired.

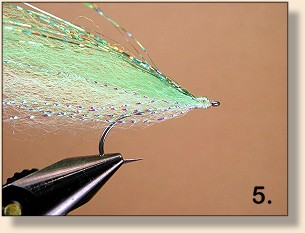
5. Here I added some dark green holographic flash to the back. Trim any loose strands of hair near the eye of the hook and build a nice head. Then, whip finish and trim the thread.

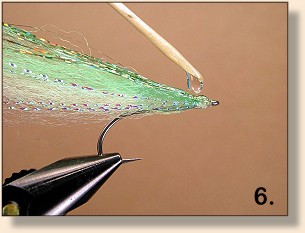
6. Mix up some 5-minute epoxy being careful to keep both parts of the mix even so it will set properly. A Post-It sheet works well for this purpose. Apply the epoxy to just the head part of the fly (as shown), working it thoroughly into the hair.

7. When the epoxy starts to get slightly stiff (begins to set), wet your fingers with the Photo-Flo solution and squeeze the fly head firmly. Be careful to keep the hair to the top of the hook so you don't close off the hook gap. You can set the depth of the fly body by adjusting the hair and how tight you squeeze.

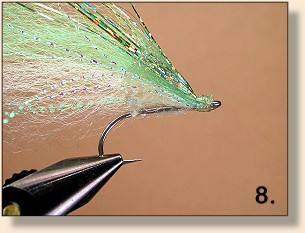
8. Keep squeezing the head until the epoxy gets stiff enough to hold its shape. Your fly should now look something like this.

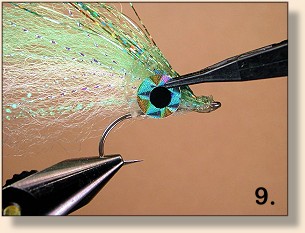
9. Select a pair of prismatic eyes that will fit the head of the fly. I prefer slightly over-sized eyes for most patterns.

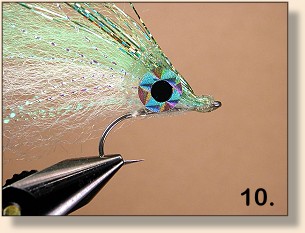
10. Stick the eyes to the sides of the epoxy head.

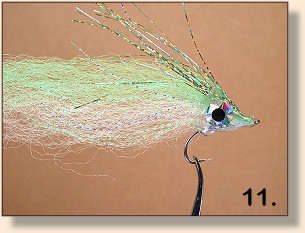
11. Apply a second (thin) coat of epoxy over the eyes and head. Rotate the fly until the epoxy sets to prevent sagging like the sag you see forming here.

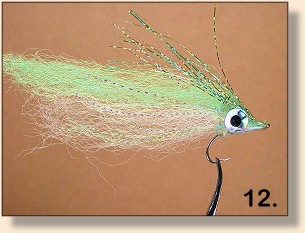
12. Once the epoxy sets and is tack-free, you can trim the body.

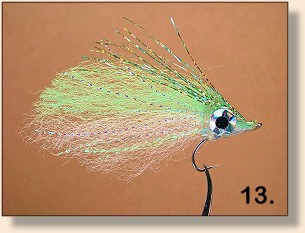
13. Use your scissors to trim the fly to the length and shape desired.

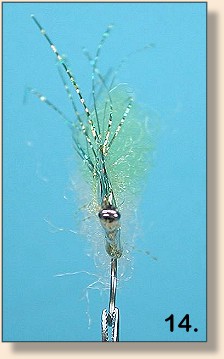
14. From the front your fly should look thin.

You can use this method of tying with any number of materials to achieve the desired colors and profiles in your flies. Experiment a little to find the perfect pattern for the waters you fish. You might find this method works well for more species than just saltwater fish. ~ Al Campbell

For more great flies, check out: Beginning Fly Tying, Intermediate Fly Tying and Advanced Fly Tying.