
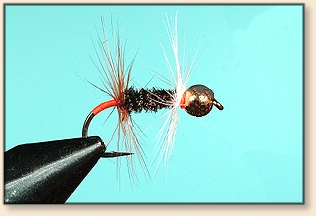
 |
|
The Renegade (Bead Head)
|
|
 Step 1: Slip a bead over the point/bend, slide it forward, and place the hook in the vise. Pinch the barb before doing this if you plan on releasing your fish. It's better to accidentally break the hook now before investing the time tying the fly rather than after. Apply a short thread base that begins at the end of the shank, travels down into the bend, and returns to the starting position. Notice how we reposition the vise so we have easier access wrapping into the hook bend. Also, because we endure the discomfort of arthritis, we find it easier on our shoulders to rotate the vise so we don't have to lift our arm to advance the thread down into the hook bend.
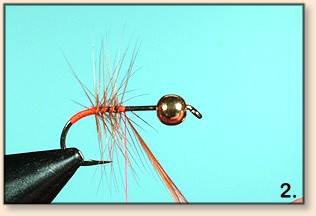 Step 2: Prepare a brown hen feather, tie it on, and wrap several turns to form a rear collar. In truth we've found the hook point can be a pain in...(you choose the body part). Therefore to make this step easier, we wrap the thread forward about three turns then advance the feather forward to meet it. Anchor the hackle with one thread turn.
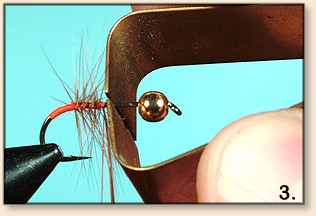 Step 3: Use your fingers or a hair-packing tool to push the feather turns tight together at the back of the hook.
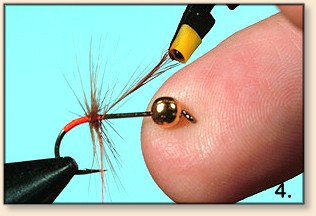 Step 4 & 4A: Wrap the feather an additional half turn, anchor it with a couple of thread wraps, and trim off the waste end. Wrap the thread forward to meet the bead (4A).
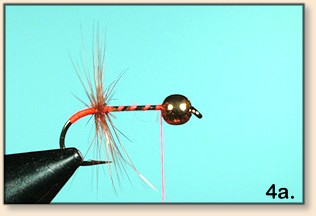 The purpose of the additional feather wrap is to tighten the hackle turns after pushing them together at the back of the shank.
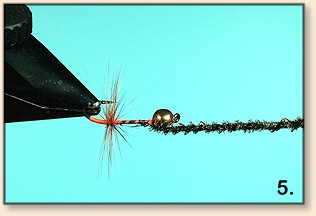 Step 5: Select several peacock herl strands, bind them to the front of the hook by their tips, and trim off the waste ends. Pull the herl and the thread forward and hold them there while rotating the vise forming peacock chenille.
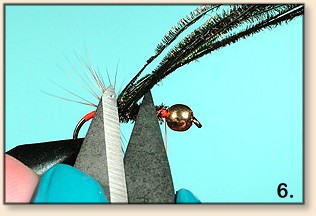 Step 6: Bring the chenille perpendicular with the hook shank and wrap it back to meet the brown hackle, tie it off, and wind the thread forward to the bead. Trim the waste ends of herl at the back of the hook. Be careful when trimming the herl to leave the brown hackle intact. Note: With a little practice Steps 5 & 6 are completed without ever stopping the vise rotation.
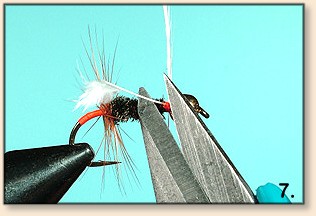 Step 7: Prepare a white hackle feather by stripping off the fuzzy material at the base of the stem. Tie it to the hook (tip forward) with several thread turns behind the feather. Make sure the last turn, though is in front of the feather. Trim off the waste end of the stem.
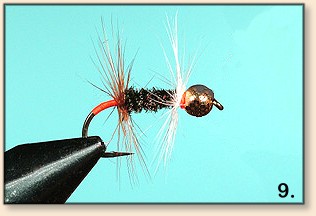
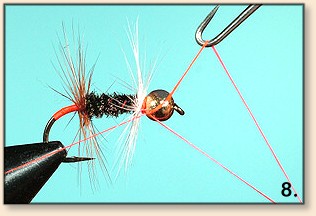 Step 8: Wrap the first two turns of feather BEHIND each other, the third BETWEEN the first two, and the last in FRONT ending tight against the bead. Tie off the feather, trim the waste end, whip-finish, and clip the thread from the hook. We like to complete the fly with a coating of Aqua Tuff or Aqua Flex. A coat of the same on the tag will certainly improve the fly's durability as well. A trick Gary LaFontaine shared with us was to place the glue on top of the bead head and use the thread in the whip-finish to drag the glue off the bead into the completed wraps.
|
Additional Patterns:Author's Note: This is the first piece we've written in more years than we can remember that we never used the "word count" feature even once. Wow! What freedom! ~ Gretchen and Al |
|
|