
 |
|
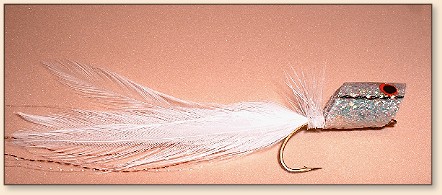
Topwater Shad
|
|
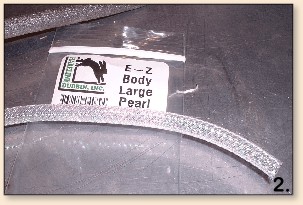
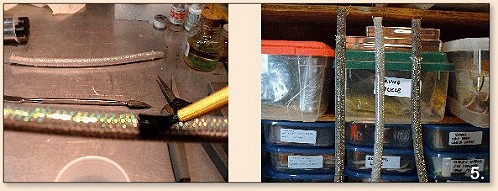
 You'll also need some 'body braid' or 'easy body braid' or 'flexi cord light' or some other braided material that will slide over the backer rod. It comes in loads of colors. I prefer either the pearl or the pearl with black lateral line. I use Easy Body Braid in the 'large' size for the 3/8 inch backer rod.
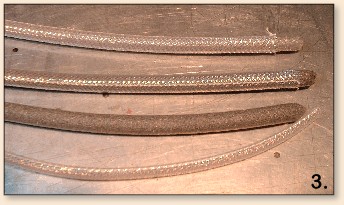
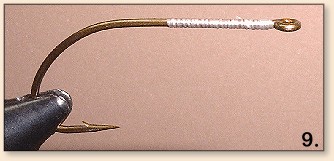
 You can create some very nice bodies with just these two materials. If you want something with more sparkle or lighter or different color, you will also need some cloth ribbon in the color/finish of your choice. You need a 'cloth' ribbon, NOT a satin or plastic one. 'Sheer' ribbons seem to work best. It's important that the epoxy 'soak' and penetrate through the ribbon to the backer rod, otherwise the body will come apart on you. The braid is attached to the backer rod with epoxy glue. You need a slow cure epoxy, NOT the quick set 5 minute type. I use Devcon '2-Ton' epoxy because it's readily available just about everywhere, dries clear, and holds up well to water. A few disposable brushes are also helpful. If you want to add the ribbon, you'll need some spray adhesive. Cut a few pieces of backer rod. 8 to 12 inches are good easy to manage pieces. Cut some of the body braid to the same length. Once it expands to fit the rod, it will be a couple of inches shorter, and that's what you want. The ribbon goes on first if you are going to use it. First, figure out how much ribbon you will need by spiral wrapping it onto the backer rod piece, leaving the first inch of the rod uncovered. Cut the ribbon and lay it on a disposable surface (butcher paper, wax paper, old box, something you won't care if you get spray adhesive on). Spray the ribbon with the adhesive. Follow the directions for a 'temporary' bond (The stuff I use says to spray and let it dry first, then apply). Wrap the ribbon around the backer rod, leaving the first inch uncovered. You want the ribbon smooth, but a bit of overlap is okay, just avoid any folds, wrinkles, or gaps. If the bond seems a bit feeble, put a piece of masking tape around the ribbon at each end to hold it there until you get the braid in place. Now, work the braid over the backer rod. Just inch it on a bit at a time until it's all on the rod. Pull it tight and smooth over the surface of the backer rod. Make sure to leave at least an inch uncovered at one end, and a finger's grip uncovered at the other.
|
|
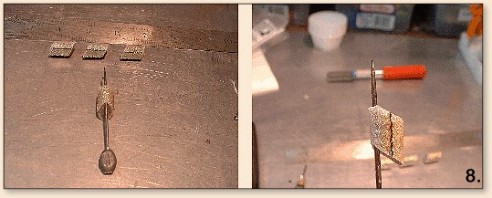
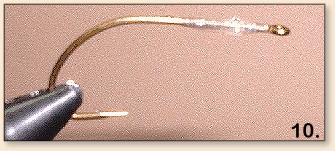
 I place an unbent paper clip through each end of the piece at this point, and use these to suspend the covered rod between two vices to make applying the epoxy easier. You can just hold the end, which works fine and is what I did before I figured out the two vice trick. You'll still need one paper clip through the uncovered end so that you can hang the piece to cure once you are done.
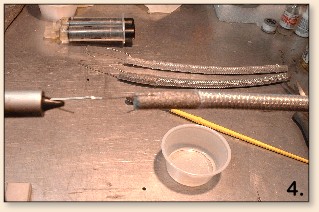 Mix some of the epoxy. Use a disposable brush to apply it liberally to the outside of the braid. You need the epoxy to penetrate through the braid to the backer rod (it should also soak through and penetrate the ribbon if you used it). You will 'see' this happening, as the braid will become translucent and glittery, and the ribbon will change and look 'wet'. Once you've gotten to this point over the whole piece, make some long strokes with the brush to remove any excess epoxy, then hang the rod from the paper clip to cure. This should take overnight.
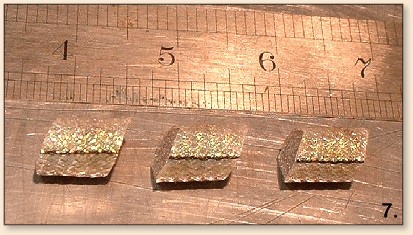
 After the piece has cured, it's time to cut the bodies. You can cut them to any size, depending on the hook used. I'm using a Mustad 3366 size 2 (Tiemco 8089 size 10), and for this hook size a body that's 3/4 of an inch fits well. You want to leave enough shank exposed at the rear to tie on the tail.
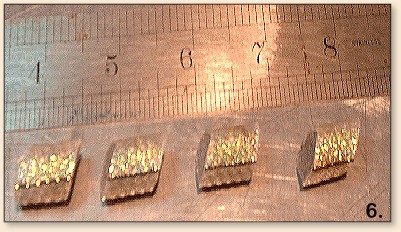 Cut the bodies with a sharp pair of scissors or a razor blade. Cut at an angle. An angled face gives the proper 'spitting' action, and is also easier to lift of the water. A 10 inch piece of covered rod gives about 12 bodies. I've found it's way more efficient to do these in bunches. The next steps should be completed on each body/hook you want to make before going to the next step. Lay out the bodies you've made and decide which end you want for the face. On the other end, trim just a bit off the point of the angle, what would be the 'bottom' of the back end of the body. This gives you some extra clearance for the tail, and gives reference for where the hook goes.
 Use a large needle and insert it through the body from the bottom of the face and out the center of the bottom of the rear end. You want to place the needle between the braided outside and the foam core. This is where the hook shank will go.
|
|
Place the hook into the vice and wrap a thread
base from just behind the eye to where the body
will end. You can use size 'A' rod building
thread for this, but floss will work, as will
plain old sewing thread. Avoid using waxed
thread. We want the glue to penetrate the
thread all the way to the hook shank.
 Mix some more of the epoxy and apply it to the thread on the hook shank. Cover all the thread with glue. Slide the body on from the hook eye to the end of the thread. Rotate the body at least one full turn to distribute the epoxy evenly. There should be a little bit of 'squeeze out' epoxy where the hook comes out of the rear of the body, remove this with a paper towel. Remove the body from the vice, check to be sure the hook is centered properly, and hang from the hook bend to cure. Again, this should take overnight.
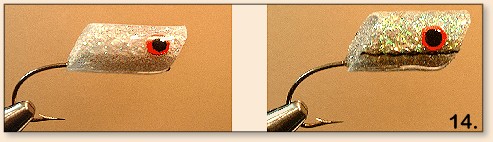
 After the bodies have cured, it's time to decide if you want to 'paint' or 'color' the bodies. You can airbrush them, use a paint brush, or use markers, as you see fit. 'Plain' works fine, up to you. Don't do the eyes yet. The bodies are still a bit 'rough' and we'll add the eyes once the final finish has cured.
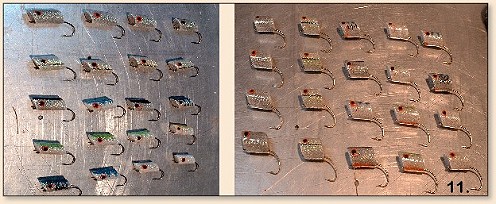
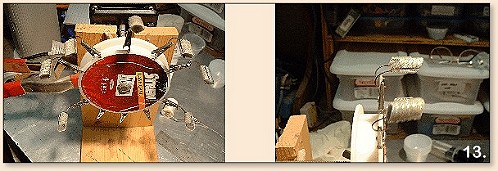
 Do any painting, except for the eyes, and allow whatever you did to dry. Now, if you have a fly turner, you can put on another coat of the epoxy. I use rod builders wrap finish for this, because I have it around, but the same 2-Ton stuff works nicely as well. Mix your epoxy and put it on unthinned. Place the bodies on the turner, and let them cure.
 If you don't have a fly turner, put a coat of Sally Hansen Hard as Nails on each body. Strive for thin enough so that it doesn't sag. It will take a couple of coats if you want them really smooth and shiny, but they will still catch fish if you skip this step completely. To add the eyes, you have a couple of options. I use paint, I like how it looks and it's easy on the curved surface. You can use stick on eyes or doll eyes if you like, you'll just need to use a gap filling glue, something like Goop or Sticks on Contact or E6000. I like a red iris with a black pupil. An injured shad will show internal bleeding in the eyes. A small thing, but every little bit helps...Up to you, of course, white/black, yellow/red, and chartreuse/black are all good colors. Hang the bodies and let the eyes dry.
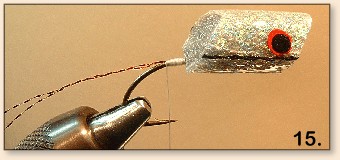
 For tails, I use a combination of white hackle feathers and Krystal Flash. The tail on a bait like this serves a purpose. It ensures the bait tracks straight, anchors the rear of the bait a bit so that it 'spits' properly, elongates the baits profile, gives roll stability to the bait, and adds some wind resistance so that the bait doesn't hit the water like a brick. Place a completed body in the vice and start the white thread at the rear of the body. Wrap a thread base to just onto the bend, and back to the rear of the body. Start the tail with one piece of red Krystal Flash. Tie it on in the middle of it's length, and fold it back and secure it with a couple of thread turns. The resultant two strands of red Krystal Flash represent the blood trail from the vent of an injured shad, another 'small' thing, but a key nonetheless.
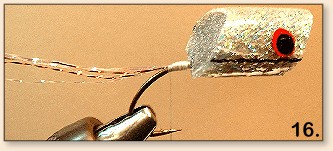
 Add two strands of pearl Krystal Flash in the same manner. The pearl Krystal Flash imitates lost scales. Another little 'key' that may or may not help, but it certainly won't hurt.
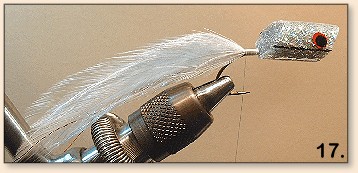
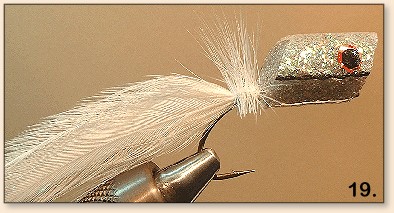
 White is the predominate 'belly' color of most baitfish, including Threadfin Shad, which is why the feathers used on this bait are white. You can, of course, use any color that suits you. Match two pairs of white hackle feathers. I use feathers from a dyed bass/saltwater neck for this. Don't be to concerned with how well they 'match', length is the primary concern here, if one is a bit wider than the other, it won't matter on the water. They should be between two to three times the length of the entire hook. Tie them in all at once on top of the hook shank at the rear of the body. Pull them into place so that they are evenly distributed to either side of the hook. Any curve in the feathers should be oriented down and to the outside. If you have trouble with this, you can tie them in two separate bunches. Cover the butts with thread, building a smooth base for wrapping the hackle. Add some head cement or CA glue.
 Tie in one more white hackle by the base of the stem over the beginning of the bend and wrap the thread forward to just behind the body. You want this hackle to have barbs between 1 to 2 times the width of the hook gap in length. Web is good here. Wrap the hackle forward in tight turns to the back of the body, getting as much hackle here as will fit.
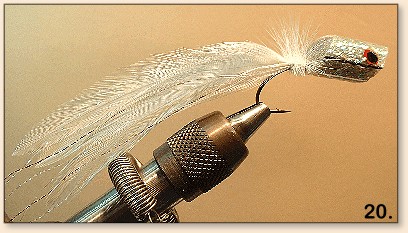
 Tie off the hackle and trim the thread. The purpose of the wrapped hackle is two fold. First, it puts out 'vibrations' at 90 degrees to the axis of movement of the bait, just like the fins on an injured baitfish do. Second, it adds roll stability to the bait, which is why we trim the hackle barbs from below the hook shank. These sideways barbs act like 'outriggers' on a canoe, keeping the bait upright and working properly. Remove the fly from the vice. Take your scissors and trim away any wrapped hackle barbs that extend below the hook shank.
 Trim the Krystal Flash so that it's about one inch LONGER than the feathers in the tail.
 Add some head cement to the tie off point, and some more to the area where you trimmed the hackle barbs.
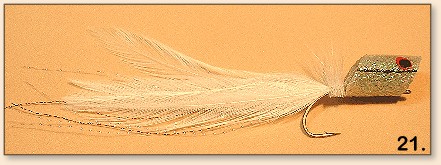 The bait is complete.
How to Fish the Topwater Shad:This fly was designed primarily for clear, deep water lakes with abundant shad populations. It has since proven to be very effective in any water where there are bass. Fish it along weed lines, over submerged trees, or around any visible cover. Just keep it wet and moving. Good Luck! ~ Buddy |
|
|