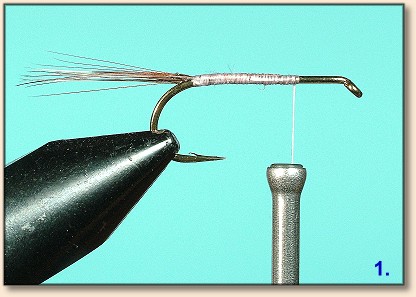
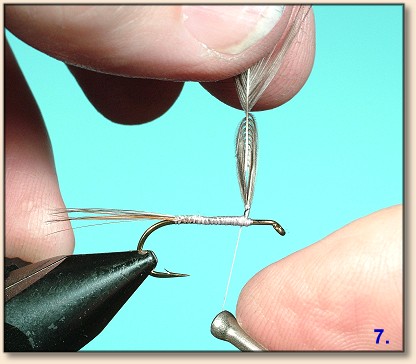
1. Pinch the hook barb before putting it
in the vise if you plan on releasing the
fish you catch. Start a thread base one-third
of the shank length back on the hook. Wrap
about one-half way to the end of the shank.
Select several grizzly and brown hackle fibers,
mix them together, and tie them to the shank
to form a tail that is about as long as the
complete hook. Trim any waste ends. Note that
we tied the tail fibers over the bare hook
shank on the last half of the body area. Often
hackle fiber tails will tilt down hill if they
are placed over a thread base because the last
thread turn (at the back of the hook) will slip
on the slick hackle forcing the fibers down.
Wrapping over bare hook shank solves that problem.
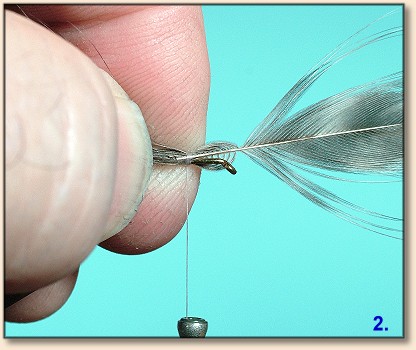
2. Forming the Wonder Wings is a two part
process. First pair up two large hackle feathers
(in this case we are using grizzly), place them
back to back curving away from each other, and
cut the heavy part of the stems off. We find
that is usually about forty percent of the
feather. Sweep the fibers back so the stems
(within the wing itself) are shorter in length
than the hook shank. We usually estimate that
length at sixty percent of the shank. Tie the
swept back fibers to the hook along with the
two feather stems using three snug but not
tight thread wraps. Notice how short the wing
is at this point. Do not loose control of the
swept back fibers, hang on to them in preparation
of the next step!
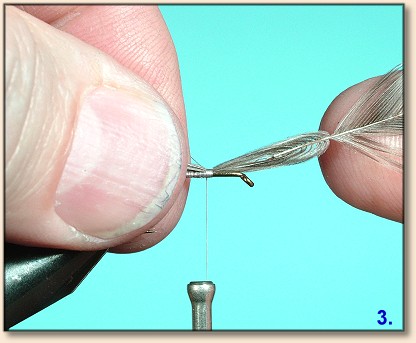
3. Maintain control of the fibers in the
left hand and use the right to pull the
feather/fibers forward slipping the stems
out from under the thread wraps. Stop
pulling when the wing is the length you
want - on the illustrated fly it is equal
to the length of the hook shank.
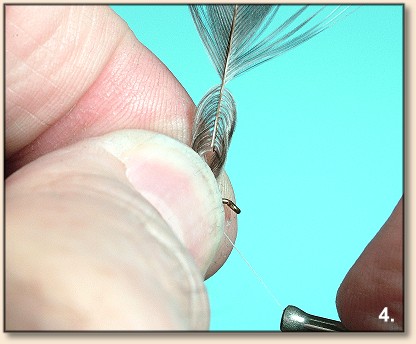
4. As soon as the two stems pull out from
under the thread, the snug wraps just became
a lot looser. Do not tighten them yet. Instead
pull the pair of wings up into the "pinch"
of the left thumb and forefinger then tighten
the thread wraps. The reason we do this is to
keep the stems in the loop straight. If you
skip this part of the step your wing will be
cocked at an angle. The fish don't care and
they cast just fine but if we spend the time
tying a fly we want it to look good. By the
way, that little tip that took less than ten
second to read gave us fits for the better
part of five years before we picked up on
the "pinch technique."
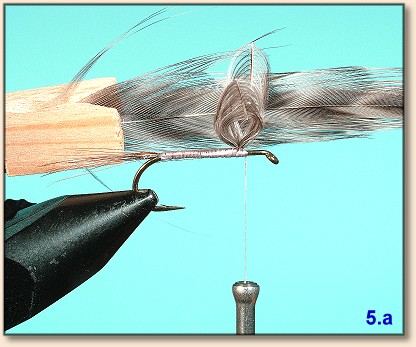
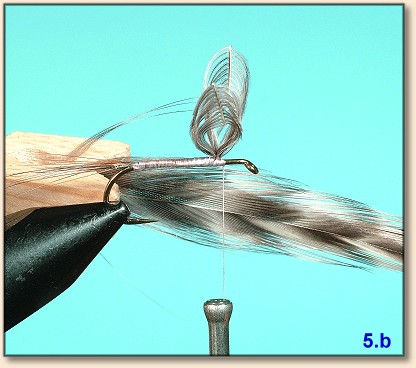
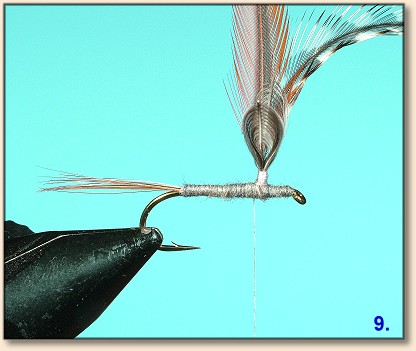
5. Trim the waste ends of the wing at a
severe angle so they will blend with the
tail fibers forming a tapered under body.
Pull the wings apart and clip the excess
feathers from them. Place the feathers in
a clothespin so they are ready to construct
another set of wings. We usually get six
sets of wings out of a pair of hackle
feathers. Stand the wings up by wrapping
thread tight against the front of the fibers
then place a single crisscross wrap between
them for separation.
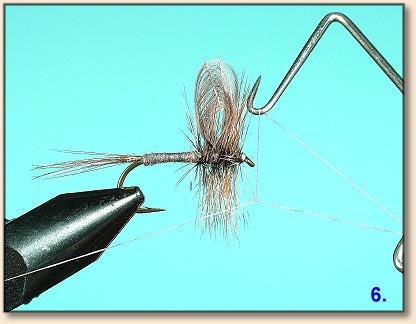
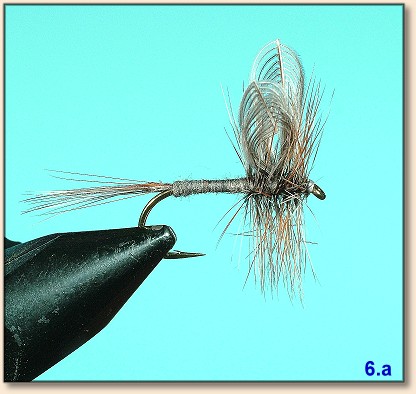

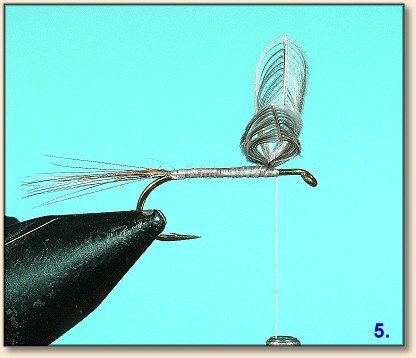
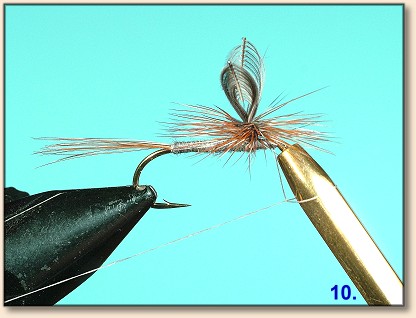
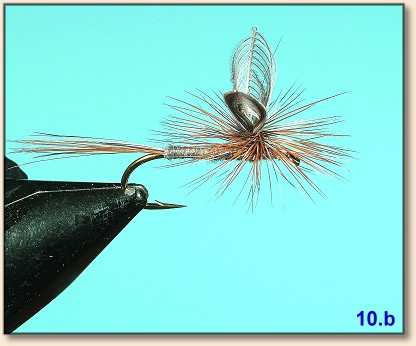
6. From here we are finishing the fly in
this step because we have several other uses
for the wing style to share with you and
limited space to do so. Place gray dubbing
on the thread and wrap from the back to the
front stopping just before reaching the wings.
Select a grizzly and a brown hackle, strip
the fuzzy material from the base of the stem,
and tie them to the hook behind the wings. We
like dubbing under the thorax area so apply
dubbing to the thread and wrap it to the hook
eye. Wrap the hackles forward to meet the
thread, tie them off, and trim the waste ends.
We used a whip-finish and a drop of head cement
to complete the fly.
7. We think this fly is awesome when tied as
a parachute but obviously the wing fibers must
be strengthened to support a parachute hackle.
Follow the steps just like before but in step
five do not separate the wings or trim off the
extra feathers. Wrap the thread tight against
the fibers to stand up the wings. Now we are
going to build a thread platform on which to
wrap our parachute hackle. Wrap the thread
around the base of the hackle fibers advancing
up the wings until the thread-covered area is
the size needed for the hackle. We are now at
the top of the "post." From the top go straight
down to the body and anchor the thread with
several turns around the hook shank. Note:
Al added a touch of black marker to the gray
thread to accent this part of the step.

8. Repeat this process two more times
anchoring the straight up and down strand
of thread around the hook shank. We call
wrapping around the post area "pouring
concrete" and the straight up and down
strand of thread "placing rebar." Now
divide the wings and trim off the excess
placing the feathers in a clothespin.
Execute a crisscross wrap between the
wings and parallel to the post. Don't
worry about the strands of thread (rebar)
along the front and back of the post, we'll
deal with them later.
9. Prepare brown and grizzly hackle feathers
by stripping the fuzzy material from the base
of the stems and set them aside for the moment.
Apply dubbing to the thread and wrap it forward
forming the body. Anchor the hackle to the hook
on the first turn in front of the wings.
Continue dubbing to the hook eye and at the
same time binding the feathers to the hook.
Be sure to leave a bit of bare stem on the
feathers at the post. After reaching the
hook eye, dub back to the post - add dubbing
to the thread if it is needed to cover the
additional area. Grasp the feathers and pull
them tight against the post. Wrap up the post
and back down making certain the thread is
hanging behind the post. Notice the rebar
AND feather stems are all working together
to strengthen the parachute platform.

10. Wrap the hackles down the post and
when they reach the body hold them in
position at a downward angle and grab
the bobbin. Make two turns around the
post to anchor the hackle. Trim off the
excess feathers then take one more turn
of thread to "tuck in" the trimmed feather
ends. Pull the thread forward to the hook
eye and use a half-hitch tool to finish
the fly; a single turn places a half hitch
and a double turn places a two-turn whip-finish.
Place a drop of head cement in the crotch
of the divided wings to anchor them and
the hackle.
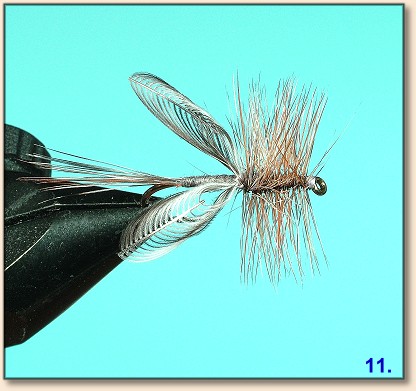

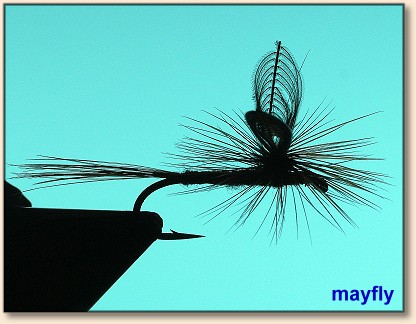
11. Here we've demonstrated a delta wing
Adams. When switching to a down wing fly
be sure to turn one of the feather over
so the natural curve on both go the same
direction. When tying the feathers on the
hook, place the natural curve down.
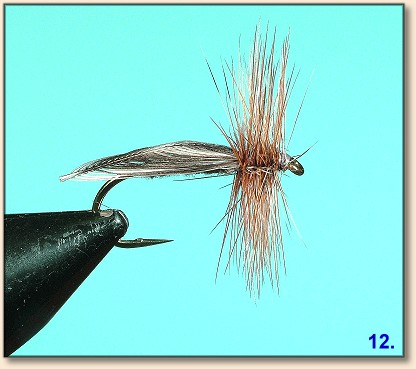

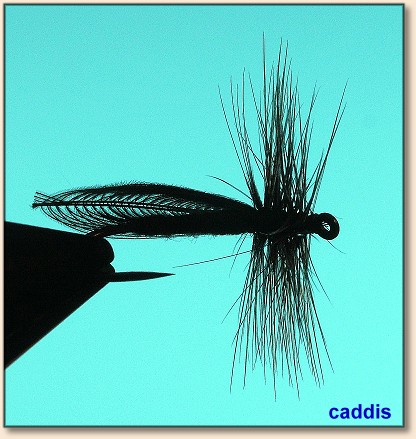
12. The caddis/stonefly style is the
only fly we tie the stem to the hook
shank as per the recipe for a European
Wonder Wing. Again, place the natural
curve down. Tie it to the hook just
like a looped Wonder Wing; short then
pull it out to the desired length. Just
be careful to not pull the stem out from
under the thread turns.