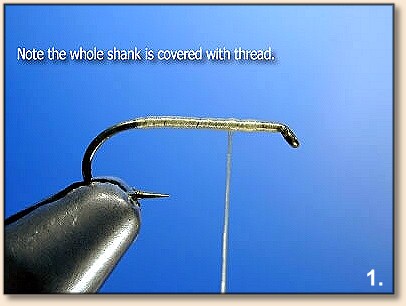
1. Covering the hook shank completely with
thread is important. We do not want the wing
hair to spin. A good thread base will help
prevent this.
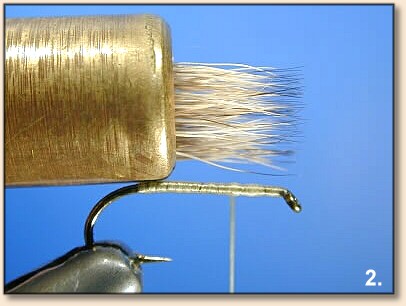
2. Clean and stack some deer hair for the
wing. Bring the stacked hair to the hook with
the tips out over the eye. The less one handles
any type of hair to be applied to a hook the
better. The more you handle the hair, the more
difficult it becomes to tie on to a hook.
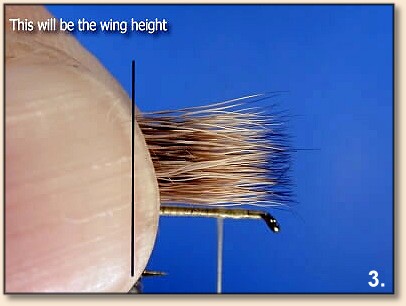
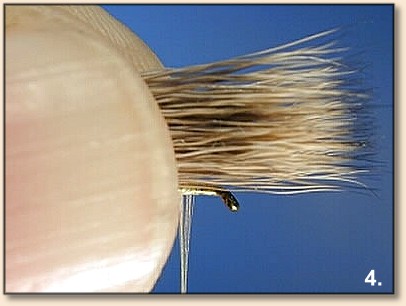
3. The length of hair for the wing is equal
to the length of the hook shank. In general,
that is the distance measured from a point
just behind the eye, to a point on the hook
shank directly above the barb of the hook.
The line above, marks the point on the hair
that will tied in as the wing. Next, move the
hair to the right so as to be directly above
the thread.
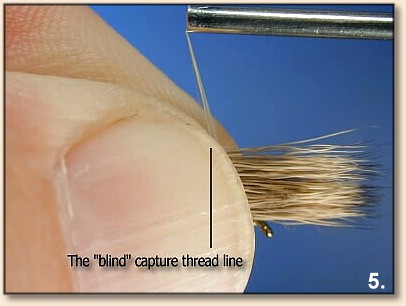
4. The wing tie in point is now above the
thread. The wing height is now the length
of hair to the right of the thread. For the
tie in itself, I like to use a "blind capture."
This is done by making a loose turn of thread
that comes up between my thumb and hair on
this side and down between my index finger
and hair on the "back side." I make two or
three of these turns. You should not be able
to see the turns of thread since they are
between your fingers. Notice also that the
hair is on top of the hook shank.
5. The thread is hidden but still it is
around the hair and hook. Maintain the
position of the hair; above the hook shank.
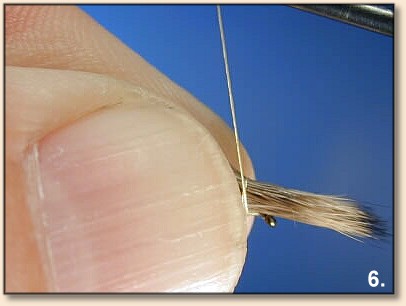
6. I have moved my fingers here to show the
capture wraps.

7. As you cinch down to bind in the hair,
"roll" your left thumb and index finger
with the hair, down onto the hook shank
as you tighten the wraps of thread. This
motion keeps the hair on top of the hook
shank... a Good Thing.
8. The typical angle cut of the wing hair butts.
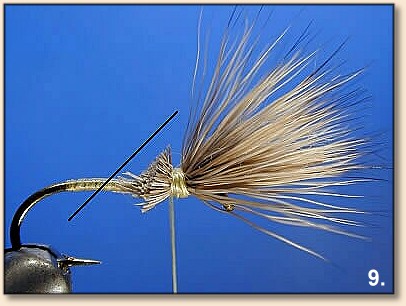
9. The completed cut. The line makes
reference to the cut angle. This angle
cut allows for a clean, tapered thread
base for the body. A square cut would
require thirty more turns and a mile of
thread to fill and taper the gap. Also,
note the hair is now tied in firmly above
the hook shank.
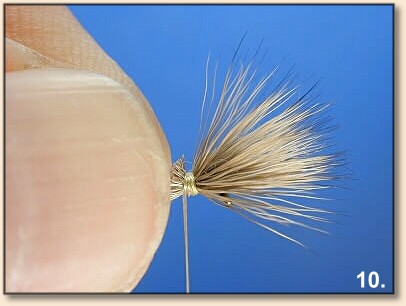
10. I want the wraps here to land in a
precise location, so I use my thumbnail
and index finger as thread guides. By
moving the "edge" they create, I can place
thread exactly where I need it. The thread
slides off this edge and into place as I wrap.
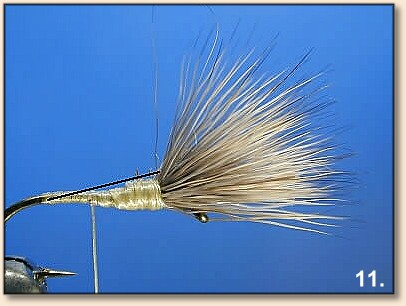
11. The butts are bound down and are
tapered, as shown by the line, for a
clean dubbed body line.

12. Now we will post the wing up. Pull
all the wing hair back from the eye as
shown. We want to produce a thread "dam"
here to force the hair up to a vertical
position. The thread "dam" should be a cone
like affair, not just a bunch of wraps at
the base of the hair. That would just fall
over and the wing will fail and protrude
forward of the eye. The taped cone will
keep the hair in place.
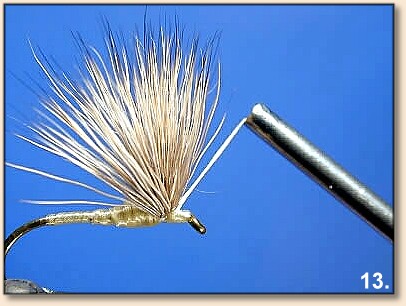
13. Force the thread firmly up against the wing!
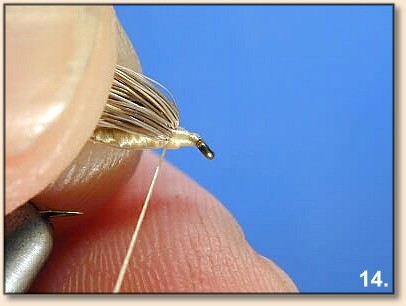
14. After you have made a small tapered
thread dam, pull the wing fibers back once
again.
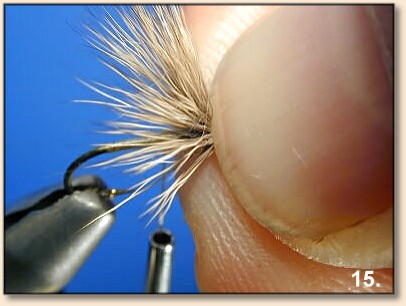
15. With the hair pulled back, force your
thumbnail down into the crease formed by the
hair and the thread dam. Roll your thumb nail
back towards the hook bend. This will force
the hair up even more and will allow you to
place a few more wraps right at the base of
the wing. This will insure the wing will stay
vertical. DUBBING will NOT support the wing!
16. Place more firm wraps right at the base
of the wing. Then take the thread under and
back behind the wing for the tailing.
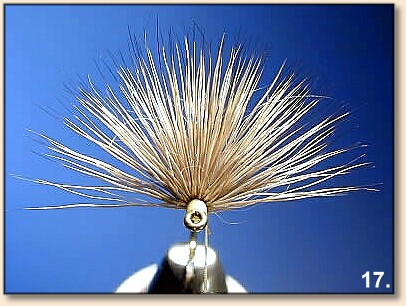
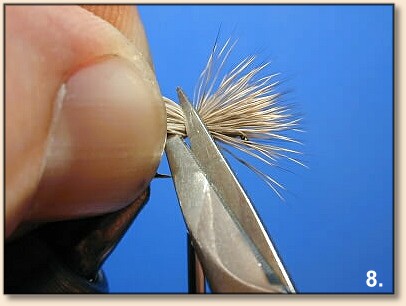
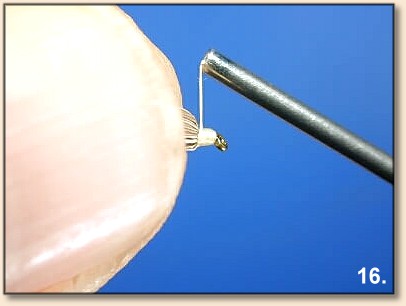
17. Completed wing, as viewed from the front.
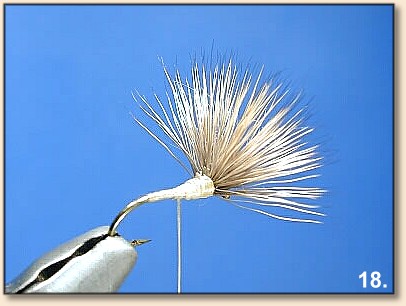
18. From behind...
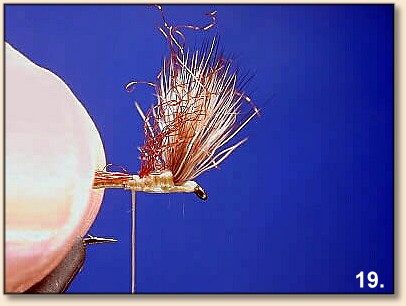
19. Here is the tie in of the crinkled
Z-lon/Antron tail fibers. The tail is
under my thumb. The material to the right
will be trimmed.
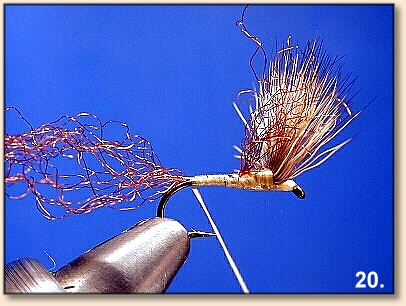
20. Tailing is now tied in. Trim the Z-lon
to about the shank length or a bit less. Use
the Z-lon sparingly. A sparse tail on this fly
is preferable to heavy one.
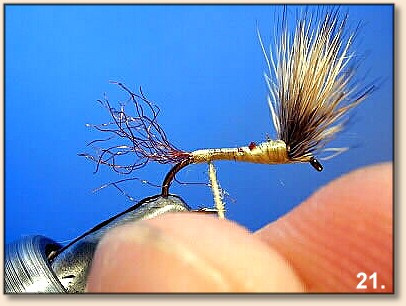
21. The dubbing has begun. Remember to
twist/tighten the dubbing after each
rotation around the hook. Use very fine
dubbing material. Pick all the guard hairs
from any natural furs you may use.
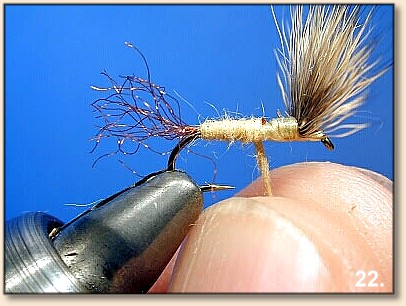
22. Continue the dubbing process...
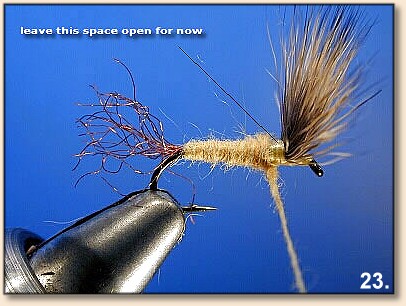
23. Dub to the point where you have but
one wrap left to finish the body. Leave
this space open. The reason being we must
have some method to cover/dub under the
wing area....
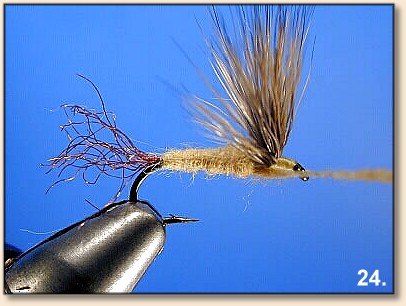
24. Move the thread forward of the body
area to in front of the wing. Unlike the
above photo,you do not need any dubbing
on the thread at this point.
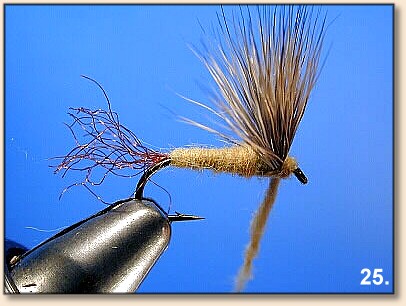
25. Apply some dubbing and then make a
wrap in front of the wing, at the base.
Tighten dub with each turn.
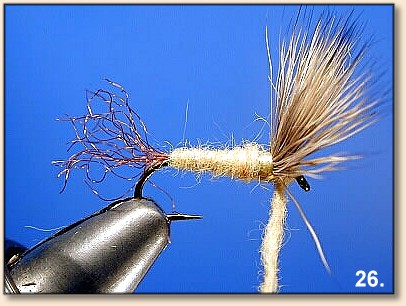
26. The next move is to the rear of the
wing and fill the space we left open.
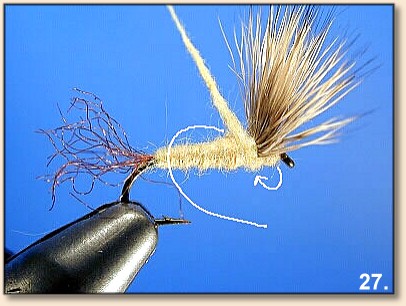
27. The area below the wing is now covered
on the tiers side. Now bring the dubbing back
over going away and under, towards the eye.

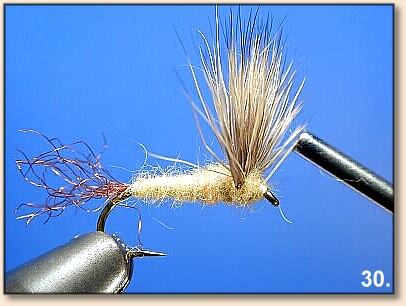
28. We are now coming back under and forward,
covering the "back side" of the underwing area.
It's a figure eight of sorts. It may require
more than just one turn to fill.
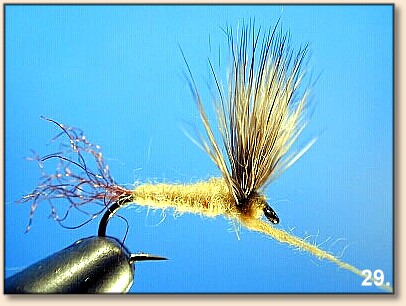
29. Just a continuation of the dubbing process.
30. Wrap a head and whip finish and your done!
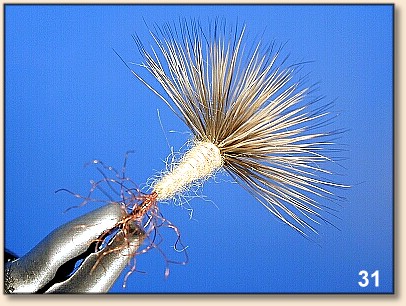
31. From behind...
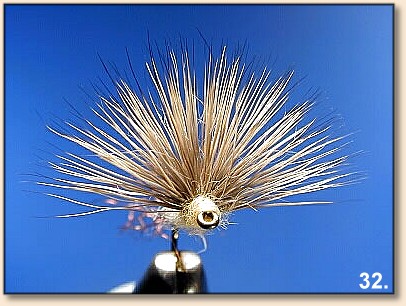
32. From the front.
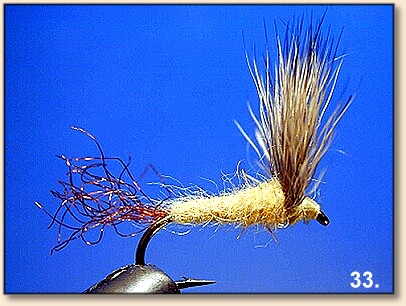
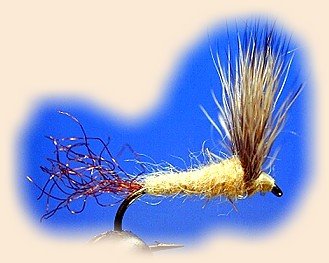
33. PMD Sparkle Dun. ~ Harry (bones)