A number of local fliers had mentioned they were
having some great results with CDC Caddis Emergers.
No one particular pattern was thought any better
than the rest, so I went looking for possible pattern
ideas that I could either tie or give stimulus to my
own variations. I came across this
beaut by Harry Mason, which really imitates our late winter
hatch really well. With only a couple of slight changes,
I tied some up and went and caught some nice Browns.
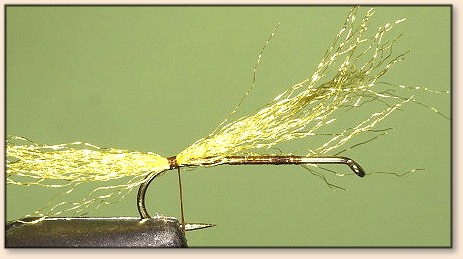
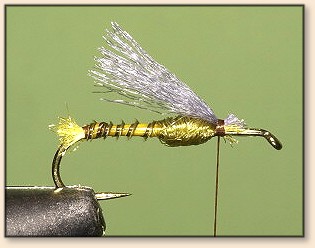
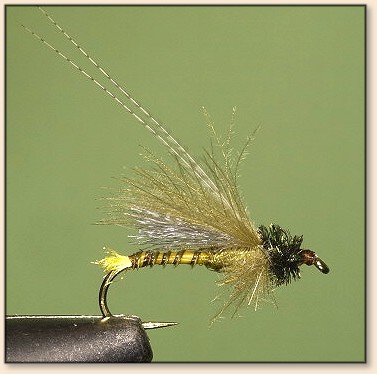
While it might look like a complicated fly, it's really
easy to crank them out. Fished only in calm waters,
my version barely stays on the surface. This fly
illustrated here was tied on a size #14.
Materials List:
Hook: TMC 5212 #14-16 (2312 optional).
Thread: Brown 8/0.
Tail: Yellow/Amber Antron (short).
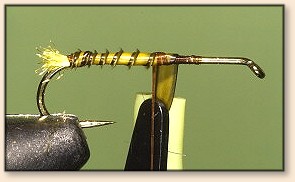
Body: Olive Turkey Biot.
Rear Thorax: Olive Antron.
Underwing: Blue Dun Antron.
Overwing: Olive #4 CDC tied flat.
Legs: Overwing tied down and back.
Antennae: Two Lemon Wood Duck fibers.
Front Thorax: Peacock Herl, single strand.
Instructions - CDC Biot Caddis Emerger:

1. Start by crimping down the barb and tying the
thread on a third of the way down the hook shank.
2. Cut a section of Yellow Antron off the spool and
then split the antron fibers so you only use half of
them in creating the tail. I tie the tail on with a
couple of wraps and then cut it short. The tail is no
longer than the distance to the curve of the hook.
"Fluff" the tail as best as you can.
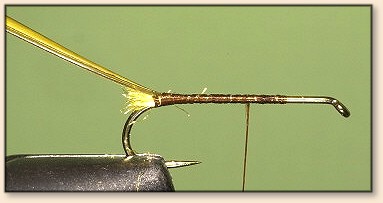
3. Tying in an olive turkey biot is done with just a
couple wraps. Once done, advance the thread back up the
shank to just past the halfway point on the shank. Wrap
the biot up the shank. Keep tension on the biot as you
wrap and use some care to space it out over the previous
wrap to create the ribbing effect.
4. Wrap the biot past the spot where you've stopped the
thread. Very carefully, make your first wrap of thread
around the biot to secure it. If you pull too tightly
at this point, you will more than likely cut the biot
with the thread and start an unwinding panic. After you
have the first securing wrap, wrap a couple of more wraps
that are now tight. Trim biot.
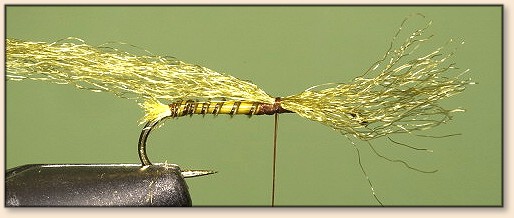
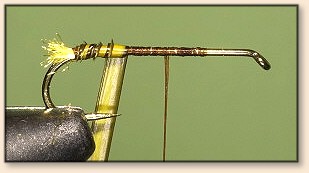
5. Over the tie off point of the biot, tie in the olive
antron that forms the rear thorax. It only requires a
couple of wraps of antron to make the thorax.

6. Tie in the blue dun antron underwing over the tie off
point for the thorax. Use a couple of wraps and snug it
down to pinch the antron against the shank. With this
accomplished, trim off the front antron right to the
wraps. The rear antron, pull backwards. With the antron
tight, cut it right above the junction of the tail and
biot. When you let go of the antron, it should snap
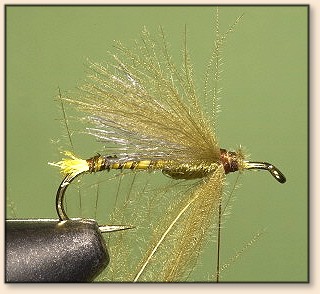
back and pop up as illustrated.

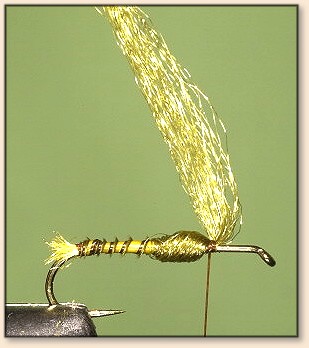
7. Using #4 olive CDC, tie in two feathers as overwing.
You want to tie these in flat. You want the length of
the overwing to be just slightly longer than the underwing.
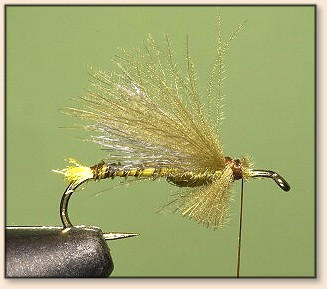
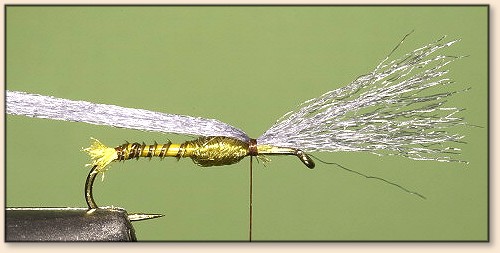
8. This can be the only tricky stage of tying this fly.
You want to take the butt ends of the CDC, split them
with the hook shank and pull them down and back. You
then tie them off to hold this position. This creates
the legs. You trim the tied down CDC just above the
barb of the hook.

9. Tie in two lemon Wood Duck fibers. You want to tie
them in using their natural curvature to have them
curve over the back of the fly. The antron and CDC
will keep them up but the curve works for you when
the fly is wet.
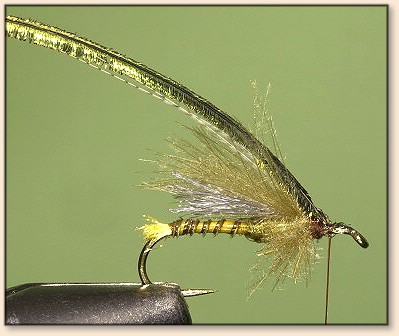
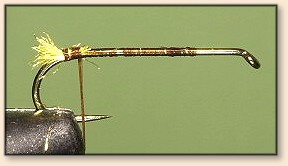
10. Wrap in peacock herl to create front thorax. I
use just one strand. The tapered look of the thorax
comes from starting the wrap over the CDC/Wood Duck
fiber junction and then winding forward towards the
eye. Tie off and create the head.
11. Finished fly.
Photographic note:
Photos captured by Nikon D1H, 60f2.8AF Micro with
SB-29s flash on Lexar digital film. ~ Moose
About Moose:
 Moose is a professional wildlife photographer, and
obviously a fine fly tyer, who lives in Mammoth Lakes,
CA. He has an extensive website to furnish wildlife
photographers with information to make the most of
their photographic pursuits. You will
find it at: www.moose395.net/
Moose is a professional wildlife photographer, and
obviously a fine fly tyer, who lives in Mammoth Lakes,
CA. He has an extensive website to furnish wildlife
photographers with information to make the most of
their photographic pursuits. You will
find it at: www.moose395.net/
