
 Draggin By Philip Rowley, Langley, BC, Canada
|
|
|
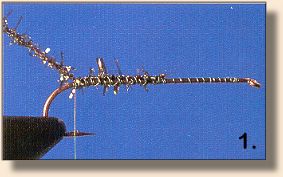
1. Cover the hook shank with tying thread. At the halfway
point tie in a length of peacock Crystal Chenille.
|
|
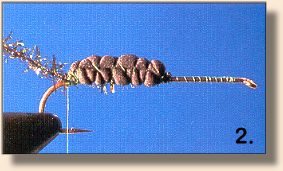
2. Return the tying thread to the halfway point and tie in a
length of round foam for the underbody. Secure the foam
tightly at the front and rear. Don't wind the thread too
tightly over the underbody as this will limit its floatation.
Depending upon the size of the fly and the diameter of the foam
bar it may be necessary to double the foam back over itself
so the body will be proportional.
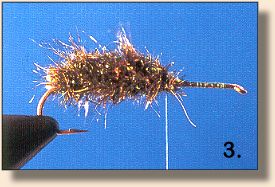 3. Form a dubbing loop at the rear of the hook. Insert a dubbing hook into the bottom of the loop. Make the dubbing loop shorter than the Crystal Chenille. This is important. Insert the dubbing mix into the bottom of the dubbing loop sliding it upward into position. This helps to keep the dubbing material from falling out when inserting additional amounts. Pull the Crystal Chenille parallel to the dubbing loop. Pull the tag end of the Crystal Chenille up under the dubbing hook and back across itself. Twist the dubbing hook a couple of times to lock the Crystal Chenille in place. Continue twisting the dubbing loop forming the dubbing noodle. Wind the dubbing noodle forward to the halfway point to create the body. Tie off and trim the excess dubbing loop.
|
|
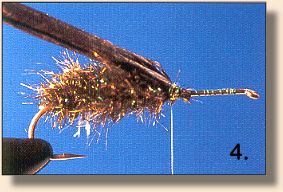
4. Tie in the wingcase material.
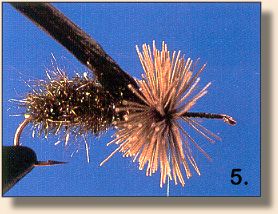 5. Spin a pipe-cleaner sized diameter of dyed deer hair to form the first part of the thorax.
 6. Tie in the silicone legs half way up the thorax. Spin a second clump of deer hair in front of the silicone legs. Be sure to pack the deer hair tightly as this improves floatation.
 7. Carefully trim the thorax while the fly is still in the vise. The thorax should be flat on top and bottom and no wider than the body.
|
|
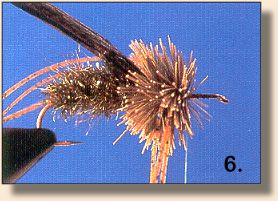
8. Pull over the wingcase but do not trim the excess. Fold
the wingcase back across the body and tie in place. Figure-eight
a small piece of round foam in place 2 eye widths back from the
hook eye.
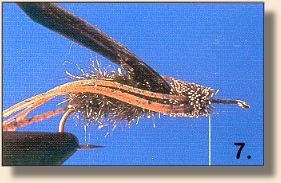
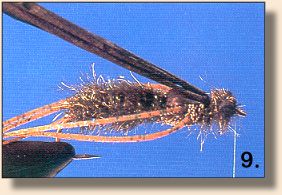 9. Form a small dubbing loop and insert dubbing. Spin the dubbing noodle tight and wind it around the eyes to form the head. Tie off the dubbing noodle at the hook eye.
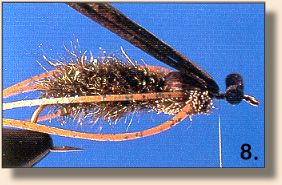
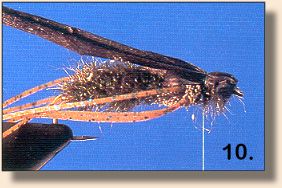 10. Pull the wingcase across the top of the head dividing the eyes. Tie off but do not trim the excess. Move the tying thread to the rear of the head by traveling over the top of the head. Pull the wingcase material back over the head and tie off.
11. Whip-finish and trim the tying thread at the back of the head. Apply head cement. Trim the wingcase on an angle towards the rear of the fly. The wingcase should extend about 1/4 back into the body of the fly. Gather the legs and trim them so they are body length. Be careful not to pull on the legs prior to trimming or the end result will be short stubby legs. ~ Philip Rowley Credits: From the terrific new book Fly Patterns for Stillwaters published by Frank Amato Publications. We greatly appreciate use permission. For more great flies, check out: Beginning Fly Tying, Intermediate Fly Tying and Advanced Fly Tying.
|