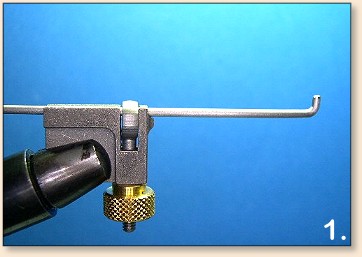
1. Mount the tube fly tool on the vise. In this
case, it is a HMH Tube Fly Tying Tool. The mandrel
is what holds the tube on the adaptor. The tube is
kept snug on the vise by using the mandrel to snug
it up against the adaptor.
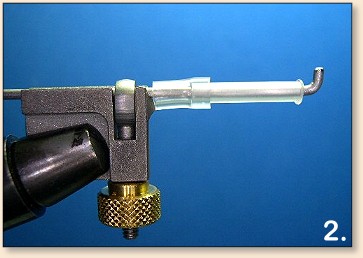
2. This is how the assembled tube and junction tube
are positioned on the tube adaptor. Before placing
the tube on the adaptor a thread check has to be made.
The thread check prevents the finishing thread wraps
from sliding off the front end of the tube. To make
the thread check, heat the end of the tube over an
open flame just enough to make it pliable. Then,
quickly press the end of the tube on a flat surface.
This will form the thread check.
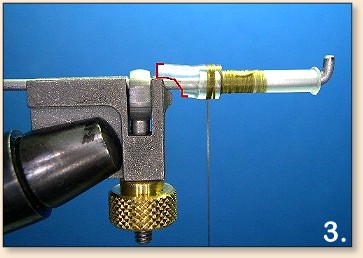
3. Before placing the tube in the adaptor, the
junction tube has to be cut into shape. This will
allow the junction tube to (1) hold the hook in
place and (2) keep the tail of the fly from fouling
around the hook. The red marks on the junction tube
illustrate the cut. Once the cut is finished, place
the tube back in the adaptor and start the thread
wraps. Start the thread about mid-tube and work your
way back into the area where the junction tube overlaps
the tube itself. Take a few tight wraps in this area
in order to snug up the junction tube and the tube.
You might have to hold the front end of the tube to
keep it from spinning during this step.

4. Tie in the olive zonker strip right over the area
where the junction tube and the tube meet. The olive
zonker strip makes up the tail and wing of this fly.
Cutting the zonker strip to size before tying it in
makes it easier to finish this fly. I like to taper
the tail end of the zonker strip down to a point.
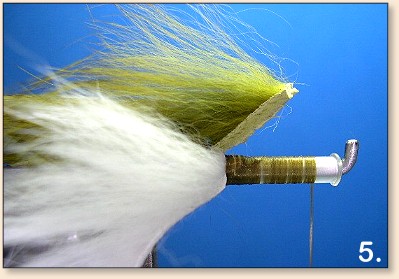
5. This is a close-up of the tie-in spot for the
white crosscut strip that will make the body of
the fly. This strip is tied in just in front of
the junction tube. Take a few tight thread wraps
and advance the thread to about 1/4" behind the
thread check.
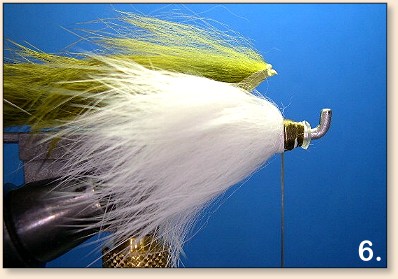
6. Lift the olive zonker strip out of the way and
wrap the crosscut strip forward on the tube,
stroking the hair back as you move forwards. Tie
the strip down tight and trim. This does not have
to be neat. The thread wraps for the head will cover
this area.
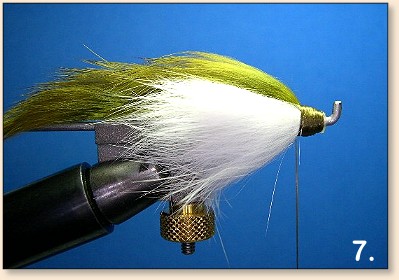
7. Grab the front of the olive zonker strip, pull
it tight towards the front of the tube and tie it
down. Form a nice, big head with the tying thread.
Whip finish at the base of the wing and clip the
thread.
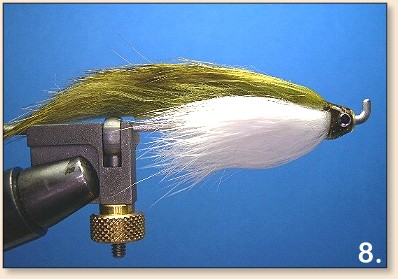
8. Finish the fly with a pair of stick-on or painted
eyes. Give the head a thin coating of epoxy or a similar
product. I like to let some epoxy soak into the base of
the wing and body in order to improve the durability of
the fly. Wetting down the rabbit fur and stroking it
back makes the job of finishing the head easier.
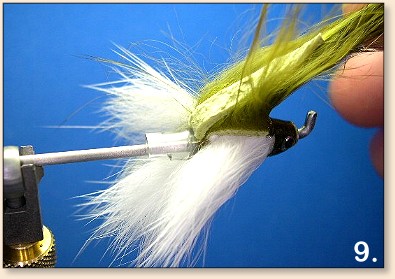
9. Now it is time to put the junction tube to use as
a guard for keeping the tail from fouling around the
hook. Lift up the olive zonker strip to expose the
junction tube. Put a drop or two of Crazy Glue Gel
on the junction tube and press the zonker strip on it.