This fly is tied on a size 9 as we use smaller flies in
the summer but feel free to tie it in bigger sizes or as
a tubefly. The fly is meant to be fished high riding on
a floating line or a floating line with intermediate tip.
Materials:
Hook: Partridge Salar gold double size 9.
Thread: Benecchi 12/0 white and red.
Tag: thin oval gold tinsel.
Body: Holo gold flatbraid and Lemon yellow
firestar dubbing.
Wings: Yellow and black arctic fox and a few
strands of gold holographic and rainbow angelhair
sandwiched between them.
Hackle: Kingfisher blue metz soft hackle.
Cheeks: (optional) Jungle cock or substitute.
Head: Red tying thread and varnish.
How I Tie the Simon-Fly
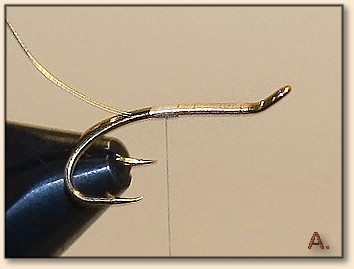
1. Start with the white thread just behind the eye of the
hook and wind back to hookpoint and tie in a piece of thin
gold tinsel on the underside of the hook.

2. Wind the tinsel back 4-5 turns to about opposite of the
barb of the hook and make a figure of eight around the
hook shanks and come up between them and tie off.
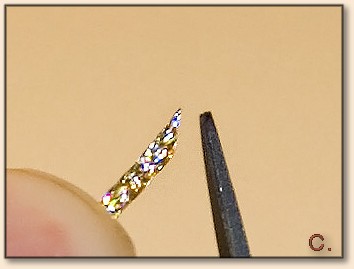
3. Cut a piece of gold flatbraid and make a angular tying-in
tag and tie in on the underside of the hook and cover the
first turn of tinsel on the tag.
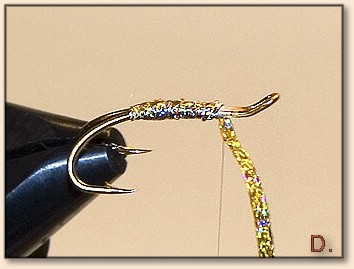
4. Wind forward in overlapping turns about ľ of the hook
length, 2 turns of thread is enough to tie off the flatbraid.
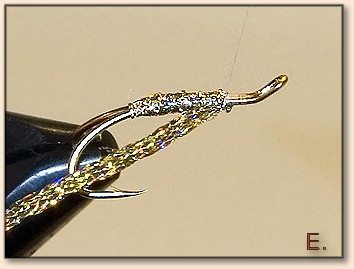
5. Before I cut off the flatbraid I fold it back on the
underside of the hook and tie off again to secure it in
place,now cut off.
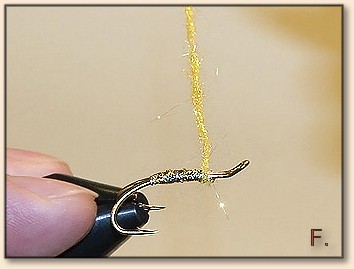
6. Spin the dubbing on your thread and wind backwards
just to cover the tying-off point on the flatbraid and
make a "ball" of dubbing.

7. I like to brush out the dubbing to make it nice and
fluffy. I use a brush made out of a wooden stick from an
popsicle with some velcro glued to it, works like a charm.
8. From the yellow fox hair I take off a clump and trim
and pull out all the spiky and stiff hairs, I will show
you later on with the black hair how I do that. I cut the
hair to length, just past the bend of the hook. Tie in the
hair facing forward by holding them just by the roots and
make a pinching loop with the thread, then fold the hair
back over itself and push down with my thumbnail to spread
them a little.

9. Take a few strands of gold holographic angelhair and
tie in right on top of the wing.
10. Tie the angelhair with one turn of thread to hold it
and then fold it back over itslef to double it and secure
with a few more threadwraps.
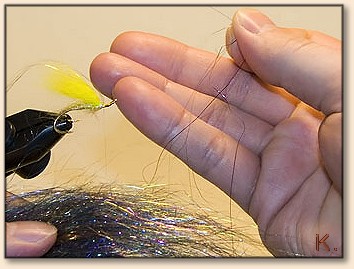
11. Do the same thing again with Rainbow angelhair.
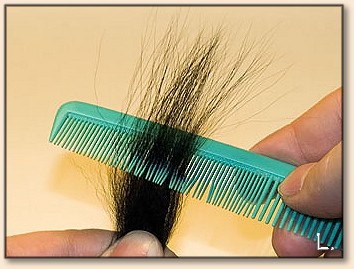
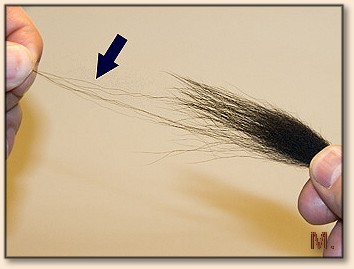
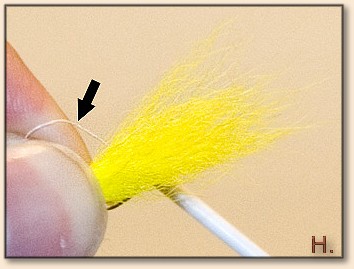
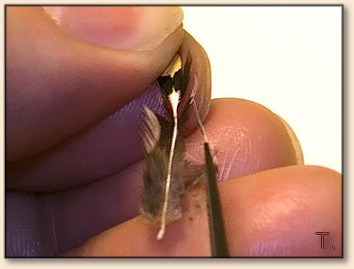
12. Here is how I prepare my hairs for the wings.
I cut off a fairly large amount of hair and hold it by
the roots in my fingers and comb through it to get the
fibers straight and in line and then I gently pull the
hairs by the tips to get rid of all the stiff and spiky
hairs, you may need to comb and pull the hairs a few times
but do pull off all the hairs that you see are spiky and shiny.

13. Here you can see how the wing is tied in by the
roots and facing forward. Tie in tight up to the first wing.
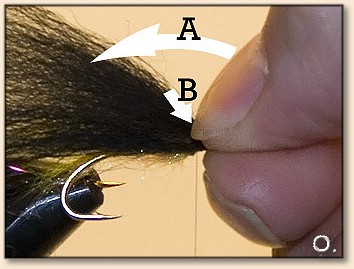
14. Fold the wing back over itself as A shows and then
crush down and spread the wing root with your thumbnail
as B shows, this helps to get a nice wide profile to the wing.
This black wing should be at least twice the length of the hook.
15. Tie down hard a few turns just at the base of the wing
to help it raise up and get the nice "teardrop" shape to it.
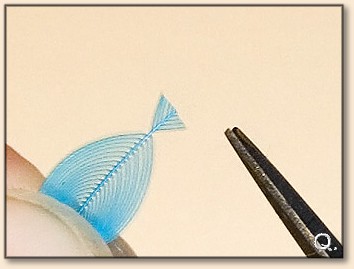
16. Now for the hackle, hold one feather by the tip and
stroke the fibers downward so you get just a few fibers
in the tip, cut off to make a small triangle to tie in
on the underside of the hook.
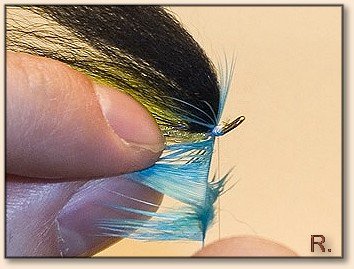
17. Before I start winding on the hackle I hold the base
of the feather and stroke the fibers back to double the
hackle, as you wind on make sure to keep the hacklestem
facing forward at all times. 2 turns of hackle should be
enough.
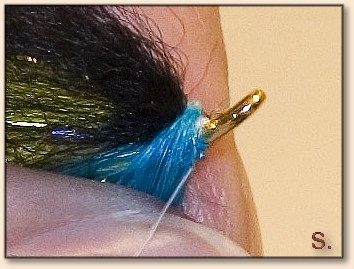
18. With your fingers pull down the hackle on each side
of the hook, if you take to many fibers from the wing along
when you split the hackle you could use your scissors or
dubbing needle. Secure the hackle with one or two thread
wraps and tie off and change to the red tying thread.
19. Take out 2 feathers of Jungle cock, or substitute, I
like them to just reach short of the hackletips. I hold the
feather by the tip and cut along the stem so I get short
fibers to make little barbs, that helps to hold them secure.
Do make sure the feathers are at the same angle on both sides
of the hook or you could end up with a spinning fly. Finish
off by making a small head with the thread and tie off and
varnish the head to make it nice and shiny.

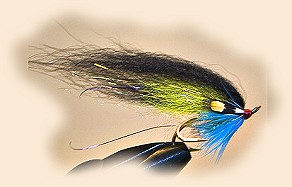
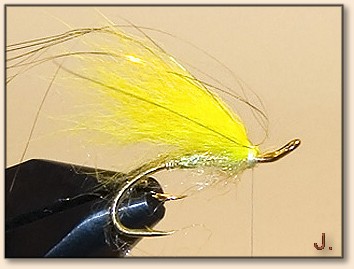
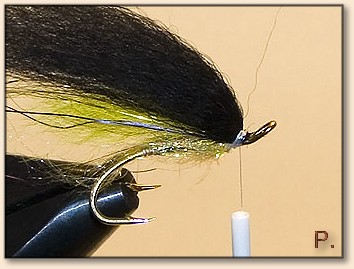
20. Finished fly.
Now you have yourself a fly to fish high in the water, maybe
in slight overcast or cloudy weather as it gives a good profile
from the fishes view. You also have the sparkle and glare from
the angelhair as it reflects light as the wing pulses and swims
in the current. ~ Peder Lindström