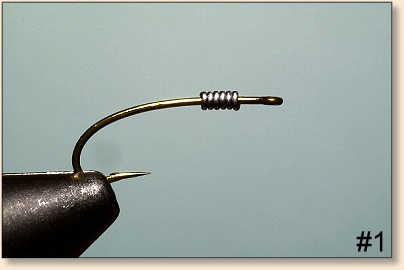
1. I attach 5-6 wraps of .15 lead weight. I use
this for weighting as well as to bulk up the thorax.
This is optional, you can weight the line instead
if preferred.
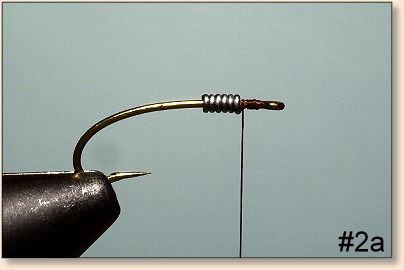
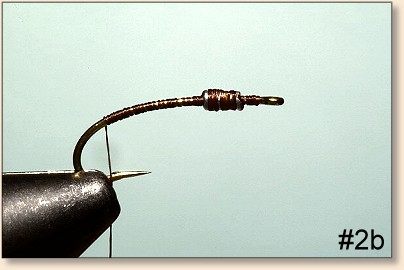
2. Start your thread as usual, slightly securing
the lead wraps as move your thread back to the bend.
Stop just in front of the barb.
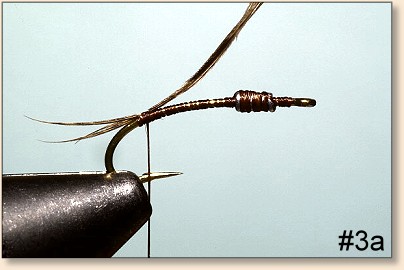
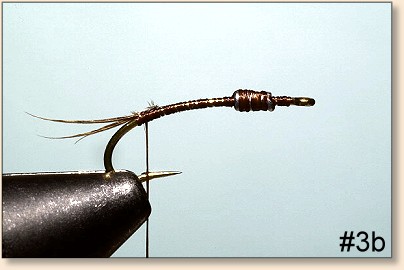
3. Tie in three barbs of pheasant tail. A slight
split between the three barbs is a good thing. I
separate them once I cut them from the feather and
change their order so they won't reattach themselves
to each other. Tie the tail slightly shorter than
normal proportions would have.
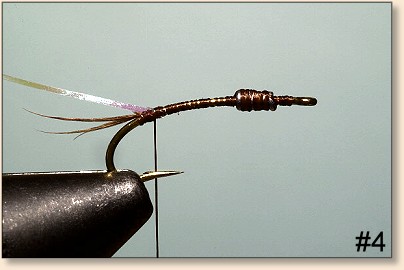
4. Tie in Flashabou with a maximum of two wraps.
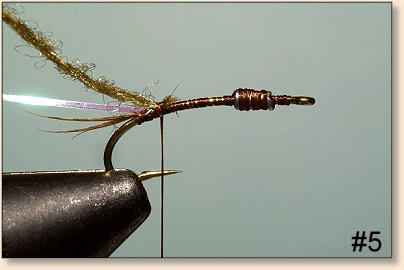
5. Tie in the back olive stripe slightly in front
of the Flashabou tie in. The goal is to avoid a lump
at the tail. Tie in with a maximum of two wraps.
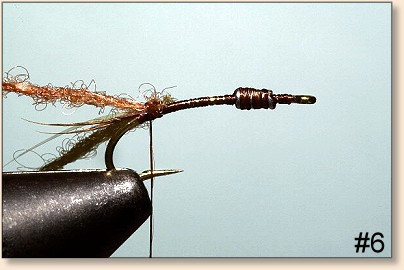
6. Tie in the body Ez-Dub and snug down with a maximum
of two wraps. Advance the thread up the shank to the
first wrap of lead.
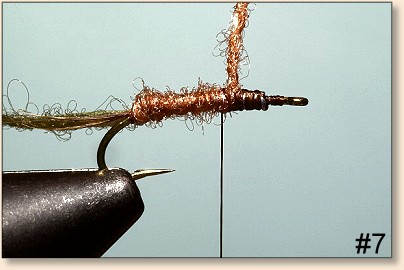
7. Tightly wrap the Ez-Dub to the shank and move it
forward to the first wrap of lead weight and secure
with just one wrap. I don't cut the Ex-Dub at this point,
but you can. I prefer to just secure it and continue on
with it later to reduce the number of wraps on the shank
to secure it, reducing body bulk.
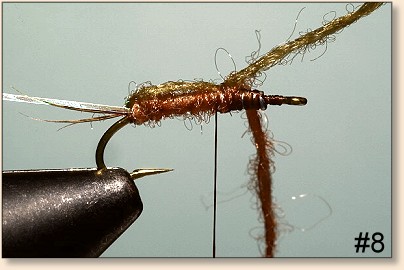
8. Bring the Olive Ez-Dub up over the top (the fly's back)
and secure it with one wrap at the junction with the body
EZ-Dub wrap. You don't want to pull too tightly nor have
the Ez-Dub too lose. You want to "smash & smear" it down
a little over the back, spreading out the dub the best
you can across the top of the body dubbing. Trim.
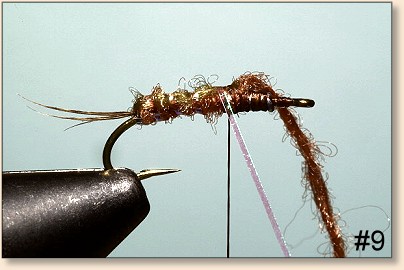
9. Wrap the Flashabou forward, wrapping it as
tightly as you can to create slight segments. Be
careful not to pull too tight on the Flashabou which
will stretch it and/or break it. Tie it off at the
junction of the other wraps at the first wrap of
lead weight. Trim.
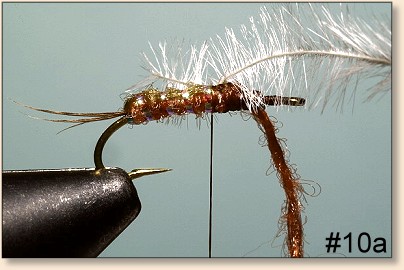
10. Tie in the White Ostrich to create the gills.
I just use one strand of ostrich, securing it on
one side with one wrap and then angle the strand
and securing it all with another wrap. I do a rough
trim at this point. I cut the feather to the perfect
length after I am all done tying the fly and can
look down and see all the proportions. Gills are
short and close to the body after their final cut.
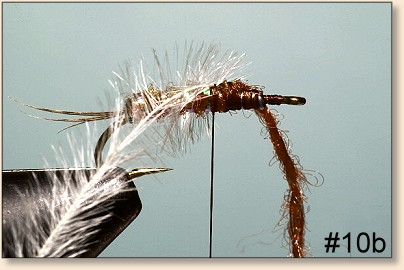
11. I put a drop of head cement on top of the two
wraps securing the ostrich. While still wet, I place
the turkey wing case on top and secure with two wraps.
The turkey wing case is a real narrow wing case, no
more the two barbs wider than the dubbed body.
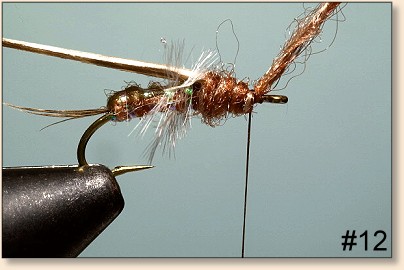
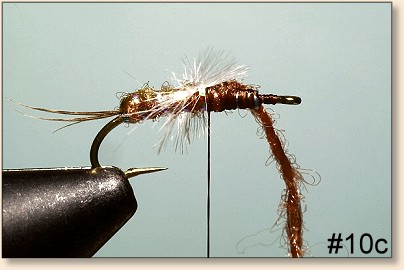
12. Bring the thread forward to the front of the lead
weight and then wrap the body Ez-Dub to the front.
You'll note I've angled the dub wrapping. This gives
a slight tapered dimension to the thorax. The dubbing
is a single wrap as it is advanced forward. Tie off
with two wraps and trim.
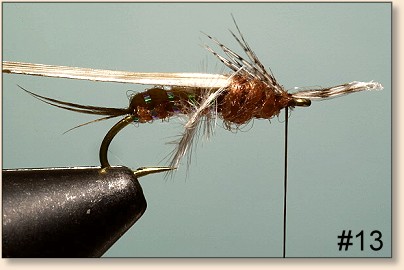
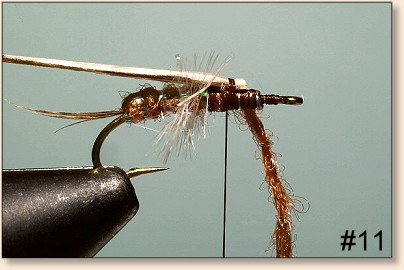
13. Tie in Partridge legs with minimum wraps and trim.
I prefer white/black segmented partridge but all brown
barbs works as well.
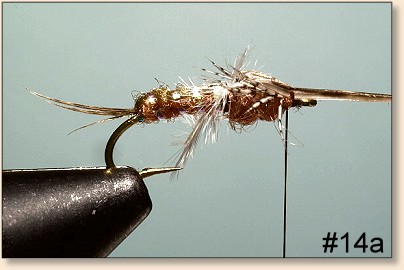
14. Using a bodkin, place it at the base of the turkey wing
case and fold the turkey over it, bringing the turkey up to
the eye. Secure with two wraps, trim and make your head.
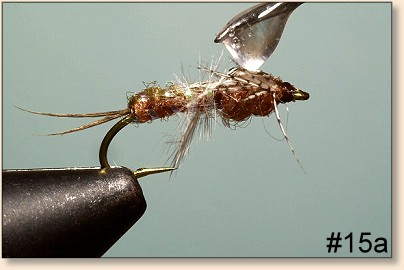

15. I typically tie up 10 -15 flies in various sizes all
at once. These are all stuck into a Styrofoam cup. It's
then that I apply epoxy to all of the flies at once. I
use the simple 5 min epoxy. I place a drop of epoxy
on the wing case and then carefully move it about on
the wing case so it's well covered. Use care not to
get any epoxy on the legs. This is especially true as
the epoxy starts to dry and gets "stringy." I tend to
get a little on the head and move it around a little
in an attempt to make eyes. While doing this, it might
get some in the hook eye which is easy to clean out.
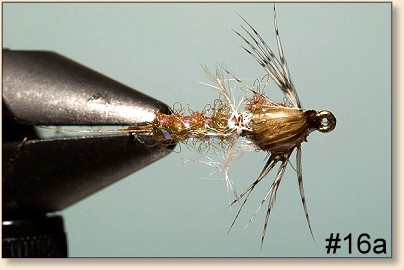
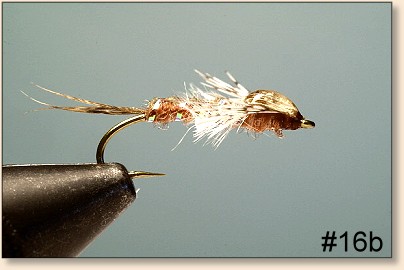
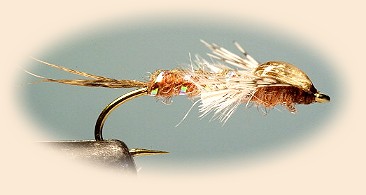
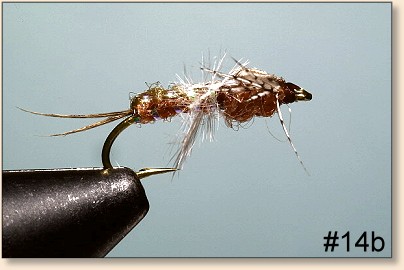
16. Finished fly, top and side views.
~ B. Moose Peterson
About Moose:
-
Moose is a professional wildlife photographer, and
obviously a fine fly tyer, who lives in Mammoth Lakes,
CA. He has an extensive website to furnish wildlife
photographers with information to make the most of
their photographic pursuits. You will
find it at: www.moose395.net/