Here are the tying instructions:
Materials List, Sam's One Bug"
Hook: - For this demostration I used a #8 nymph
1x long and 1x strong. I also have it tied on a #6 hook.
The larger hooks help to keep the smaller bluegill off
and assist with the bass that decide to hit it.
Thread: - I use Uni 8/0 and try to match the
thread color to the body.
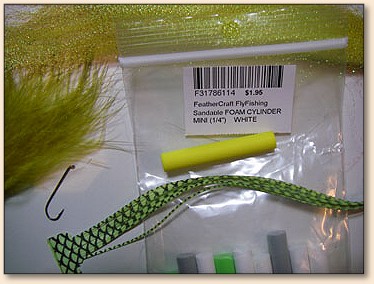
Body: - 1/4" sandable foam which I found at
FeatherCraft. Yellow has been my most successful
color, but, I am sure other colors will work.
Tail: - I used marabou with 2 to 4 strands
of krinkle flash tied in. Sam stated not to use
too much flash in the tail. I am sure other material
could be used for the tail.
Legs: - You can use any rubber leg material
that you prefer and in whatever color you want.
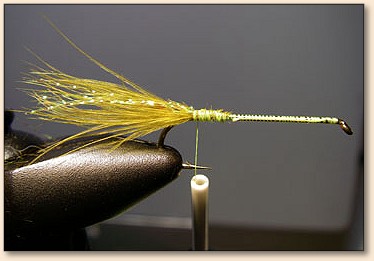
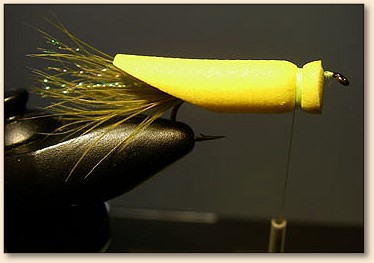
1. Here is the hook in the vise with a thread base
from eye to tail tie-in point, tail and flash tied
in. After that you run the bobbin back to the eye
of the hook and do a whip finish and cut the tying
thread. At this point you can lay the bobbin aside
for later.
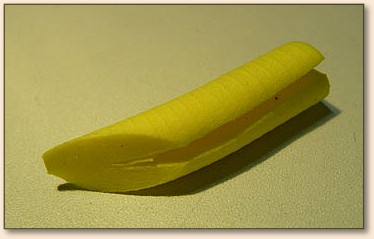
2. Slice one end of the foam body at a sharp angle.
Measure the body length to start behind the hook eye
and end at the hook point where the angle should start.
This will keep the hook gap clear for better hook setting.
Carefully slice the bottom of the foam at the center line
the full length of the foam to about the center of the
foam cylinder and then, with your fingers, spread open
the slit to assist with putting it on the hook shank.

3. Spread a couple drops of your favorite super glue
on the top of the hook shank over your thread wraps.
Careful to stop short of the tail tie-in point or the
tail material will soak up the glue and ruin the tail
action. Take the foam body and slip it over the hook
shank with the glue on it and position it with the angle
starting at the hook point and the body stopping behind
the eye of the hook. Press the body around the hook shank
and together at the bottom of the hook shank. Hold in this
position until the glue sets and seals the slit the entire
length. This is where reverse action tweezers come in handy
to hold the body together until the glue sets. Some glue
will squeeze out and if you are not careful, you will glue
the popper to your fingers. Don't ask me how I know that!
4. Once the glue has set, re-start your tying thread about
one hook eye width back from the hook eye and do several
thread wraps in one place to create a "head" for the popper.
Do a whip finish over these thread wraps, cut the tying
thread and you are finished with the bobbin and tying
thread. Apply some head cement or Sally Hanson to this
whip finish and thread.
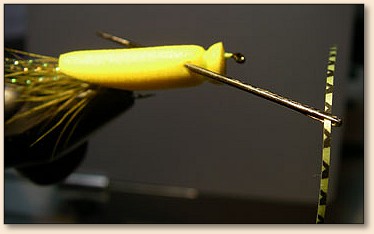
5. Thread your rubber leg material through the eye of
a needle and insert the needle just behind the "head"
of the popper on the side facing you and push it through
the body at an angle so that it comes out on the back
side of the body at the back. Do this step again from
the opposite side which will give you two legs on each
side of the popper. Trim legs to size that suits you.
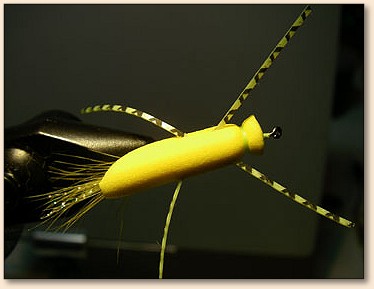
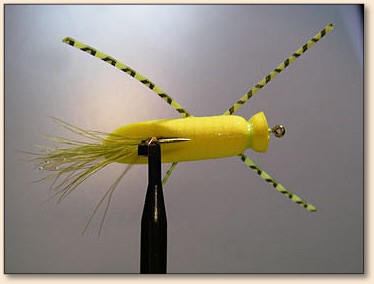
6. Picture #7 shows legs in place and trimmed. I
usually apply one drop of head cement or Sally
Hanson at the base of each leg where they enter
the body. If you don't the bluegill will yank
the legs out of the body which does not affect
the "fish catching" of the popper but it does
give the popper a better look.
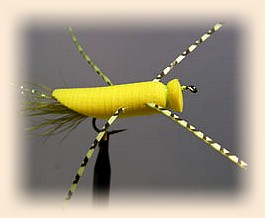
7. Your Sam's One Bug is finished and ready to go fishing.
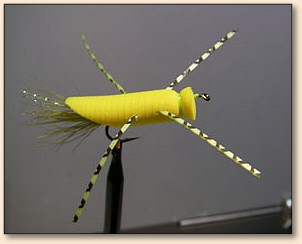
8. This is a view of the bottom of the popper showing
the slit is sealed the entire length. This is a very
durable popper, easy to tie and a real fish getter!
Give it a try and let me know how it works for you.
"Sam, this was for you my friend." ~ Warren