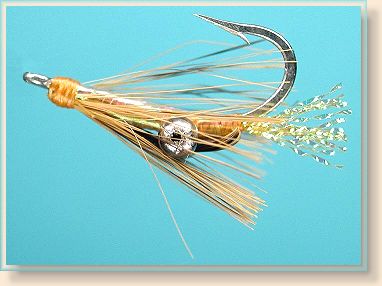
Al's Shrimpf
By Al Campbell
Al's Shrimpf is a pattern that's derived from my Shwapf pattern
used in fresh water. The idea behind this fly was to create a pattern
that is easy to tie, is easy to vary the color and size to fit local
conditions, and looks like a shrimp when you're finished.
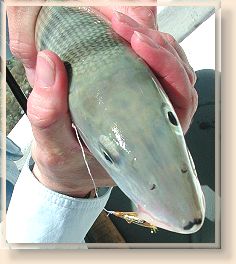
The bonefish loved it on a recent trip to Belize.
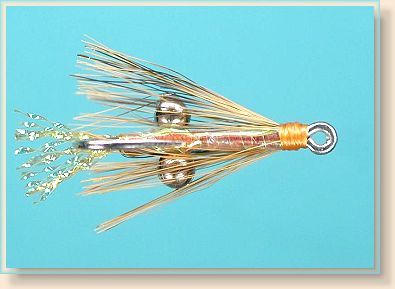
Too many bonefish patterns don't look like anything in the water. By
that, I mean they look vaguely like shrimp or crabs, but they don't really
look like shrimp or crabs. On the other hand, the Shrimpf does look like
a shrimp when you put it in the water. I'm not the only one who sees it
that way either. The bonefish of Belize chose it overwhelmingly over
the standard patterns tried by the group I was with.
(See Belize part 3)
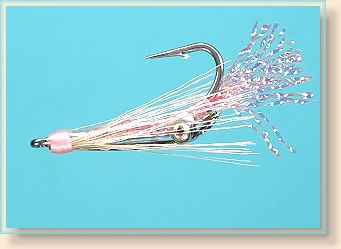
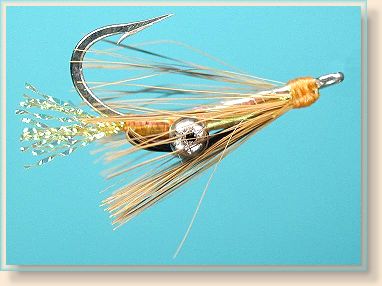
The Shrimpf incorporates some of the key features found in most successful
bonefish flies. It has a body that seems to glow and has some crystal flash
that attracts fish. Unlike most other bonefish patterns, it's easy to tie and
can be easily varied to match the size, color and sink rate of the fly to the
desires of the fish. Except for the cost of hooks and a variety of crystal
flash, these flies aren't expensive to tie either.
Materials: Al's Shrimpf
Hook: Mustad 3407, S71S, C70S or equivalent stainless saltwater hook, size 4 to 8.
Thread: 3/0 orange thread.
Tail: Orange crystal flash.
Back and hackle: Long fox squirrel tail hair with dark tips.
Body: Wide pearlescent tinsel (I usually get mine from the
long tinsel sold for Christmas decorations).
Eyes: Silver bead chain. For less weight I use
pearl craft beads in the smallest size I can find.
Cement : Any water-base cement will work.
Tying Steps:
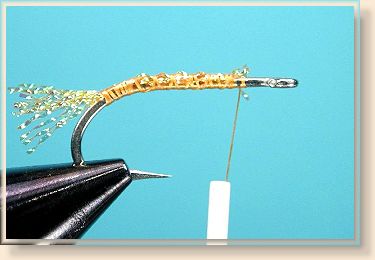
1. Lay down a thread base. Tie a small cluster of crystal flash fibers
to the hook securing the fibers slightly past the beginning of the hook bend
(12 to 24 strands depending on hook size and how bulky you want the fly
to be). Trim the crystal flash to extend 1/3 to 1/2 the hook shank length
past the bend of the hook.
2. Select a small cluster of squirrel tail hairs (30 to 50 depending on hook
size and desired bulk). Remove all the under-fur using only the long, stiff
hairs. Trim the tips. Tie the hair to the hook, tips first, securing it to the
same place on the hook bend you secured the crystal flash.
3. Tie in a strand of wide, flat pearlescent tinsel, securing it to the
same place on the hook bend.
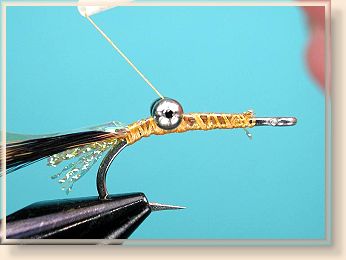
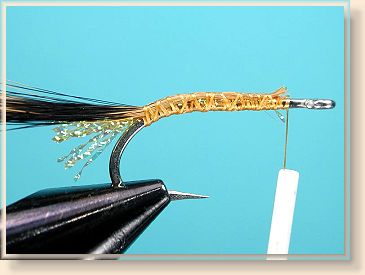
4. Tie in the bead chain eyes on top of the tinsel using figure-8 wraps
to secure them to the hook.
5. Start wrapping the tinsel. Your first wrap should pass between the
eyes and tail, then under the hook and eyes covering the thread used
to secure the eyes.
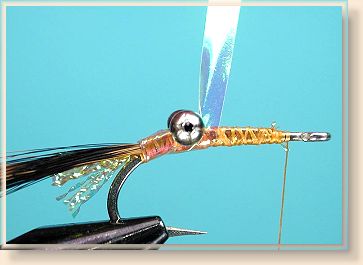
6. Wrap a smooth tinsel body all the way to the eye of the hook.
When you have the body finished, tie the tinsel off and trim it close
to the hook.
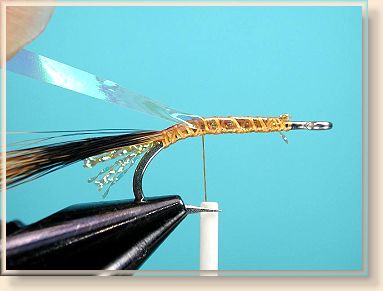
7. Pull the badger hair over the top of the hook, between the bead chain
eyes and secure it tightly behind the hook eye.
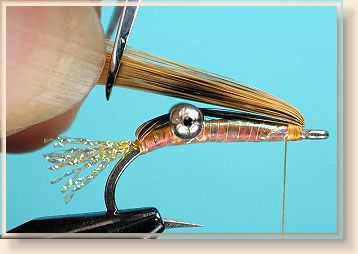
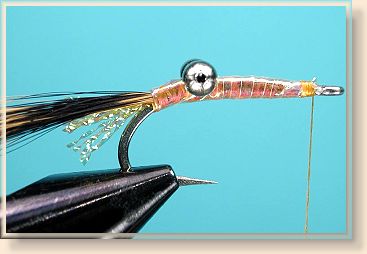
8. Pull the hair back toward the tail measuring it to extend half the
distance from the hook bend to the tail. Trim the hair at that length.
9. Flare the hair around the hook trying to keep it as even as possible
on all sides of the hook.

10. Hold the hair in place and secure it to the hook building an even head
as you tie it down.
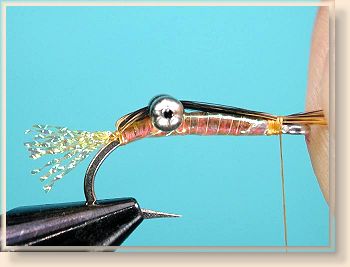
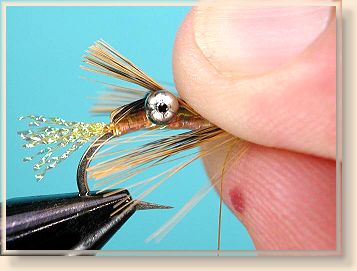
11. Whip finish and cement the body and head. I apply a drop of cement
to the hair at the eyes to secure them to the body so they won't move. Your
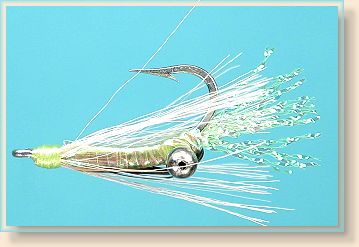
finished fly will swim with the hook point up as shown.
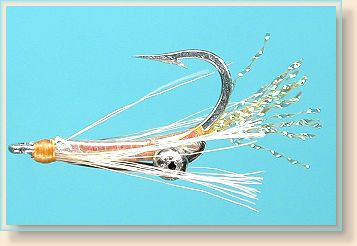
12. From the top it should look like this.

One last note; it seems this fly is a fair match to small crayfish. A couple
of local guys have already tied it (based on the flies I have in the vise case
at work) and have been clobbering the trout in a couple of local lakes.
For freshwater you don't need stainless hooks. ~ Al Campbell
|