Our Man In Canada
January 4th, 1999
FAOL Logo

Build Your Own Trout Net
You'll have the best looking net on the stream!


By Clive Schaupmeyer

Feathered Frame

Note: This is not an instruction on how to build a fly-fishing net, but an overview of the process.  If you are interested, get together with some friends and track down a local net builder to work with you. If you have detailed questions send them to me and I will try to get an answer back to you.

 There is something about wooden nets that we all like. They fit the 'organic' outdoorsy view we have of ourselves. Which works provided we ignore the SUVs, graphite rods, space-aged waders, and all the other tackle. No matter, wooden nets are a nice touch.

Building a fancy wooden net seemed mysterious to me, but with the expert instruction we received it was not difficult. That's not to say you can't build one on your own either, but having a guide was a help. Here's how several club members and I got into building a net.
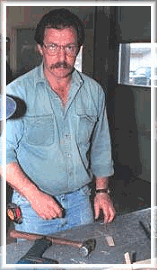
Net building instructor, Alan Kloepper

About two years ago a new member, Alan Kloepper, showed up at our local fly-fishing club meeting with a handmade net. The gorgeous net was passed around and fondled by drooling club members. Alan was clearly a fine craftsman, but the obvious questions were: Could we do that too, and would he show us how?

Late last winter several club members gathered in the local school division maintenance shops on a couple of Saturdays and Alan guided us through the construction of hand-made nets.

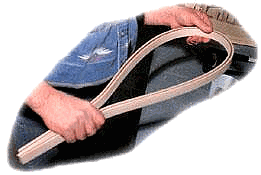
Our nets are made from four wood parts: three clear (knotless) hardwood strips to form the frame, and a handle insert. Our group used combinations of dark walnut and light birch strips. Other woods like maple are also suitable. I used the walnut on the outsides of the frame and placed the lighter birch in the middle, like a rye and cheese sandwich. I also decided on the darker walnut for the handle insert. Others used the reverse combination.

Following is a summary of the basic materials and steps for one net:

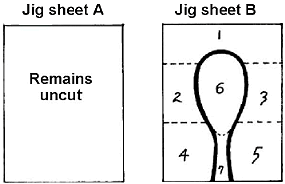
  • A net shaping jig is made from two rectangles of strong 3/4-inch particle board. Plywood could also be used. (Details on request.)

    Net Jig Drawing

  • One rectangle of particle board remains uncut and is the base of the jig. (Jig sheet A in the diagram.)

  • A 1/2-inch strip of wood is cut from the second piece of particle board (Jig sheet B) in the desired shape of the net. We used a traditional teardrop shape. The veneer wood strips that will become the frame will eventually be formed in this opening.

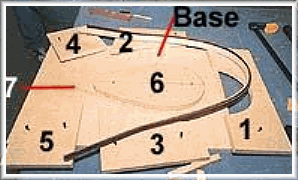
  • The top is then cut into seven sections. Five outside sections and two inside sections.

    Jig Bases

  • Inside section #6 is permanently screwed to the uncut base section of particle board.

  • Three thin strips of wood about 6 feet long and 1/8 inch thick are cut on a table saw.

  • The strips are soaked in hot/warm water for 3 hours in an upright 4-inch plastic PVC tube that has been capped on the bottom.

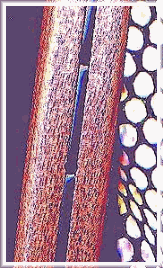
    Net Clamp

  • To pre-form the wood strips (prior to gluing), the soaked strips are hand formed around jig section #6 (screwed to the jig base rectangle), and jig sections 1 to 5 are clamped and then screwed into placed around the veneer strips.

  • The strips are allowed to set (preferably) overnight, although we were on a tight schedule and waited no more than 2 hours. In damper climates overnight would be better.

  • A handle insert is cut from a solid board of either the light or dark wood.

  • The pre-formed wood strips are removed from the jig.

  • The wood strips and handle insert are coated with carpenter's glue on all contact surfaces.

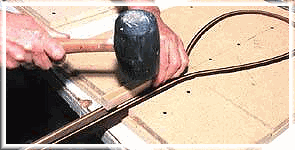
    Mallet

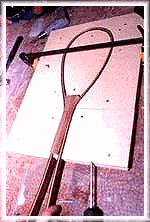
  • All four pieces are set into the jig which is again secured with screws. This is tricky. (Section #7 is removed prior to this stage and set aside. The wood insert handle replaces section #7 during the gluing process.)

  • The whole affair is allowed to dry for 24 hours, then the net frame is removed and sanded.

  • A thin shallow groove is routered into the outside of the frame where the webbing is to be stitched. (This is tricky.)

    Net Frame

  • Two or three coats of Spar varnish is applied to the net frame.

  • Holes are drilled at about 1 1/4- inch spacing in the grove around the net frame.

  • Nylon cargo netting is cut to shape and sewn with a serger.

  • The webbing basket is hand laced to the frame with vinyl lacing. Manufactured net webbings can also be used.

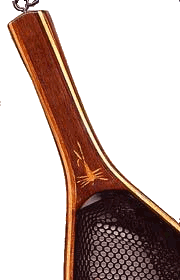
    Net Close-up

    The whole process took something like 10 hours for each net. There are several tasks that require two or three sets of hands so it would be a good idea to work with others. I have also left out some of the trickier details of construction, but hopefully you get the idea of what is involved. Alan's experience was a boon to us novice net builders.
    For the group project we all used a teardrop-shaped frame copied from an old wooden net. Since then club member Ken Zorn has drawn patterns for several frame shapes using a computer drafting program. Alan Kloepper has now completed twenty handmade trout nets of several shapes including standard teardrop, triangle and narrow catch-and-release. Nice looking nets.

    We'll likely have another net-building bee again this winter. I hope so because I gave my net to my fishing partner John. The net was baptized in October when John and I were out. So now I have to build one for myself.

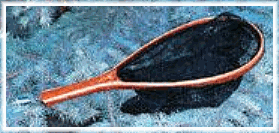
    Finished Net

    Closing thought for the week is credited to Edward R. Murrow (1908-1965): Anyone who isn't confused really doesn't understand the situation. ~ Clive Schaupmeyer

    Our Man In Canada Archives
  • Bio on Our Man In Canada

    Clive Schaupmeyer is an outdoor writer and photographer. He is the author of The Essential Guide to Fly-Fishing, a 288-page book for novice and intermediate fly anglers. His photo of a boy fishing was judged the best outdoor picture of 1996 published by a member of the Outdoor Writers of Canada. He fly-fishes for trout in Alberta's foothill and mountain streams and for pike near his home in Brooks, Alberta. For information on where to find, or how to get a copy of Clive's book, Click here!

    [ HOME ]

    [ Search ] [ Contact FAOL ] [ Media Kit ]

    FlyAnglersOnline.com © Notice