WOW, that looks really good. I hope mine looks half as good when I get it done.:roll:
I know this is late, but if anyone is having problems with guide spacing on a shorter blank, look at schneiders rods spacing chart (highlight the chart to see the numbers) (http://www.schneidersrods.com/guide_spacing1.htm) or you can use one of these to calculate your own.
 designation
 downlocking reel set
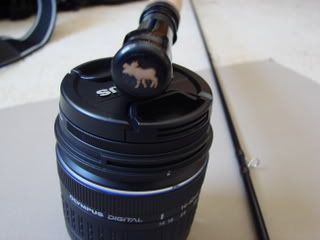 gotta take care of the plug!!
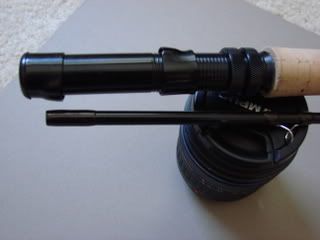
 did a spigot ferrule (thanks Mike!!)
On to the rod sock!!
Betty that is a great looking rod, very well done. Who ever gets it is one lucky fly fisher.
Betty that looks really good…
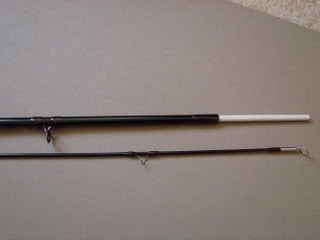
Question…my piece were cut into two equal parts, is anyone else doing a spigot with two equal pieces…am I SOL as far as making the piece equal when unattached as the spigot will more and likely stick out of the butt section a couple of inches???
Betty that does look very very good. I love the butcap
cholcomb, don’t worry about it!! If the pieces go together, and hold :rolleyes:, it’ll fish just fine!!
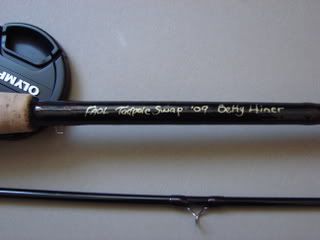
Thanks Guys! It was a fun build! Looking forward to doing it again!! Buttcap/plug was fun … couldn’t just leave it looking so “plain”!! Anybody else use the “inexpensive” reel seat in a down-locking position?
I did mine that way. One section is a bit longer, but it really isn’t an issue IMO. Otherwise, you have to go with the metal ferrules. Not really that expensive either.
thanks…I was originally thinking metal ferrules but ran into problems…see installing ferrules…
well if others did it that way I guess…it shouldn’t be a problem
Ok I’ve got the spigot ferrule in…about how much should stick out…I heard 2 inches…which is about what I have…should it be more???
I have 2 inches stickiing out on the spikot ferrule. The top fits down all but about a 1/4 inch so as it is put together over the years it allows for wear. glued in with rod bond I don’t think it will ever come out.
Can I use epoxy to attach the spigot ferrule?..
harleybob…thanks, I’ve got about a 1/4 gap…I read that it is for wear as well.
set and mark the spigot ferrule where it comes out of the bottom half of the blank. now epoxy the bottom half of the spigot below the mark that shows where it comes out of the bottom half of the blank. Drop it through the bottom half of the blnk, you will have to push it through, and grap the tip of the spigot and pull snug. Let the epoxy cure and you are ready to go. Preaty easy once you do it the first time. before that it can be a little nerve racking LOL. hope this helps BOB
LOL!! That was the hardest part of the build … getting the spigot through the blank! There aren’t many things in my house thin enough or long enough to push it through!!
My blanks came in busted up so I used them to push the spigot through guess there is something good in evrything even if you thought it was a bad thing LOL
HB…with the busted blank…did you use that as the spigot…got a perfectly matched taper ![]()
Betty I agree it was pretty nerve racking getting it to fit…nothing a cordless drill and sandpaper couldn’t fix.
Since, I don’t have something to ram it in…HB did I understand you right… just pull spigot snug…
Thanks
yea you understood right. When the tip of the spigot comes out grap it and pull snug. Let it set overnight to set up with the epoxy. I ordered a 12 inch ice fishing rod to make the spigot.
thanks…all right…let the building begin ![]()
If you are having trouble getting the piece to come out of the blank because of the epoxy stickyness. Try usiing a 1/4" dowel to “ram it home” until it gets exposed. then grab it and pull the rest of the way out. Wipe off extra glue with some DNA(denatured alcohol)
ok rod is wraped and waiting for the finish to be applied. One more rod to go then it is break time for about 3 months so i can get other things done. Finish should be done by Sunday.