Switch Rod - Step by Step Build

Ok, well I am back from vacation and had a little bit of time yesterday to work on the rod again…

When I left off I had finished glueing up the bottom piece of the handle. Next step was to shape this piece. Ideally I had wanted to mount a short piece of rod onto a jacobs chuck and then slide the handle piece on to that. Kind of a free floating mandrel. Well the jacbos chuck wouldnt open up wide enough, and my three jaw chuck wouldnt close far enough so I decided I could just make one out of some scraps I had laying around. Here is the scrap wood mounted up in the lathe…

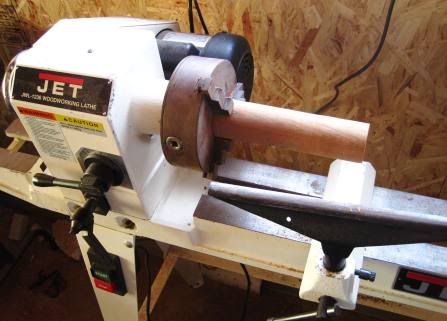
Next step was to turn this down to the proper size…Since it was turned on the lathe it is perfectly centered and should give a nice true round handle.

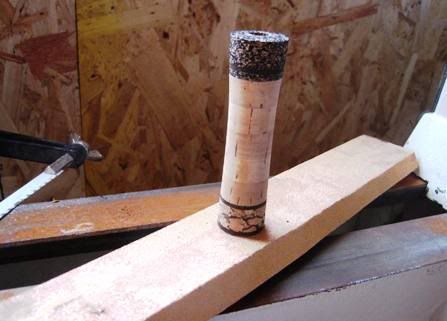
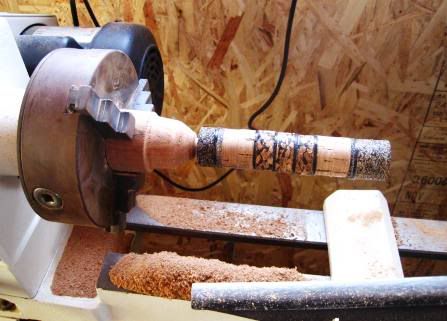
The nice thing about doing it this way was that I was able to sand the mandrel down so that the fit was perfect. I was a little concerned about the wood breaking, but since I would only be applying light sanding pressure I figured it would be alright. Here is the bottom of the handle mounted on the wooden mandrel.

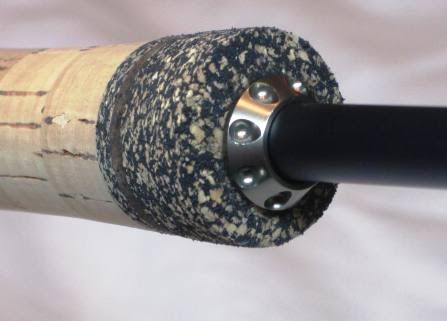
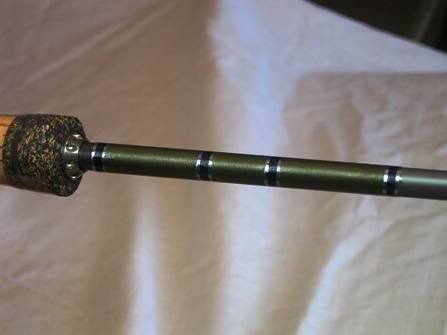
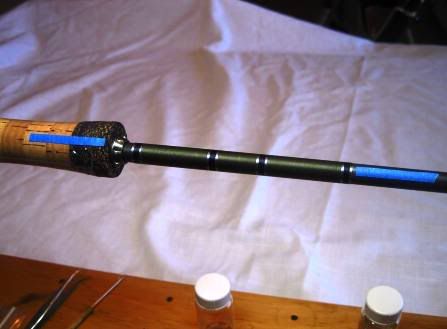
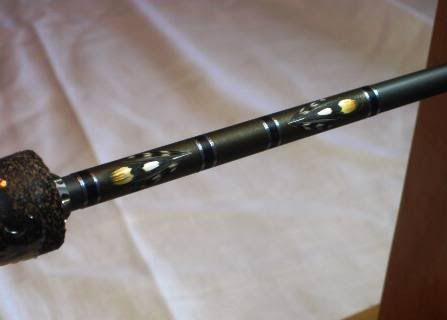
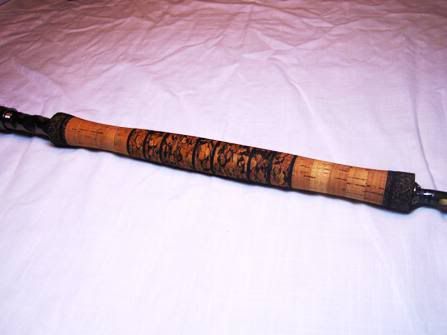
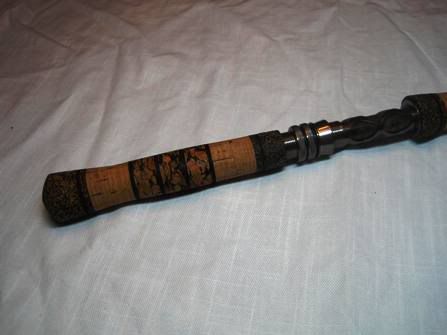
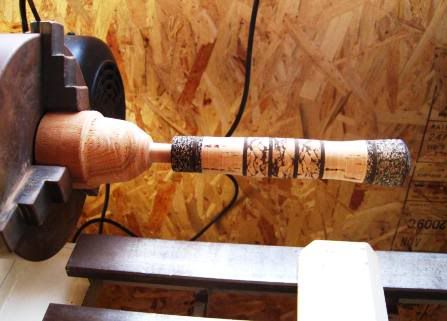
I sanded this handle down just as I did the front part of the grip. It turned out pretty good. I like the looks of some of the handles with dramatic curves and profiles, but dont think they feel as good in the hand. This handle has a slight bit of shapelyness to it, but most importantly it fits my hand very nicely!

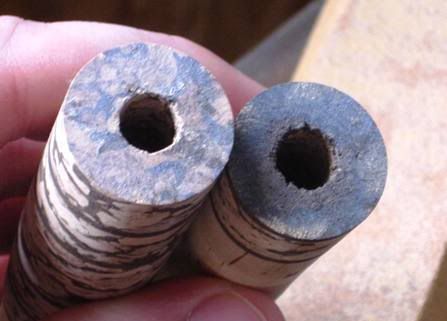
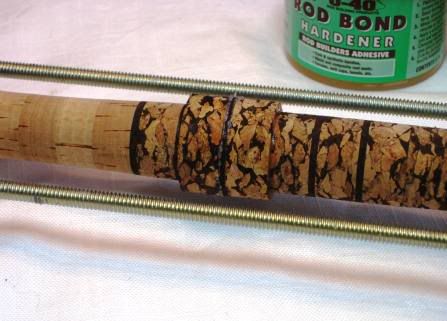
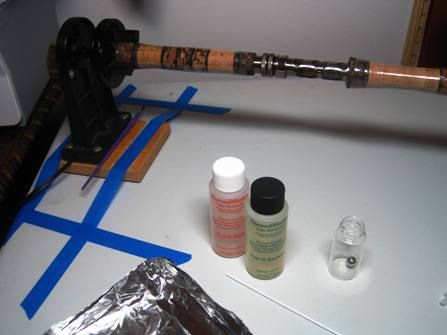
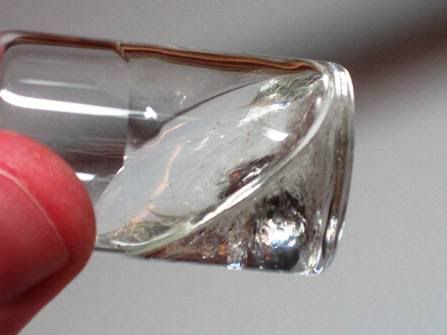
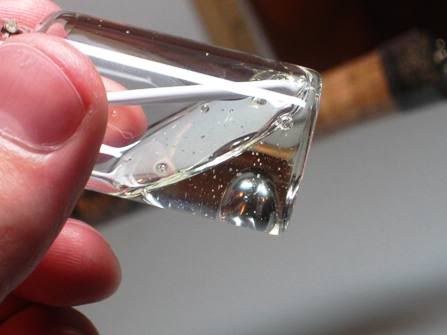
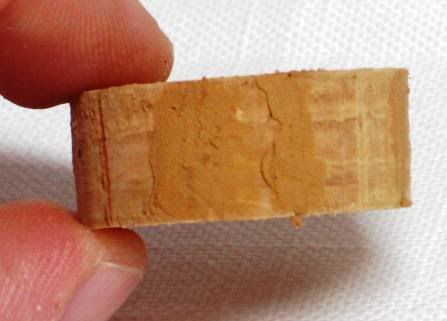
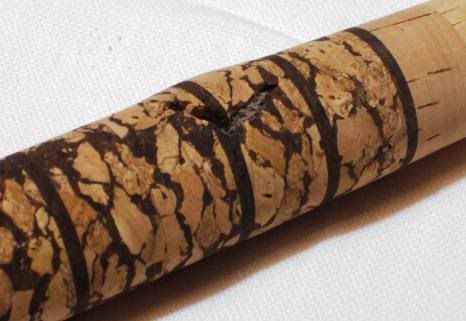
The regular cork I bought for this rod was supposedly FLOR grade, but my source was one of these major sporting goods retailers that also happens to sell some rod building components. Obvisouly not the best source for cork, but I had gift certs there so thought I would give it a try. Anyway long story short there are some pits in the cork that I felt were too deep to ignore. I like the look of some pits and streaks as I think it adds a little character, but I dont like ones deep enough that I have to worry about them chipping out at some time…here are some of the culprits…

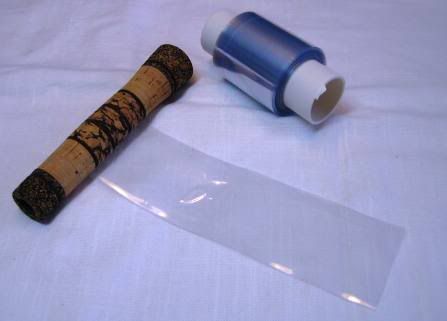
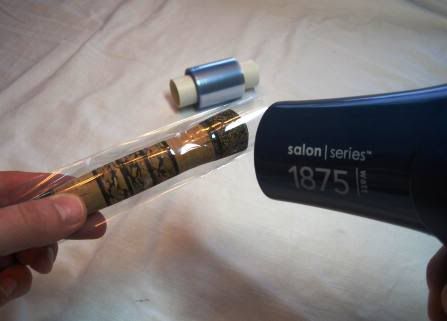
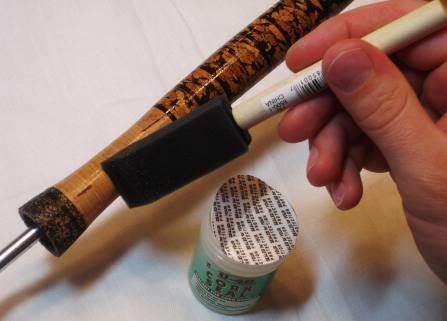
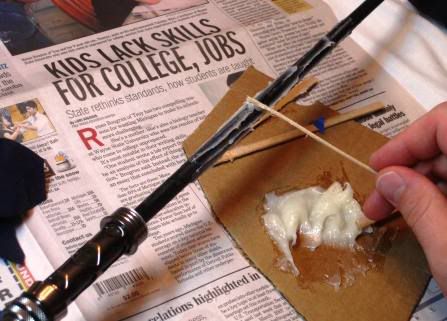
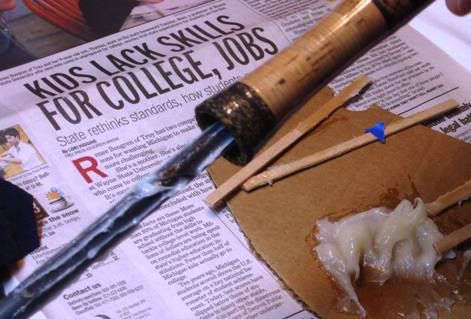
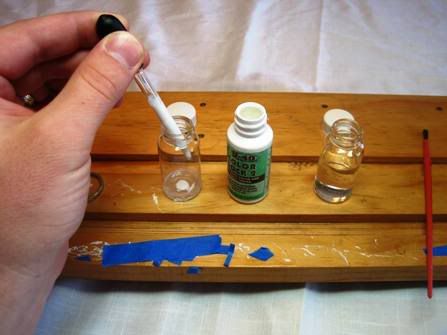
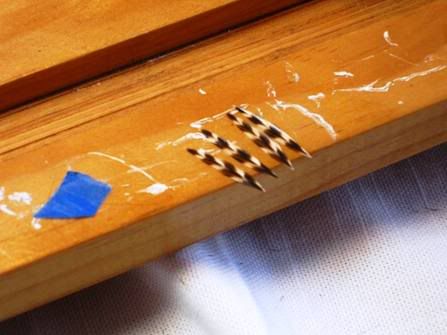
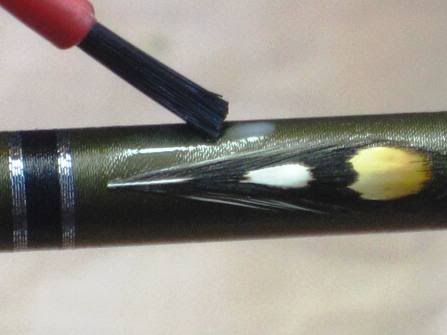
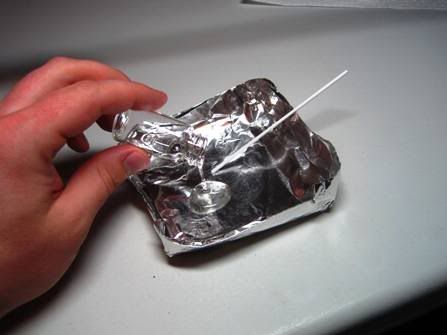
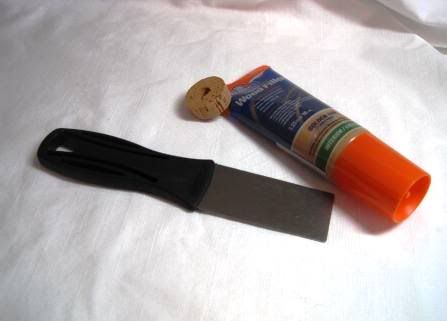
I had heard of some people using this elmers golden oak wood filler to fill cork so I thought I would try that out since I had never used it before. Decided to try it out on a test piece before I committed to using it on my handle…

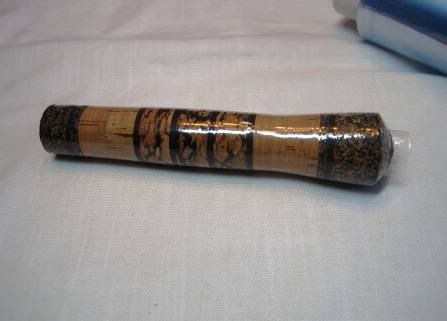
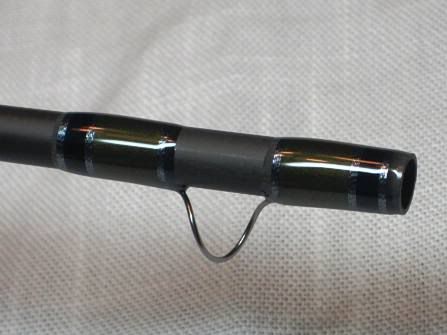
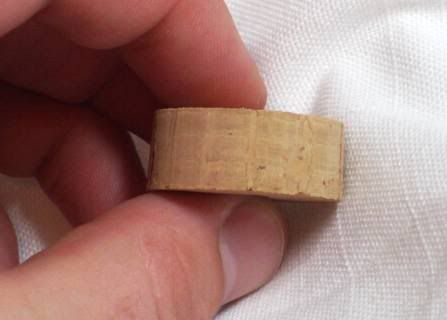
After wiping most of the material away with a damp cloth and then sanding the residue after drying I ended up with this. Looks pretty good. I think I will use it on the handle…

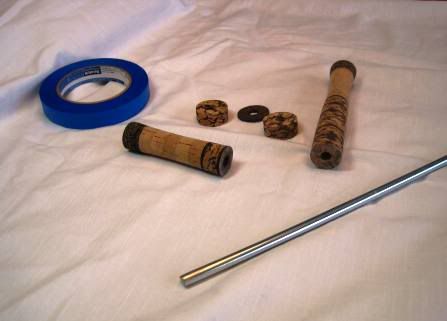
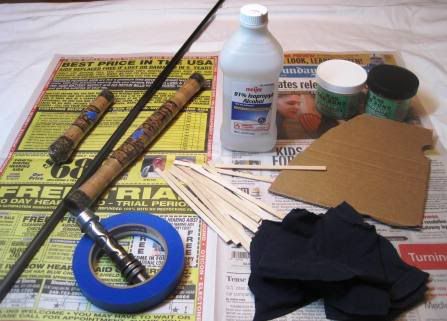
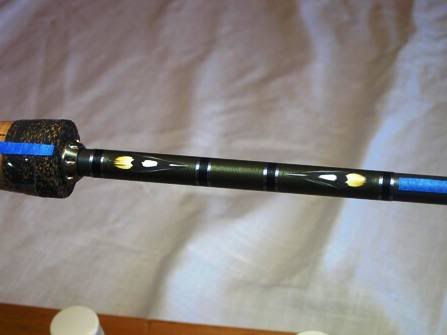
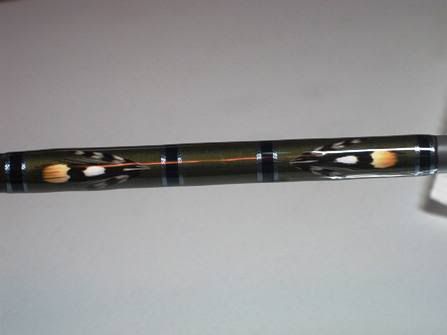
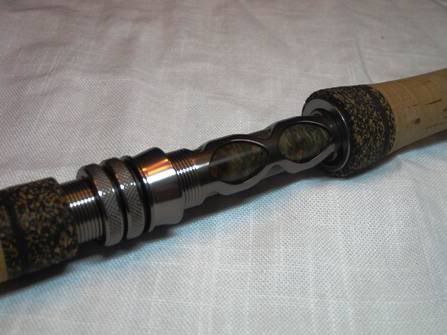
Next step was to fit the pieces to the rod blank. The butt piece had already been reamed to size, so just had to ream out the reel seat and the front grip. Round file mounted ona hand drill can make quick work of this job…

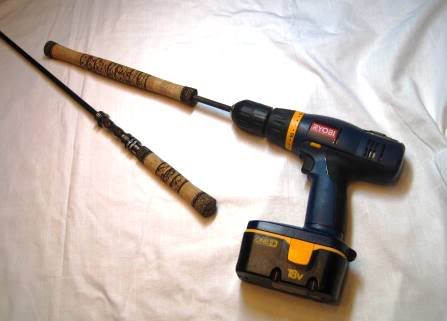
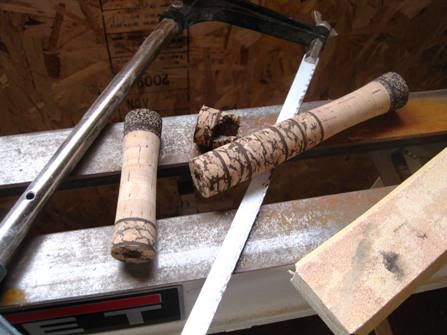
The round file didnt quite enlarge the hole enough and looking at it I figured that one of my reamers was about the perfect size. So I mounted the reamer in the drill and began to ream it out more…I dont exactly know what happened but for some reason at one point inside the grip the grit on the reamer all decided to come off. I started to feel the handle bulging for some reason and tried to remove the reamer but disaster happened…

I guess I dont really understand why this happened like this…really bums me out. Never experienced this before, and of couse it happens on a larger handle (read more expensive!) My wife asked me if I could just glue it back together…I’m pretty sure if I try to clean out all the grit and glue it up it will look pretty bad…so I guess I will be making a new handle. Really bums me out because this handle was a perfect fit and felt really good in hand. Oh well, such is life. I am short 5 cork rings though so now I have to place and order and wait for it to get here…serious delay in the project. I wont post photos of making the new handle as you’ve already seen how I do that…hopefully this set back wont take too long to fix.

Yonks

Yonks,

Try to cut out the broken rings of the grip you have already made. Ream some new rings to the same ID and glue it back together. Then turn it down on a mandrel. I hope it works, no sense in throwing away that nice grip you have made. The tape must have broken and unraveled while you were reaming.

Greg,

Beautiful idea! My brain was too stricken with dissapointment to see any solutions. This should work nicely. I have already begun the “surgery” and will hopefully get to post some pics tonight. My only concern is that since I have already reamed out the center of the handle that my gluing and turning mandrels are now a little small. Should be able to build them up with some painters tape. I just hope things end up relatively centered. You da man! Thanks!

Yonks

The most you will be off center, as long as you use a continuous piece of tape, is the thickness of 1 layer of tape. That is not enough for you or anyone else to notice.

I would center things and glue up, then turn it on the same mandrel that you glued on. Then you are not having to shim up two different mandrels.

Ok so I started surgery on the jacked up handle today. Thanks to Greg F for the great pointer!

First step was to cut out the “infected” area. I did this with a hacksaw instead of with power as I wanted to ensure I wasnt cutting anything I didnt want to cut…power tools work good at cutting…sometimes just too good. I tried to cut close to the glue line, but still leave a little extra behind that I could sand away…

Next I sanded down each of the pieces so that I was directly on the glue line, trying not to sand away too much but making sure I removed enough material and kept it nice and even and smooth all the way around…sandpaper mounted on a flat surface worked great for this…

The resulting “limbs” after amputation and preping :slight_smile:

I had enough of the exotic cork around so that I had everything I needed. The mandrel required shimming with painters tape to get a nice tight fit. This photo however was taken before that.

Glued the new pieces in place. I think this might work out alright. I’ll give it a few days in the clamp and then put it back on the lathe. Hopefully things turn out well. I am going to place my order for more cork anyway, since there is always something else that I can use it on…just in case I have to sand away too much material or make another goof…

OK…now I’m paranoid about my handle pieces after that mishap. I filled the few pits in the bottom piece that were bothering me and sanded them flush. Decided I would shrink wrap this now to protect the handle until later…

Simple as putting the shrink wrap around it and then blasting with a hair dryer…

This stuff is cheap and easy to apply and will keep the exterior of the handle protected from say things like epoxy during glue up…etc… has a perforated edge so it comes off easily.

So thats it for now. I think the surgery went well. The patient is still in critical condition, but is stabilized. With some luck we can expect a full recovery. Other things going on are wrapping the guides…but we already saw that. I will post another update as I make more progress. Thanks for checking in.

Yonks

Ok back with a quick update on the status of the rod. So last installment you saw me trying to fix my broken handle. How did it turn out???..GREAT!!! Yippee I was pretty pumped it turned out and I didnt have to build another handle. I reamed it out to size under hand power this time. Here’s a photo of the mock up. I added the reel on for the photo so you can get the full effect :lol:

My cork came in today for the replacement handle. Looks like I wont be needing it…anyone need a switch rod handle made? LOL I actually have another project coming up so the cork wont go to waste.

I decided I wanted to seal the handle up so I applied cork sealer to whole thing…

Still working on wrapping the guides. Those are almost done now. Yeah I know I am slow :lol:, but I am only working on this for a little while at night…word of advice…dont try to wrap guides in front of the TV…darned olympics…they keep grabbing my attention away.

I already had a winding check for this rod, but I saw some pretty sweet ones that Batson came out with for 2010 so I had to get some. Check it out…I think it looks pretty cool.

Ok thats all I got for tonight. Wanted to give a status update on the handle. Everything is back on track now. I hope to glue the handle assembly in place this weekend and finish up all the guide wraps. That will leave just the butt wrap and epoxy left to go. I can see the light at the end of the tunnel…

Yonks

Very cool. I do like that check as well its got a cool look to it.

Steve

Good job on the cork handle, it looks great. It takes time when you have to fit it in between family and work, etc.

Greg

Another quick update…

Was able to glue the handle assembly up tonight. First step was to shrink-wrap the pieces so that they were protected from any goofs with the epoxy during glue up. I then decided which sides of the top and bottom pieces were going to be the “up” side and marked with some pieces of blue tape. Next time to gather all the components up to do the glue up. Here’s the whole pile…

I then LIGHTLY scuffed the blank under the handle area to give a little better foot hold for the glue. Then I just apply to the glue to the blank.

To make sure you get enough glue in the joint make sure to work the handle back and forth up and down the blank while twisting. You will get some glue on the blank above the handle but thats OK it comes right off with some IPA.

Once all the parts are in place I like to clean up any little spill over with the IPA on a rag and then apply tape in the manner shown below to make sure the parts all stay together over the epoxy “set-up” time…

Its important to keep checking on the handle to make sure things haven shifted while waiting for the glue to set-up. I like to keep the handle resting on the butt piece in a vertical manner, which should limit any movement.

I’ll give the glue a couple days to set up completely and then continue with the winding check and butt wrap.

Stay tuned…were getting close to finished product :smiley:

Yonks

Lookin real good Yonks…so whats in mind for thread colors?

Thanks Steve! I’m getting real anxious to get this baby out on the river!

Thread colors will be olive green, navy blue and Metallic Steel Blue (I think it looks more like a Titanium color if you use it in small trim bands). The reel seat has a bit of the olive/navy shade in it so I wanted to mimic that. There should be an example of the wrap on page one at the bottom, without finish though.

Yonks

Ok. Back with another installment…

I am a big fan of decorative wraps on my rods. Typically I do a Chevron wrap matching the color of my guide wraps. These wraps are typically fairly long and arent a problem when using a normal handle. Since this two handed handle system is so long the space between the front of the grip and the first ferrule and guide was shorter than would be typical. I thought a large chevron would be too much here and seem too crowded. I decided then that I would go with a feather in-lay. The following is the process I used for doing the inlay.

I did a test inlay to practice the pattern with but I wont show you that here as it will ruin the suspense…

First I layed down my background wrap. This layout may seem strange at first but I promise it will all come together in the end.

Since this wrap will be centered on the top axis of the rod I layed out tape lines to help me make sure everything was in line while I was laying up the feathers.

Heres the pile of components I used for the inlay. I noticed after this photo that I didnt have a bodkin and tweezers in the photo so just pretend those are there as well.

First step was to make a diluted solution of the color preserver. I used equal parts of color preserver and distilled water. You want to make sure you use distilled water not “spring water” as those contain minerals. Diluting will give a longer working time as well as allowing you to see what you are doing easier because of the less opaque solution. Also make for less “sheen” as you apply multiple layers.

The focus of the feather in-lay is typical…jungle cock eyes. They just look so good. Here I selected a pair and cut to equal lengths.

I dipped the brush in distilled water and then give it a good tap to help remove any air bubbles in the brush…I then placed a dab of the CP solution on the wrap in the selected location and set the jugle cock in with tweezers.

I applied CP to the top of the feather to sink it down onto the wrap and then after lots of painstaking work aligning and manipulating each piece of the feathers to the exact placement I wanted I ended up with this…

I let this dry for about 2 hours and then proceeded. Next step was to cut the grizzly hackle to length…

Again placed a drop of CP in the correct location to help set the feathers in place…

It was a royal pain in the rear making sure all the spacing and alignment for the grizzly hackle was in the correct place but below is the final result. I think it was well worth the trouble…

I then recoated the entire wrap with a non-diluted sample of CP to lock everything in place real good.

You may be wondering why the gap in the middle. This is where I will place my logo after the first coat of epoxy goes on. Oh and by the way this was the last step before epoxy. All the other guides are wrapped and CP’d. I hope to be doing epoxy tomorrow night as long as something else doesnt pop up in the schedule. I hope to have a completed rod by the weekend.

Thanks for looking.

Yonks

Excellent tutorial. Thanks for your time and effort.

Dana

Ok so I am back for more. Was able to completely finish the rod this weekend. This post will show the epoxy work and then I will post again quickly with the finished rod photos.

For the epoxy on this rod I chose to use threadmaster lite. I typically use Flex-coat lite with great results, but figured I would try the threadmaster since lots of people seem to like it. One thing I noticed was that is was very easy to eliminate any bubbles with the threadmaster. I like the viscosity of the flex-coat better though. I would certainly use the threadmaster again, but I wouldnt say I found it to be much different than what I am used to.

Ok so here is the rod all set up in the turner. You’ll see that I have it taped down. This is because these things slighly vibrate as they run and since I run these overnight while I am sleeping I figure its best to tape them in place and not have to worry about any movement. Oh and also since this rod is so long, I did it in halfs. So since I use two coats of epoxy that equals 4 nights of epoxy work…glad to be done :smiley:

Next step is measuring the resin and hardener. I highly recommend using syringes for this. I use 3 mL of each component even for small work to ensure proper stoichiometry. Notice the air bubbles in the syringe. Its important to let these migrate to the top and then push them out.

I mix my epoxy in 20mL glass vials with a stainless steel ball. Here is what the epoxy looks like all marbled up as you first begin to mix. I mix by just rolling the flask around and around. The steel ball will do the mixing.

After a couple minutes of mixing the epoxy will have no marbeling and is ready to go. I scraped off the sides and mixed with a plastic rod to ensure everything was mixed well which resulted in the bubbles in this photo. Probably unnecessary but I wanted to be sure. The bubbles are no problem. They will go away soon…

I then pour the epoxy out onto an aluminum foil pan which spreads the epoxy thin and dissipates the bubbles.

I didnt take any photos while epoxying because…well my hands were occupied. But you can imagine the process. I use a brush to apply my epoxy.

Here is the butt wrap with a coat of epoxy on it.

The butt wrap was then to receive decals so after 24 hours I applied these decals after trimming to size with a razor blade. You will be able to see the results in the next post…

I then applied a second coat of epoxy in the same way as the first.

Ok thats it for now. Next post has finished photos…

Yonks

The switch rod is done! Finally! I cant wait to get this baby out and chase some steelhead with it. Turned out pretty well I think. I hope that this tuturiol was helpful and entertaining. It was a bit of work doing all the photos and write ups but I’m glad I did it. I hoped it proved useful to both beginners and experienced rod builders. Sometimes its just nice to see the way that others do things. I certainly know that there are probably better ways to do some of the things that I did in this build, but the methods worked for me and the final product looks pretty good. Sorry these photos arent the best quality. I hope to take some good “glamour” shots next to the river when I get out. Thanks for following along. :smiley:

Front Grip…

Rear Grip…

Reel Seat…

Butt Wrap/Inlay - Top…

Butt Wrap - Bottom…

Stripping Guide…

Snake Guide…

Take care,
Yonks

Very nicely done, Yonks.

Thanks.

John

yonks,
I can’t begin to match your craftsmanship but I’m getting ready to build my own switch rod. Same blank, only in the 5 weight. I hope it turns out at least half as nice as yours. Your work is an inspiration to me. Thanks.

Yonks,
Well done! I am not usually a big fan of feather inlays but yours is very nice. The entire rod came out beautiful! Thanks for the work it was fun to watch it progress.

Yonks,

Beautiful rod! Many thanks for the very interesting an educational effort - your skill and artistry are an inspiration!

Cliff

Excellent job and tutorial. I especially liked your set-up for making the thin cork pieces that went into the handle and will try that on some future builds.

I make some wood inserts like that by first cutting the wood to the thickness I want, then cutting with a hole saw.

Dave