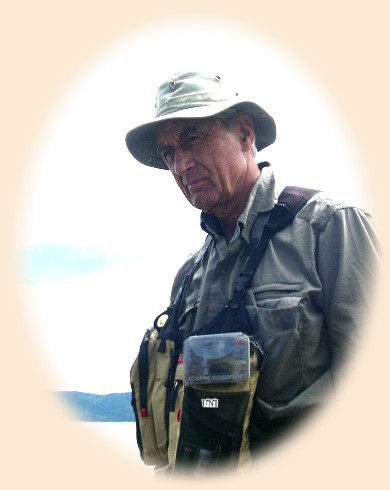
Polar Shrimp Tube Fly By Faruk Ekich
TUBES UP, AT THE READY
I consider myself one of the most fortunate amongst
fly fishers. Borne and raised on the banks of Vrbas,
a beautiful limestone river that decorates the two
millenniums old town of Banja Luka in Bosnia and
Herzegovina, I grew up with equally long tradition in
fly fishing, going back to its origins perhaps.
Braided horse hair lines going down to single strand
tippet and hand tied flies on the stream to meet the
whims of capricious prince - grayling …, but about
that subject, on other occasion.(For those that are
interested, there is an article: “Faruk of the North,”
by Michael Simon in the Art of Angling Journal,
Volume 2, Issue 4, that can be accessed on my web site
under
Links).
My good fortune followed me when, upon my emigration
to Canada in 1966, I came to live in Smithers, British
Columbia of all the places. There, I was tutored in to
the art of steelhead fishing by the greats of that
time like, Wally Booth, Ted Laboda and Hederingthon
whose frequent guest was Roderick-Haig Brown.
Later on, in 1970 I moved East where I waded into the
Atlantic Salmon tradition in Quebec.
The last 23 seasons I was obsessed with the beauty of
Salvelinus and sought the most remote places in Arctic
regions of Canada, like Sutton River in Polar Bear
National park for the sea going brook trout and
Coppermine River for the char. It was during this
period that a need to diversify from the traditional,
hook mounted fly, came about.
There were many reasons for that. Staying for three
weeks at a time in the land of midnight sun with
daylight around the clock, one spends lots of time
fishing - sometimes as long as 16 hours per day.
With the abundance of feeding fish, anyone can land an
embarrassing number of fish there.
The only challenge is, how to release them in the
best shape possible. Using the strong and heavy leader
helped in shortening the exhausting fights and
quicker releases. But, the Salvelinus family has a
problem with coagulation and the least amount of
bleeding can result in a fish’s fatality.
In my opinion, the traditional fly, with it’s long
shank hook has two major disadvantages for fish
safety: long shank and point down keeling.
In the prolonged fight, the leaver of the long shank
makes a larger hole (bigger wound) and the hook point
down, often gets the tongue hold where the blood
vessels are.
There is a third disadvantage that may be of detriment
for fish safety:
In the pool that has been disturbed with previous
fight, fish lies low and often, in an attempt to get
down to them, one snags the fish’s back. The ensuing
fight exhausts the fish (as a fisher trying to
recover it for the release).
Step by step, I developed this concept of the Tube Up
fly with the fixed short shank hook held point up.
In addition of reducing the fish injuries, it offers
the following advantages:
- Better holding then the long shank hook due to
it’s shorter leaver. - Better hook-ups, especially on the downstream
hanging fly when the fish dives straight down after the
rise. Closing it’s mouth on the fly at that downward
position, the full width of the upper jaw is at the
hook’s point reach, rather then just a possible tip of
the lower jaw when using the standard, point down fly. - It reduces the frustrations of scrapped fly due
to broken hook. - Enables you to choose the much lighter hook for
the desired gap on the large dry fly, which allows you
to have sparsely dressed fly with better float-ability. - Hook gets disengaged from the fly at the beginning
of the fight and fly stays out of harms way
of the fish teeth. - Tube Up, like the “keel fly” eliminates the bottom
snagging.
Commercially available tubes did not have the range
of sizes that I needed for my style of tying, at least
at that time. I wanted to have a choice of the tubes
with varying lengths, diameters and materials.
I use the metal tubes found in hobby shops- made by
KandS Engineering from Chicago.
Several sizes are offered in copper, brass and
aluminum. I use mostly copper for the wet and Q-Tip
for dry flies.
Both ends of tube are flared. Tail end to anchor the
shrink tubing piece which holds the hook position-
point up and front end to protect the head winding.
For plastic tubing such as Q-tip, the flaring is
easy - heat from a lighter. The metal tube needs
to be formed into flared end. While it is possible
to do it by gently tapping with the tapered tool such
as center punch or just an ordinary thread tap point,
it is a slow process.
I could not find the flaring tool needed for these
small diameters. So, I made a prototype (shown below),
which I still use, that accommodates two diameters:
1/16"(1.6mm) and 3/32"(2.4mm).
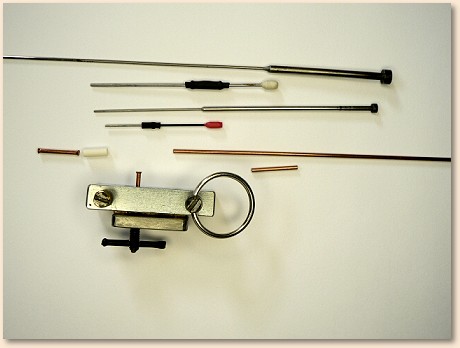
Flaring tool burnishes the surface of the flare into
a smooth finish which eliminates the need for a
plastic sleeve that is supposed to protect the leader
from chafing. In my opinion and experience through the
long use of sleeveless tubes, I do not believe that a
tube fly with its small weight has enough force that
could penetrate the leader’s surface. Anyway, the
flared ends assures that the edge does not
contact the leader.
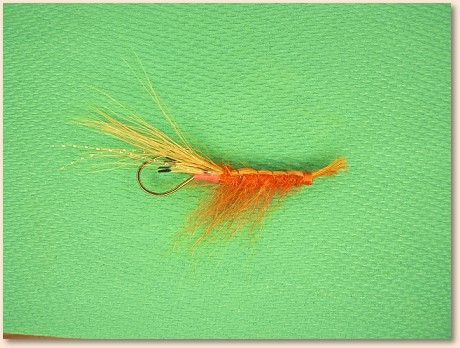
For this time I will describe the Polar Shrimp, the
wet fly for the char fishing. It is made for the
rigor of heavy duty Arctic fishing and refined for
durability and simplicity, not the appearance!
(When it comes to flies, I think that the beauty is in
the eyes of beholder). My favorite colors are: orange,
green, purple, amber and white.
Paul Marriner, the author of many books and articles
on fly tying and fishing, wrote an article in the
May/July 2005 issue of The Canadian Fly Fisher about
the Polar Shrimp and included it in the new book:
A Compendium of Canadian Fly Patterns"
(see: www.galesendpress.com if interested).
I hope that this concept can be of use to you as
well.
Happy tying. ~ Faruk Ekich
MATERIALS FOR POLAR SHRIMP:
Hook: Short shank up eye such as Daiichi 4250 or
Owners 5115 size 4.
Thread: UNI 3/0 orange.
Tube: Copper tubing 1/16"(1.6mm) O.D. X 1"(25mm)
long - flared on both ends.
Hook anchor: Shrink tubing 1/8"O.D.(3mm)X
1/4"(6mm) long color orange or white
colored with permanent marker.
Antennae, Carapace and Tail: Polar bear guard
hair - color orange with two strands of Crystal flash.
Eyes: Golden pheasant tippets section.
Body and Legs: Polar bear underfur.
Ribbing: Copper wire 0.010" Dia. (0.12mm).
Publisher’s Note: Legal Polar Bear fur can be obtained
in the US from Bear Lodge Angler, a Sponsor here on FAOL.
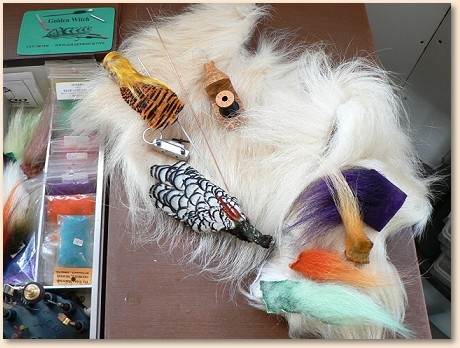
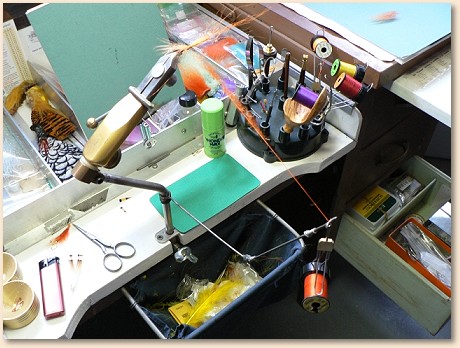
TOOLS and MATERIALS:
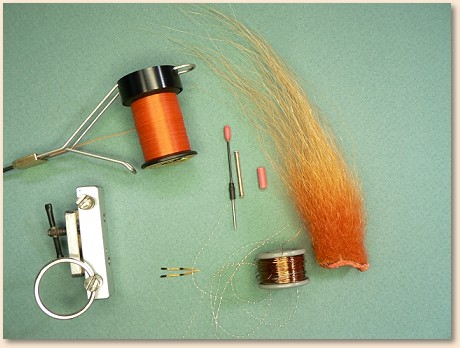
Clock wise from top:
bobbin with 3/0 thread
tube holding mandrel set, (This one is made out of an Ejector
Pin (see photo Special tooling above.) but any pin (such as
paper clip or wire), with diameter that enters inside of
copper tube and one end flattened and covered with
heat shrink tubing for better grip, will do.
In addition to that, a small section of copper tube
covered in shrink tube is used to grip the other end
of the tube as shown in next photo.
flared copper tube and heat shrink tubing,
polar bear hair,
copper wire, Crystal flash,
golden pheasant tippet section for eyes and
flaring tool.
TYING IN RIBBING:
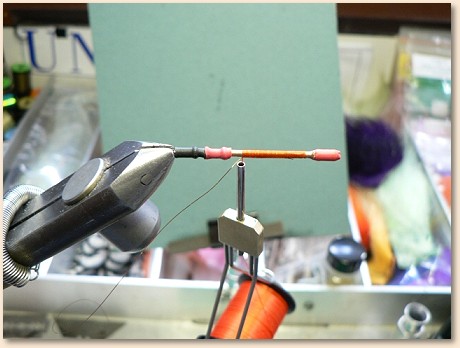
With the heat from a lighter, secure the section
of the shrink tubing at one end of copper tube
and place it on the mandrel as shown.
Apply pressure on the mandrel toward the jaws of
the vise to create the holding friction between the
jaws and the head of mandrel before closing
the jaws. Contact between three points of shrink
tube create enough tension that hold the tube in
place for good thread torque. Attach the ribbing.
TYING IN EYES:
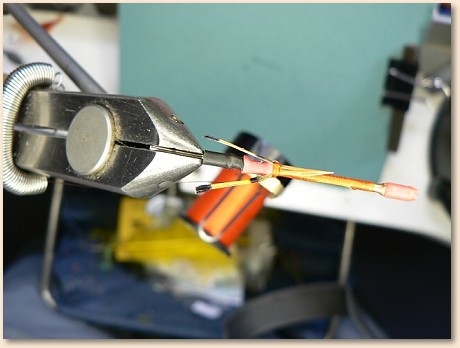
Continue with the thread up on the shrink tube just
before the “bump” created by the flare. (This “bump”
serves well to spread the eyes and the hair).
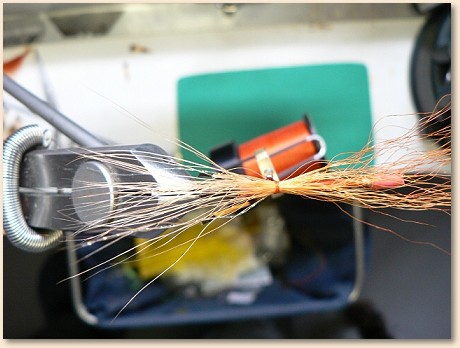
TYING CRYSTAL FLASH ANTENNAE:
Start on near side with one wrap, then swing the
other end to the far side and tie with second
wrap.
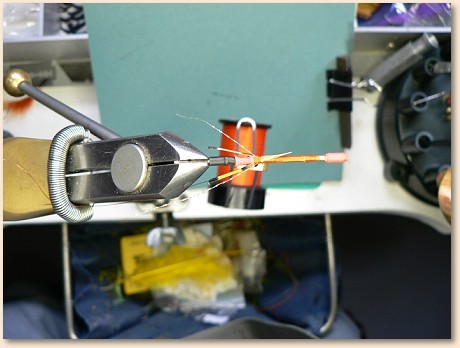
SEPARATING GUARD HAIR and UNDERFUR:
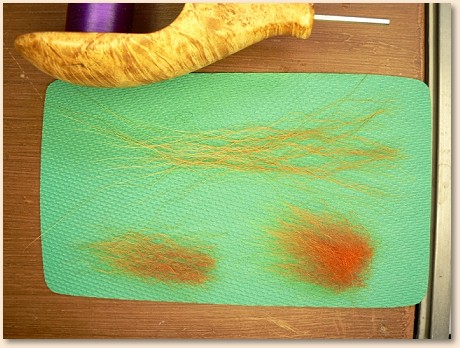
Polar bear section has three distinct lengths
of hair. Cut the clump that has sufficient amount
of guard hairs that will form the antennae,
back (carapace) and the tail.
Hold the tips of the guard hair firmly while pulling
gently on the other end of the clump.
You will separate the main, long guard hair.
Do the same now, holding the tips of the medium length
hairs and you will separate the finest fibers
that will be used for dubbing and the legs as shown.
Attach the guard hair extending out 1-1/2 length of
a tube, spreading it with the thumb nail around the
top.
FORMING THE DUBBING LOOP:
With griping “wax” such as “Wonder Wax” applied to
the thread section place the underfur making
sure that the tips are aligned to the left
and that they extend farther at tying point
going progressively shorter towards the end of the
dubbing loop. This helps to create somewhat tapered
profile of the legs.
(I double up the thread to form the loop but the
splitting method can be used).
DUBBING:
Wrap two turns over the tying point while “training”
the tips of the hair in direction facing the
antennae. Lift the tail end of guard hairs and
continue wrapping toward the head under the guard
hair.
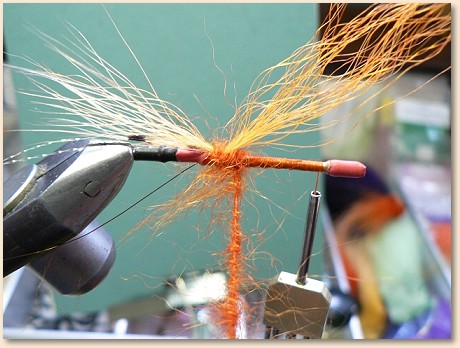
COMPLETING THE BODY:
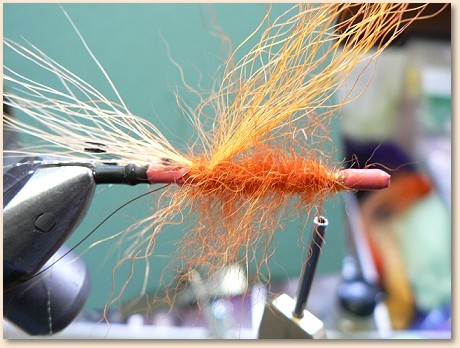
Bring the dubbing to a position approximately one
tube diameter from the flared end and tie down.
With your fingers, spread the dubbing hairs from the
top of the buddy downwards to form the legs.
RIBBING:
Rib in the opposite direction(4-5 turns), spreading
the guard hair with the thumb nail to form the back
(carapace?). Tie in and form the tail fanning the
hair out in as thin a layer as possible. Whip finish
and protect with head cement of a choice.
Tail can be shaped and manipulated to serve as a
lifting “fin,” much like the Rapala lure,
or it can be trimmed down if lifting is excessive.
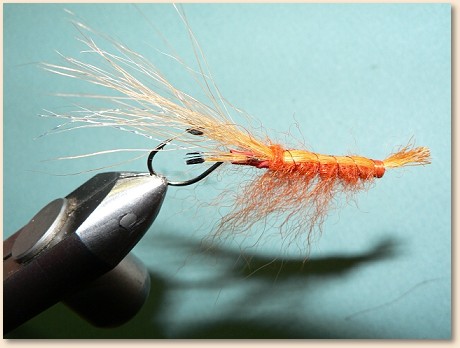
TOP VIEW:
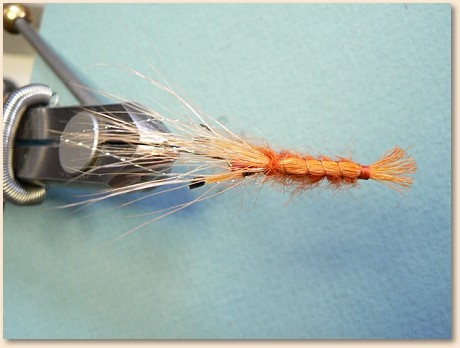
SIDE VIEW:
HOW TO FISH:
For the char and in higher velocity currents, I use
different shooting heads to match the conditions, or
High Density/High Speed Steelhead line of 275 grain
for better mending capabilities.
My leaders are 5 foot(1.5m)-20lb abrasive resistant
materials such as Stroft (or Maxima in the past).
Strikes are expected at the drift as well as on the
swing and with the char, they are awesome!
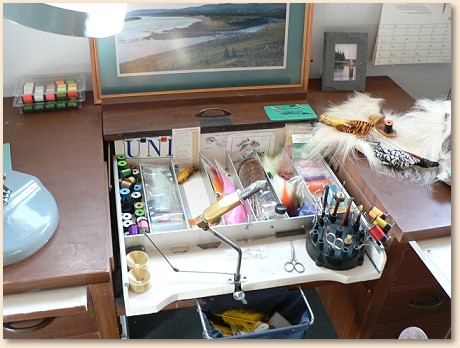
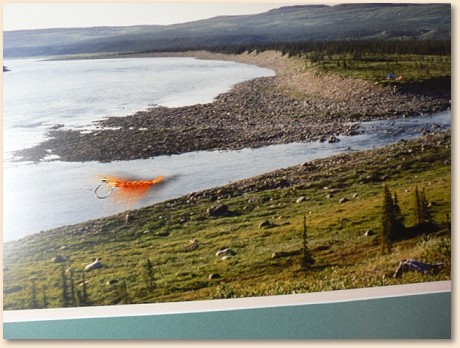
The photo above is of “MY” camp where I fished three
weeks at a time for 14 summers.
Knowing that this concept may be too complicated for
the tyers that have difficulties to flare the tubes,
I will show my dry fly skater made on the Q-Tip
or similar plastic tube, next time. It is much
simpler. In any case, should anyone have some
questions, I will be at your disposal.
Best Fishes, ~ Faruk Ekich
Originally published October 9, 2006 on Fly Anglers Online by Faruk Ekich.