 I use one of the drill press lathe attachments from Grizzly. It works great in my little bench top drill press.
RATTAN WRAPPED GRIPS
I have had a couple of the folks here on Fly Anglers Online ask how I do my rattan wrapped grips. There are other tutorials, but I like to do them just a wee bit differently. I find this a great way to take an inexpensive cork grip and dress it up. It can also be a good way to make a grip just a tad larger for folks that might have larger hands.
Let’s start by getting our materials together. You will need a cork grip, wood glue like Titebond III, a Super Glue type gel, accent thread, and of course, some rattan. Most of the other tutorials suggest 4 mm rattan. I prefer 3 mm as it conforms to the curved grip better and is still wide enough to be able to wrap a grip without any splices. Either will work, but anything smaller than 3mm will require splices which I will not get into in this how-to.
I get my rattan from David Plym at the Tole House here in Denver. He does not have a website but you can call him at 303-778-8571. He is a fly fisher, too! You can get rattan from many places on the Internet as well. Try a search for “Caning Supplies”.
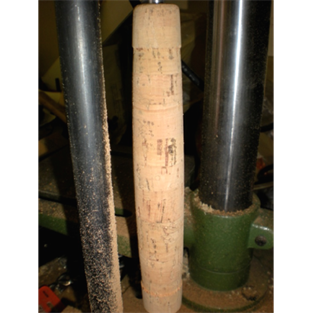
This particular grip will be a cigar shaped grip on a lady’s rod. I do not want to make the grip any larger, so I start by putting the grip on my mandrel and marking the area I will not be wrapping. Then I turn the grip down just a touch in the area I intend to wrap so that the rattan will not be too high or add to the diameter of the grip. This also makes the shape of the grip ‘flow’ better.
I use one of the drill press lathe attachments from Grizzly. It works great in my little bench top drill press.
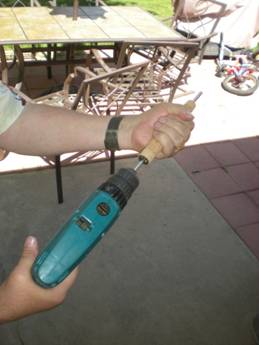 As the mandrel was a tight fit, I used a simple hand drill to both mount the grip on the mandrel and to remove it. If you are wondering what the black ring is, I am using an uplocking slide band seat on this rod and bored the grip to fit the seat. This left the grip thin enough that I wanted to make sure it wasn’t damaged while working it over. The ring is epoxied in place.
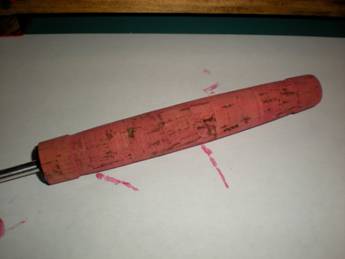 Now that the grip is turned and close to ready for the rattan, I am taking one more “dress up” step. The entire grip gets stained with ‘Eco Flo’ Dusty Rose Pink stain available from Tandy Leather. This is a water based stain so we will need to fix it with a coat of acrylic spray. Oil or spirit dyes and stains can be used as well. The cork takes them nicely and they do not need the added step of fixing them with the acrylic spray.
I have poked the mandrel back in the grip a bit to use as a handle to keep my fingers from becoming Dusty Rose Pink.
 Now we need to get our rattan prepared. Take a full length of rattan that is about 10-12 ft long and coil it up so it will fit in a coffee cup or small bowl. Cover with water and nuke in the microwave for about 15 to 20 seconds. Let set for 10 minutes or so to soak and get nice and pliable.
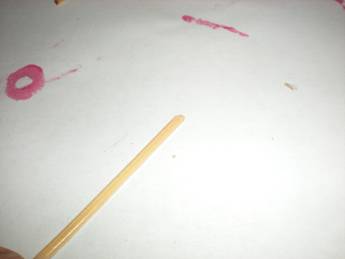 Once the rattan is ready, unroll and trim an end, rounding it neatly.
 Trace around the tip at the starting point of your wrap and gouge the cork out so the first ¾” or so of the wrap is recessed and does not form a lump when you start wrapping. Then, using a touch of Super Glue Gel, stick the tip down.
 Coat the area where the rattan wrap will be with good wood glue. I use the same glue I glue cork rings up with, Titebond III. Start wrapping the rattan, keeping the wraps as tight to each other as you possibly can. Use a damp cloth to wipe off any glue that comes up between wraps.
 Continue to wrap, adding more glue as necessary.
 When you get to the end, relieve the cork as you did at the start, trim, and tuck the end of the rattan under the final wrap, securing with a touch of the CA gel. Use the bodkin to help if necessary.
Here is the completed wrap on the stained grip.
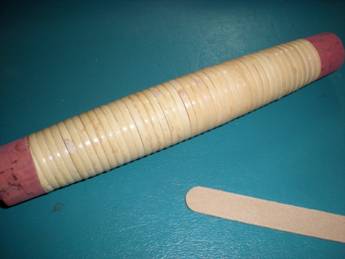 You will have fuzzies left on the rattan. You can use an emery board to lightly sand them away. Hit any other little bumps that might be objectionable as well. Get it nice and smooth.
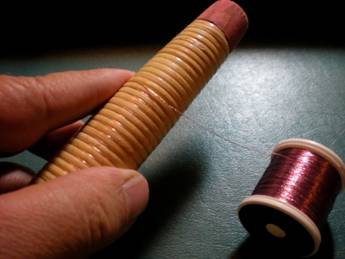 To finish the grip off, we are going to wrap an accent thread into the little valleys between the rattan wraps. Use a bodkin to tuck it under to get it started at the beginning of your rattan wrap. Then wind it in to the other end, keeping it snug but not so tight as to pull it under the rattan. Here, I am using Dusty Rose Metallic thread.
 Once the glue is dry, hit the whole works with a light coat or two of acrylic spray fixative. This will hold things in place while you finish the rod and keep the water based stain from rubbing off on anything. Ream and mount as you normally would, position the start and stop points of your wraps on the guide side of the rod.
When you apply the finish on the guide wraps, put a light coat on the grip as well to permanently lock the accent thread in place and protect the rattan.
My go to rod has a rattan grip and is very comfortable in the hand and does not slip in the least.
Now, let your imagination go wild and start wrapping!
Kevin B Proctor
Rods By Kevin, Ltd.
720-732-7417
[ HOME ]
[ Search ] [ Contact FAOL ] [ Media Kit ]