THE CHERNOBYL ANT - A mutant becomes a legend
Once in a while, a new fly pattern comes along that quickly becomes an indispensable part of your arsenal. There are a few fly patterns that seem to catch all fish, just about everywhere, all the time. Prime examples are Russell Blessing's Woolly Bugger, in 1967, and Bob Clouser's Clouser Deep Minnow, in 1987. Most experienced fly anglers would agree that you should never hit the water, anywhere, without a few of these in your fly box.
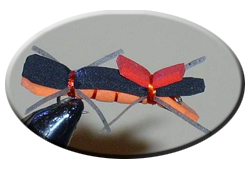
To this list, we must add the cartouche-shaped, and somewhat freaky-looking Chernobyl Ant. Simple and quick to tie, but don't let that fool you. The Chernobyl Ant will catch all species of freshwater trout (except maybe lake trout), largemouth, smallmouth, and white bass, spotted bass, rock bass, calico bass, strawberry bass, yellow bass, crappie, bluegills, other sunfish, and on occasion, walleye and carp. I have even had a channel catfish grab one, elevating my heart-rate significantly. I have heard that it also catches Atlantic salmon. The Chernobyl Ant catches fish when nothing else will, even live-bait.
The Chernobyl Ant owes its existence in part to a failed material made for NASA in 1966. NASA tried to come up with a light, but resilient foam that could be used on the Apollo spacecrafts that would be comfortable, and absorb some of the shock from G-forces. The resulting closed-cell foam material proved to be too delicate for the purpose, but eventually, the product was marketed in the early 1970s as Craft Foam. It wasn't long before the material was used commercially to make cricket, and spider imitations. Home fly tiers were quick to adopt the new material. No one seems to know what the first pattern tied with closed-cell foam was, or exactly when, but foam flies like the Madam X, and various cricket and hopper patterns have been around for a while.
In the late 1970s, Larry Tullis (who also came up the the Wiggler...), a professional Guide in Utah, wanted to come up with a new fly pattern for cutthroat trout, based on the cicada. He used Craft Foam for its buoyancy, and durability. Mr.Tullis fished it successfully on the Green River, and in 1984, he showed it to several other guides there. Mark Foesland modified the fly slightly, and named it the Black Momba. Another Green River Guide, Allen Wooley added rubber legs to the Black Momba, instead of hackle, in 1990, and thus, the Chernobyl Ant was born.... The fly would go on to take "Best Fly" honors in the Jackson Hole 'One Fly' contest., after another Green River guide, Emmett Heath showed the fly to the contest host, Jack Dennis. The fly had no official name at that time, but it was classified as a 'mutant' because of it's materials, parts, and uniqueness. This was only a few years after the Chernobyl nuclear plant disaster in the USSR, so with a little tongue-in-cheek, gallows humor, the fly was eventually christened the Chernobyl Ant. It has become one of the all-time greatest fly patterns in history.
The Chernobyl Ant looks just like what it is, two squarish pieces of foam and two pair of rubber legs. To a human, it doesn't really look like much of anything in nature. Perhaps this is the key to its success. No one knows for sure what a fish thinks it is, but by varying the color combinations, it seemingly can suggest a cricket, grasshopper, cicada, or maybe just something that might be good to eat. Like most other predators, fish are very opportunistic, and have a strong sense of curiosity. They may bite this pattern precisely because it doesn't resemble anything they have seen before. Whatever they think it is, it works, and that is the object of the game.
Another endearing feature of this fly is that, short of casting it into trees, there is no way to fish it wrong. You can dead drift it. You can 'twitch' it. You can even fish it with a nymph, tandem-rigged. You can throw it on still water and just let it set. All of these methods work. It is a perfect fly for newcomers to fly fishing, because the fly always lands right-side-up, is highly visible (modern versions are tied with one or more strike indicators on top), and does not require any real 'action' from the angler. It is unsinkable and, except for the legs, indestructible. And the legs can be easily repaired. I have a few that are missing a leg or two, and they still catch fish! And when a fish bites it, there is no question. You will see the strike. Chernobyl Ants work very well at night, unlike most other fly patterns. Lastly, for novice fly tiers , it is a very quick, easy pattern to tie, and the materials are about as cheap as it gets.
If not for NASA's failed experiment, who knows where the world of fly tying would be today? One thing is certain; it would be less fun without the Chernobyl Ant, and the other wonderful foam fly patterns many of us have come to rely on.
Materials:
- Hook: Cabelas Model 40, or similar. Size 12-8.
- Thread: Unithread, color to match under-body.
- Underbody-2mm Craft Foam, color 2
- Body: 2mm Craft Foam, color 1
- Strike Indicator: 2mm Craft Foam in whatever color you can see the best.
There have been many variations on this fly, but this is the most current version, similar to what you would get if you purchased them from a retailer.
You can tie this fly any size you want. I usually tie it on a size 10, or 12 3X long-shank hook for all-around use. You can go bigger for largemouth bass, and smaller for small panfish., but this size works pretty good for all fish. As far as colors, I think the basic is Black and Tan, but Black and Orange, and Black and Yellow are very common. Tied in Green ,or Brown, and Yellow, it makes a very good Hopper, and in all Black, or Black and Gray, a good Cricket. You can tie it in any color combinations you want. Feel free to experiment. I have even tied this with a marabou tail on it, in green and white, and it seemed to work well for a frog imitation around lilly pads. There is no limit to what you can do with this pattern. It is an easy tie. The only 'tricky' parts are keeping the legs out of the way while segmenting the under-body. If you wish, you can finish with a Super Glue knot, or several half-hitches. I discourage using half-hitches to finish. It's been my experience that they will always come loose, sooner or later. If you have to use half-hitches, be sure to coat them well with Super Glue.
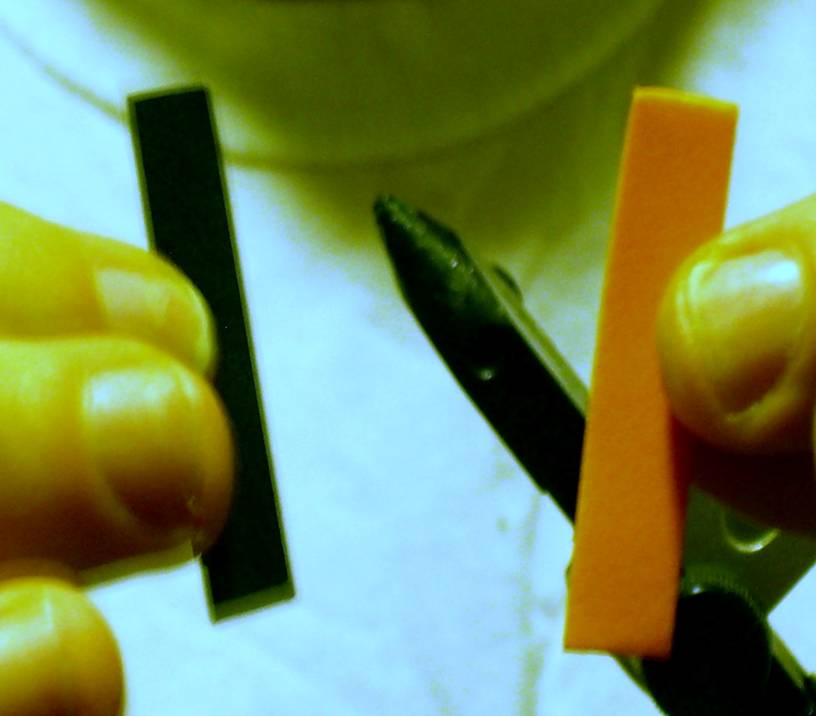
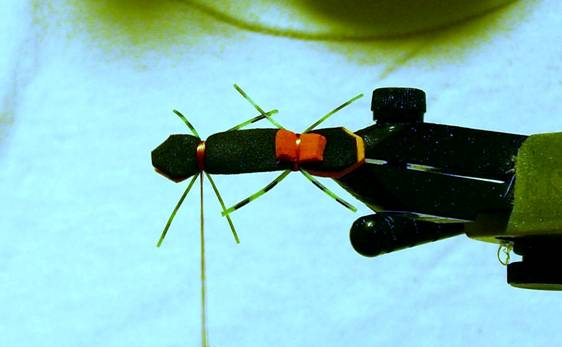
- Cut two strips of foam, of two different colors, a little less than the width of your little finger., and 1-1/2 times the length of your hook shank. It doesn't have to be exact. The two pieces should match up closely. In this example, I am using black and orange, but other colors like black and gray, black and tan, and black and yellow are common.
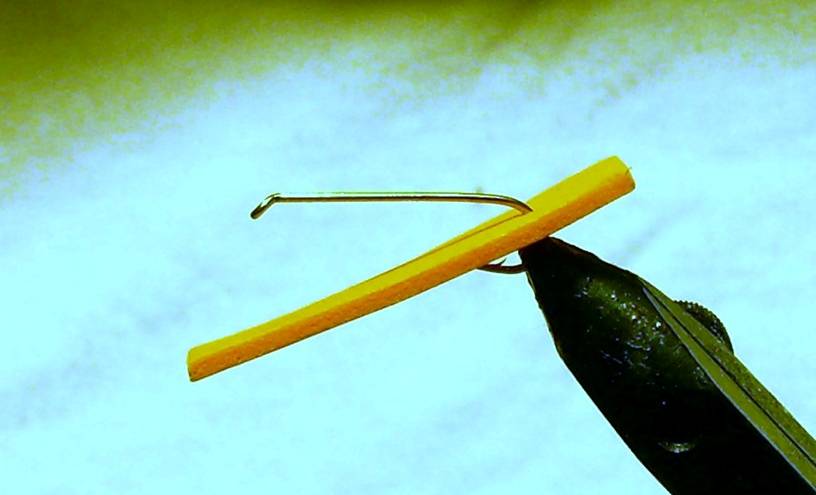
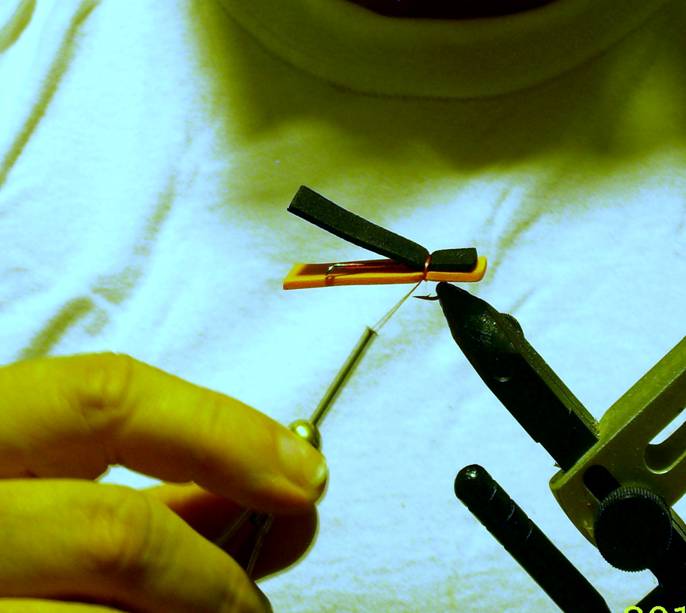
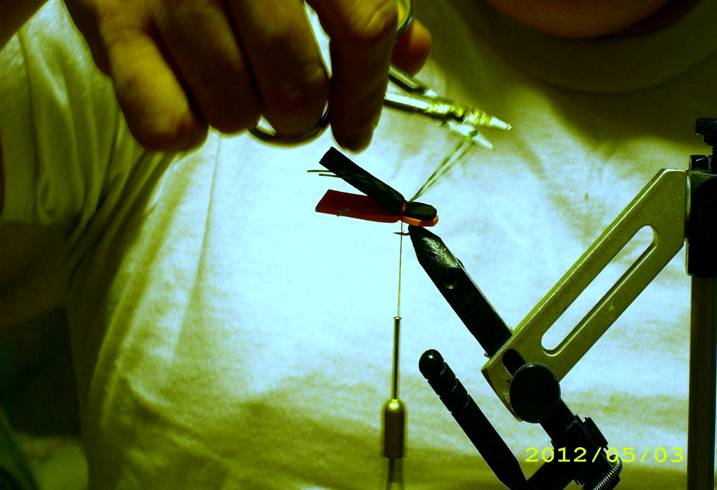
- Run the hook through the center of the rear ¼ of the bottom color of foam. You want about ¼ of the hook shank length overhang (it takes some practice, but you'll get the 'hang' of it quickly).
- Now, coat the hook with lacquer, Sally Hansen, or whatever you like to use, and lay a base of thread along the hook shank, stopping just over the barb. Lay the top color of foam on top of the shank, matching it up with the bottom foam, and secure both pieces with 4 or 5 wraps.
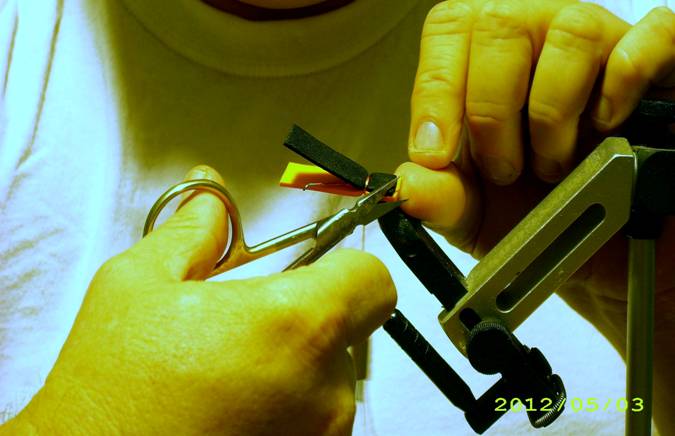
- Trim the foam to length, if needed, and snip the corners to create a rounded, bug-looking rear. Doing this now, before tying on the legs makes life a lot easier, because there is no danger of accidentally cutting off a leg, and they won't be in your way.
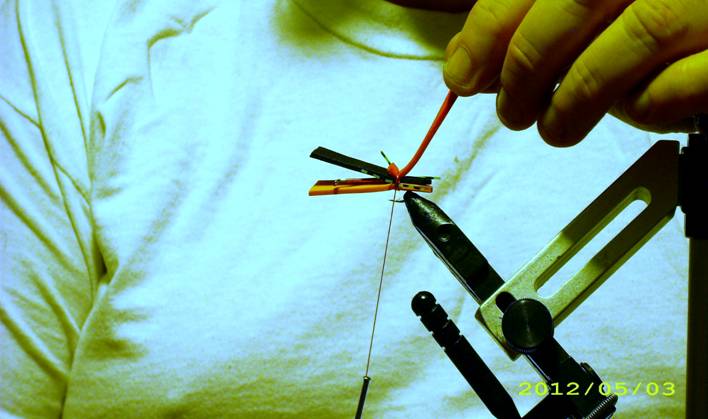
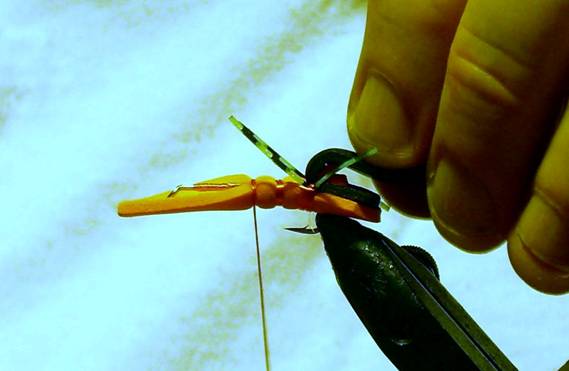
- Take a full length of Silli Leg in whatever color you want, and double it, as close as you can. Any color is fine, but fish seem to hit it a little harder when it has barred legs.
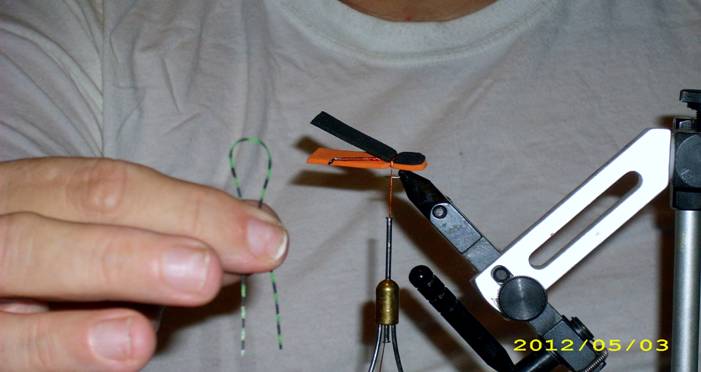
- Tie the legs on top, as close to the middle of the doubled up length as possible. Only take a few turns of thread on them, because you will need to reposition them in a bit. They just need to be snug, not tight.
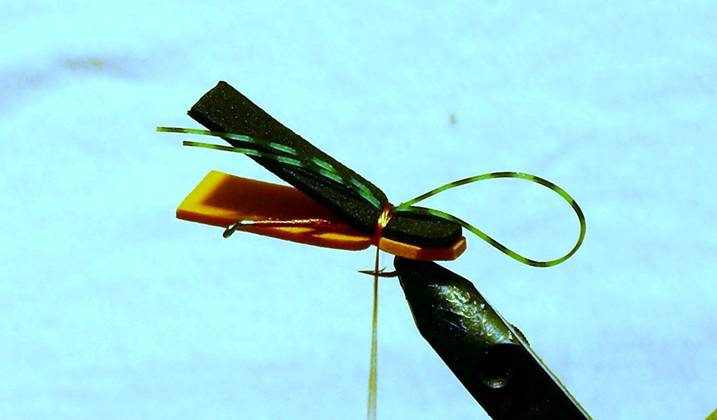
- Snip the loop end.
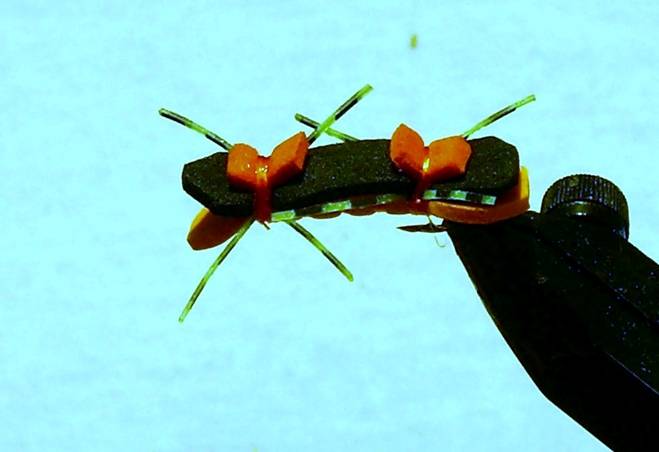
- Now, gently pull each set of legs to each side. Don't pull too hard, or you will break them. When they slide into position right between the two foam layers, you will feel a slight 'bump'. Then you know they are right. It should look similar to this:
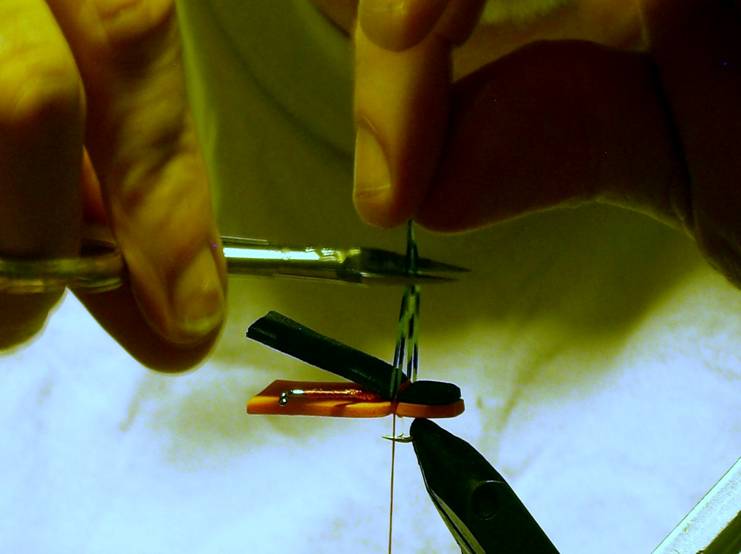
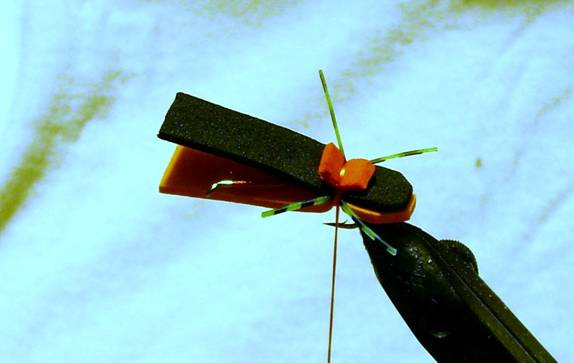
9. This is one situation where long legs are not necessarily a good thing. Trimming them individually makes it hard to get them the same length. But here is how to make them perfect, every time. Grab the ends of all the legs, and pull them straight up (but don't stretch them). Now, simply cut them to the right length. You want them to just overlap with the front set. Remember, you can always go back and make them shorter, but not longer, so err on the side of long. You can do final trimming when the fly is done.
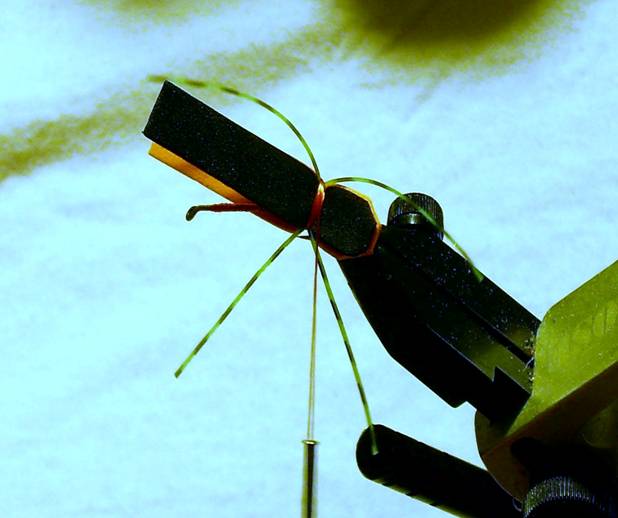
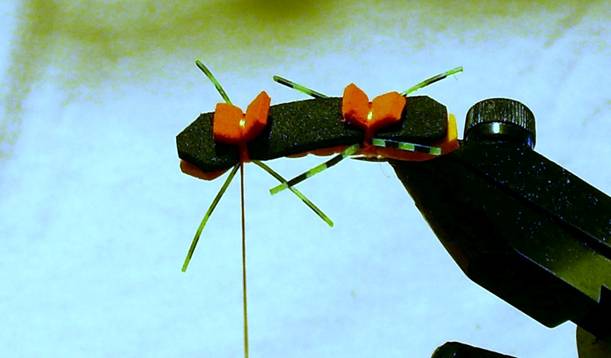
10. Here is what the completed rear legs should look like, more or less.
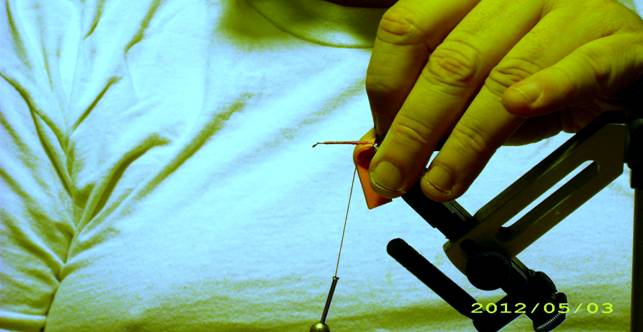
11. Now, some people like two strike-indicators on their ants, sometimes of different colors, so they can tell which is the front, and which is the back, when it is on the water. Others, like myself, prefer just one indicator on the front, in a bright color that can easily be seen on the water. And some may not like any indicators at all. All three ways are fine. If you want two indicators, here is where you'll put the first one. Otherwise, just skip this step. You need to cut a strip of bright foam a little less wide than the body of the ant. Tie the very end to the top with a few wraps, leaving around 1/8" tag on one end. Doing it this way gives you something to hang on to, instead of fooling with a small piece of foam, and lets you trim both ends evenly.
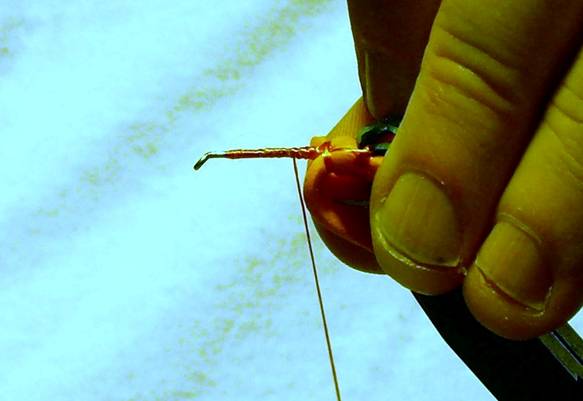
- Trim the long end even with the other end.

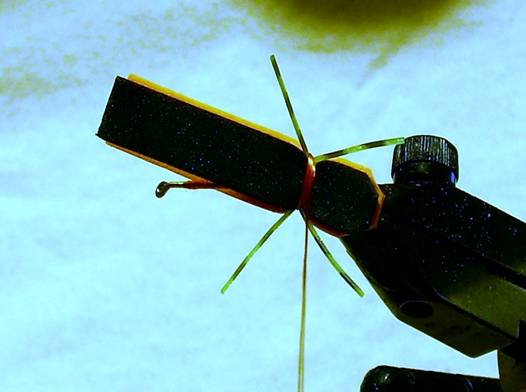
- We're done with the rear of the fly. It should look similar to this:
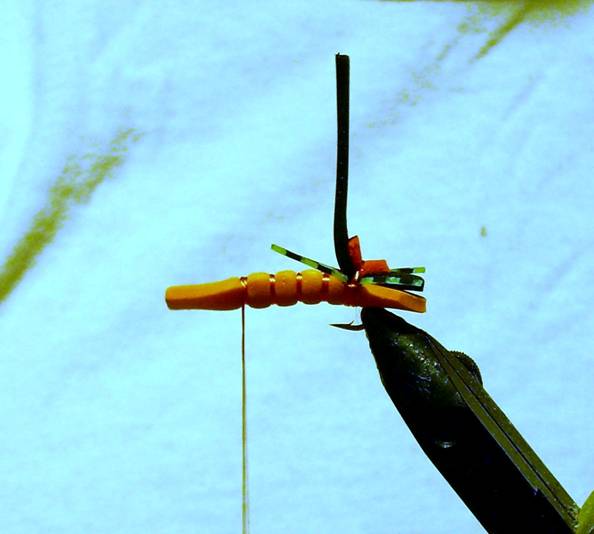
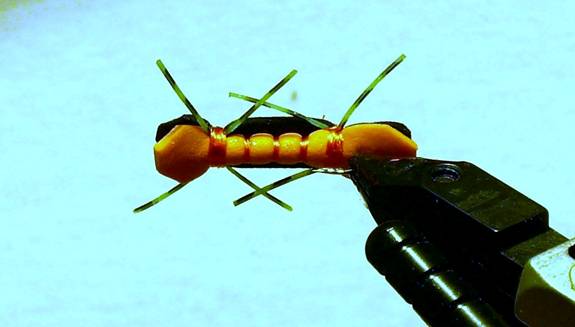
- Now, it's time to create a segmented under-body. Early versions of this fly used dubbing, but all-foam makes a much better fly. Using you fingers, gently hold both pieces of foam, and the legs back out of the way (I know, it takes some practice......), and wrap the thread along the hook shank, advancing it 1/8 of an inch, or however big you want the segments. I always try to make at least 4.
14. Allow the bottom colored foam to come forward, pinch it around the hook shank, and while still holding the other foam and legs out of the way, take a few wraps around the bottom foam, creating a segment (your fingers are going to be so agile when you get used to this.....)

- Pull the bottom foam back once again, and repeat the process to create another segment.
- Tie the foam down again, just as before, to create the second segment.
- Continue making segments this way until you get to one hook-eye distance from the end of the hook.
- To make the 'carapice', 'shell', or whatever it is.....just pull the top foam forward snugly, but not too tight, and tie it down over the last under-body wraps. You just need a few wraps at this point.
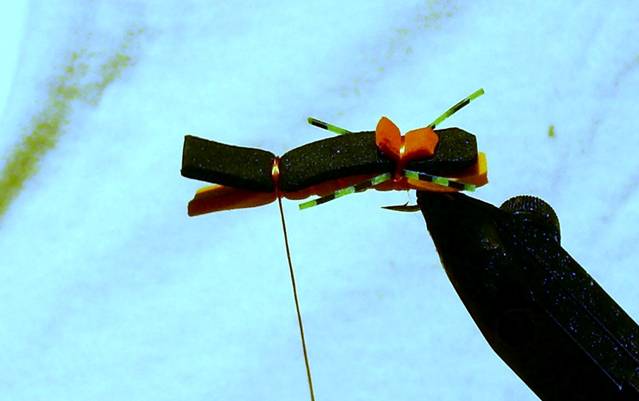
- Trim the 'head' to around 1/8 beyond the end of the hook-eye, and snip the corners to make a buggy looking 'head'.
- Do the front legs exactly like you did the rear ones.
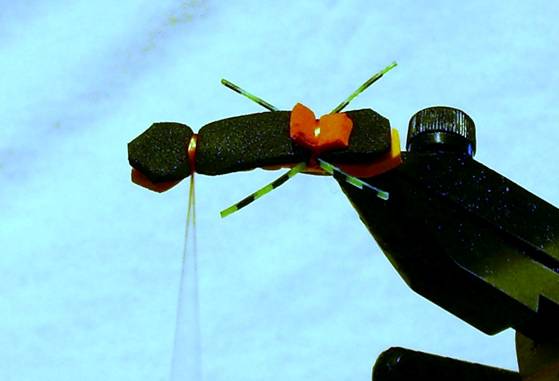
- Make a strike indicator just like you did on the rear.
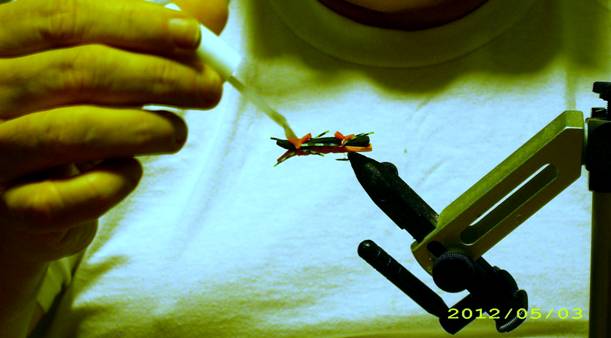
- Now, you can whip-finish it right here (which is what I do...), or you can use a Super-Glue knot, or a bunch of half-hitches (but I don't recommend either of these methods. Proper flies should always be whip-finished....). However you decide to finish it, just cast off the thread, reposition the legs to where you want them. Do any final trimming you want, then carefully coat the thread wraps (all of them) with Hard As Nails, or whatever you like to finish with. Do not get any on the legs, or get messy on the foam body with the finish. Try to keep it just on the threads as much as possible.
- Viola! Here's what the fish see, minus the vise:
- Here is what you see:
Fish it any way you choose. There is no wrong way.
About The Author:
Dr. Joel C. Brothers is a free-lance writer and musician. His Doctorate is in Holistic Health, and he is also a Spiritual Healer. He is an avid outdoors enthusiast, fly angler, and fly tier. He writes for several outdoor publications and websites. He has been a member of FAOL since 2005, and his user name is Gigmaster.
For more great info, check out:
Beginning Fly Tying | Intermediate Fly Tying | Advanced Fly Tying.