
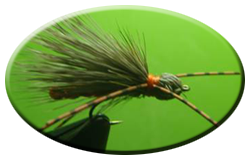
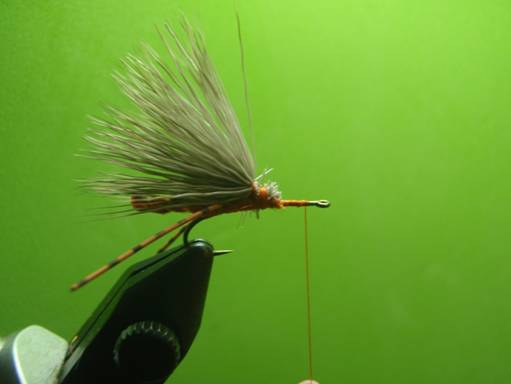
FURLED EXTENDED BODY OCTOBER CADDIS
While some articles I've read suggest "skating" October Caddis patterns, my approach has involved dead drifting them. This pattern tends to ride very low, by design, and does not "skate" well, although lots of fish do hit it when it is moved slightly. It is more representative of a spent caddis with some movement of the FEB and the antenna and legs taking place below the surface suggesting a struggling insect. At least that is what I imagine the fish are seeing. Whatever they are seeing, a goodly number of them see this fly as food, not fake.
Materials:
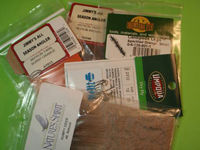 Hook – TMC 2312 size 12
- Thread – Montana Fly Company 3/0 orange
- FEB – burnt orange and medium to dark brown antron
- Legs – Montana Fly Company speckled orange Centipede Legs, size small
- Wing and bullet head – natural humpy deer hair
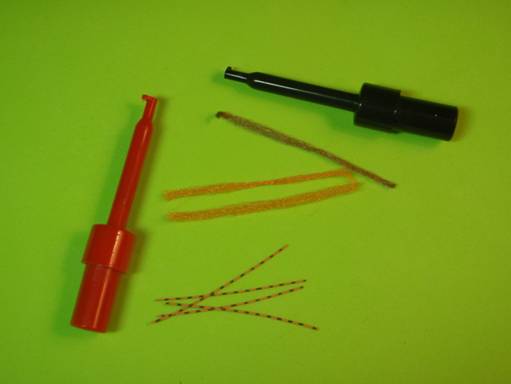
Cut an appropriate number of antron strands and legs prior to starting. The antron strands should be about 2" each. One strand of the MFC centipede legs cut into four equal pieces does nicely for one fly.
Start the tying thread a bit behind the eye, leaving enough bare shank to "spin" the deer hair for the bullethead. Lay a thread base to the end of the shank and then wrap forward to about the two / thirds point.
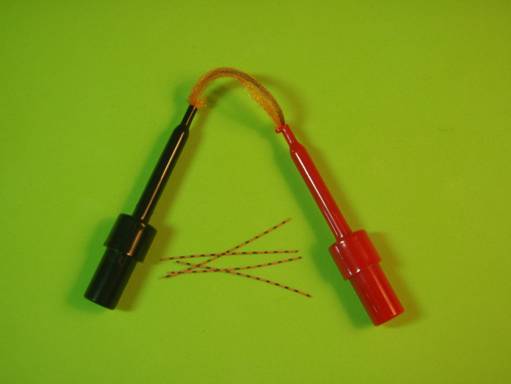
Electrician's clips are great furling aids. Use one strand of brown and two strands of burnt orange antron. Put the ends of the combined strands of antron into electrician's clips.
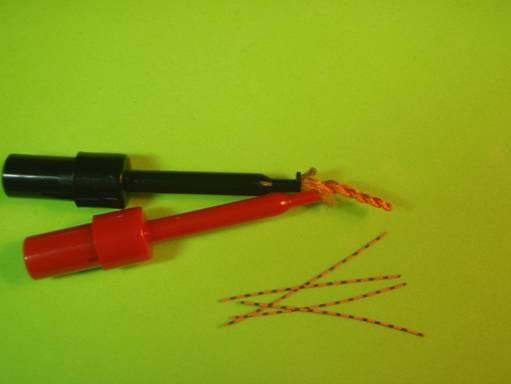
Twist the clips in opposite directions five, six, seven times to create a tightly twisted bunch of antron that wants to curl back on itself. Holding both clips in one hand, grasp the center of the twisted bunch and pull on it, twisting in the direction it wants to twist as you relax tension on the clips, to create the Furled Extended Body.
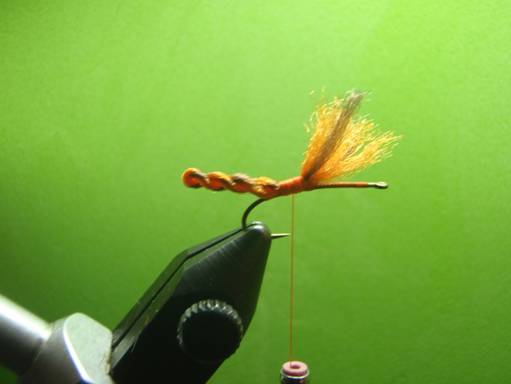
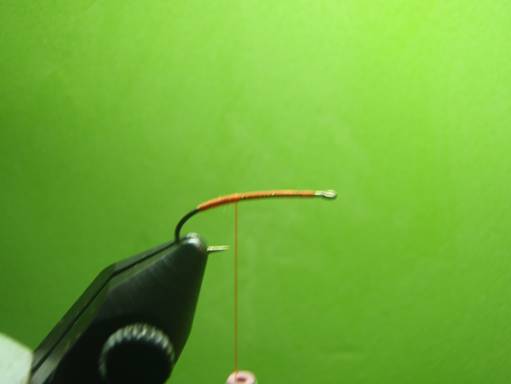
Remove the FEB from the clips and twist it again in the direction it wants to go. Tie in the FEB so that it extends well past the bend of the hook. Trim the waste end of the FEB material at about the one third point.
In tying down the FEB, create a rather long thread base for the rear legs. With the tying thread at the front of that thread base, loop the legs around the thread, even them up, and take a couple turns around the hook to secure them. Then pull the legs back and down on each side of the hook and wrap back over them. With a little practice, you will be able to vary the angles, both out and down, at which the legs come away from the body of the fly.
Wrap the thread forward, tying down the remaining FEB material.
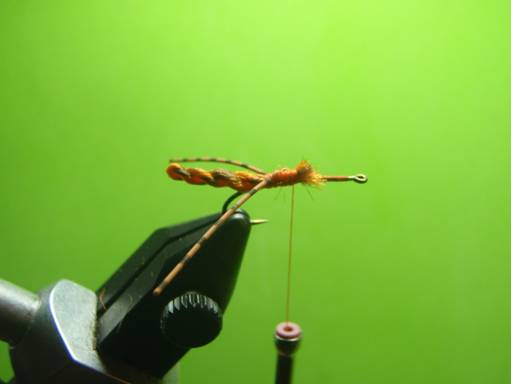
Cut, clean, comb, stack and trim a medium size bundle of deer hair. The wing should be long enough to extend noticeably beyond the FEB, and to have an eighth inch or so forward of the initial tie in point. I like to loop the tying thread around the butt ends of the bundle of deer hair, using that extra eighth inch, before tying the deer hair to the hook.
Wrap the tying thread forward to the front of the bare spot on the shank behind the eye.

Cut, clean, comb, stack and trim a smaller bundle of deer hair. It should be long enough so the butts can be placed at the tie in point for the wing with the tip ends extending far enough forward of the eye that they can be folded back well behind the wing tie in point.
Holding the deer hair in place as described above, take a couple soft wraps around the bundle and then a firm wrap to spin it on the hook. Wrap back through the butts to secure them in place. The tips will flare out from the shank, hopefully with an even distribution around the shank. Trim the butt ends as needed.
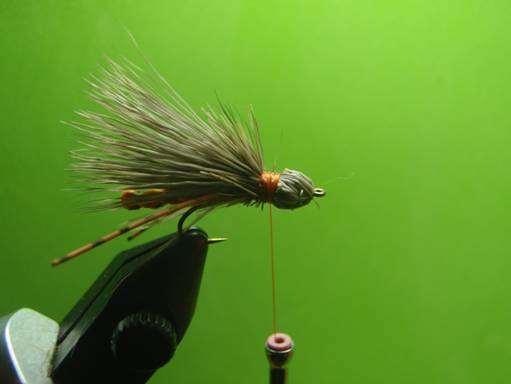
Wrap the tying thread back to just forward of the tie in point for the wing. Fold the deer hair back from the eye to form the bullet head.
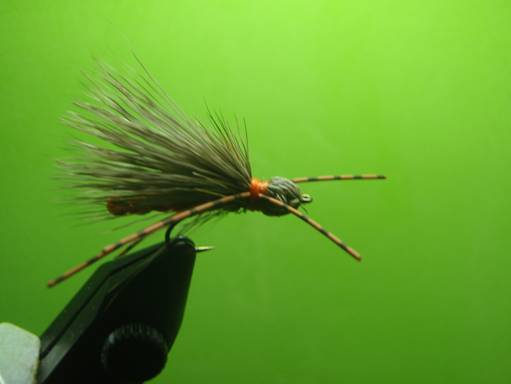
Take enough wraps over the bullet head to keep it secure and to create a base for tying in the front legs. I like to lay two sets of legs over the thread base, take a couple soft wraps, move one set of legs to each side of the fly, and then take a good number of tight wraps to secure. When the legs are secure, finish with a couple five or six turn whip finishes. Trim the bullet head deer hair on the underside of the fly behind the tie in point, and the legs, if necessary. Apply head cement if so inclined.
One of the great things about the October Caddis, for those who are fortunate to fish the freestone streams and rivers they inhabit, is that they follow a six month succession of large insects starting with skwalas in late winter / early spring, salmon flies in the early summer, golden stones for much of the summer, and hoppers for a good part of the summer into early fall. The fish are used to looking up for big things to eat by the time the October Caddis hatch is on, and they are not bashful about hitting a good OC pattern.
Speaking of "big things", last fall on the Lochsa River in Northern Idaho, I was fishing this pattern on a piece of water that regularly gave up a good number of rather large West Slope cutthroat trout. After casting just above a mid-river lie that usually held one of those trout, I was watching the fly drift downstream when a large, dark form porpoised up to the fly, hit it, and continued upstream. I put a bit of pressure on the line to stop the fish – and didn't. The 4X tippet snapped as the fish, most likely a large steelhead, took the fly for a ride upriver without missing a flip of a fin.**
John
| Note |
|---|
| It is not legal to target steelhead on the Lochsa River. |
For more great info, check out:
Beginning Fly Tying | Intermediate Fly Tying | Advanced Fly Tying.