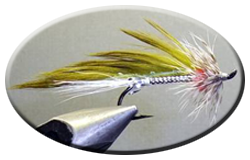
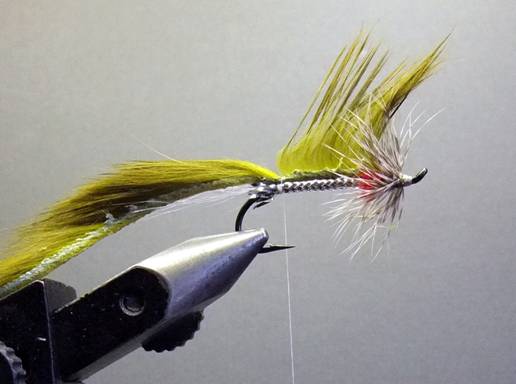
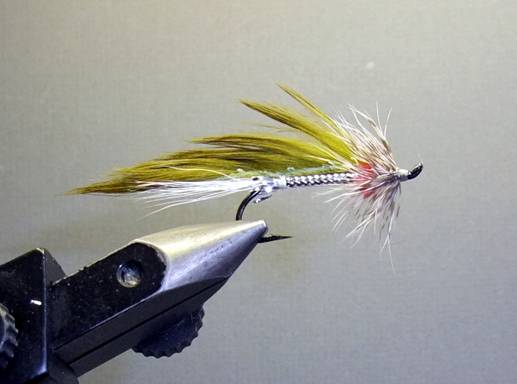
PERFECT ZONKER
The Zonker was originally designed by Dan Byford of the Unite States. It is a cousin of the matuka, which is a fly from New Zealand. They are both streamers, and what distinguishes them from other streamers is that the wing of the fly is tied in at the eye and also tied in along the hook shank, or at least at the hook bend.
This has three benefits:
The fly has a good profile like a bait-fish
The wing does not foul around the hook bend when casting.
The use of the fur strip makes the fly very durable.
This demonstration will concentrate on proportions, and measuring material placement against the hook. Often the position of the thread will be the marker for spacing.
The best hook is up-eye or at least straight eye as it allows the weight of the leather to remain below or at least even with the eye – the fly remains upright.
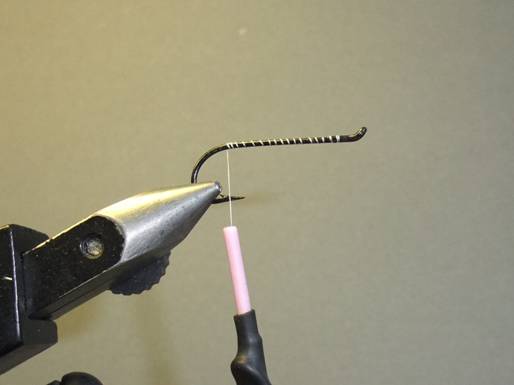
Start the thread and take to the bend, stopping right above the barb.
Select about 12-15 white buck tail fibers – use a hair stacker to even them.
Measure the tail for length against the shank of the hook.
Tie in the buck tail right above the barb with two wraps over, one under and one over.
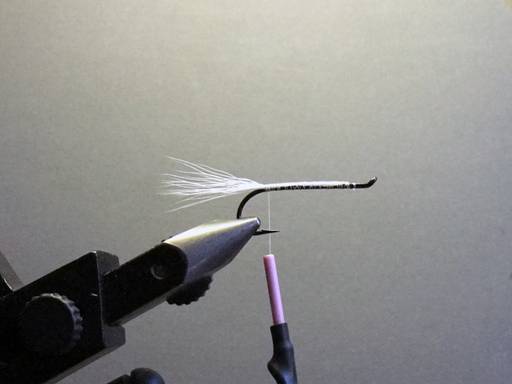
Bind the buck tail to within ‘3 eye-gap’ distance of the eye, and wrap back to the tie-in point.
Lift the buck tail butts @ 45o and cut straight across. This will allow the butts to lie down at a slope.
Return the thread to a point above the barb (binding the buck tail) and finish with a half hitch.
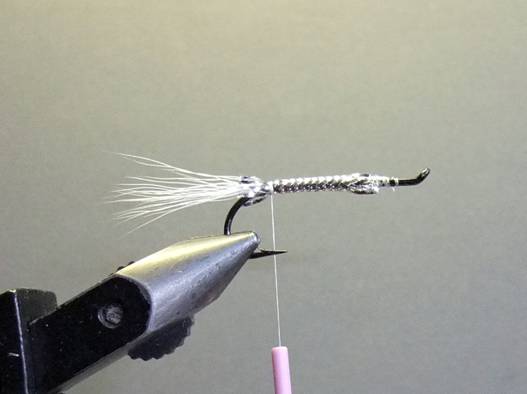
Measure the tinsel for length from the bend of the hook to ‘2 eye-gaps’ from the eye and cut.
Carefully remove the string core from the tinsel tube.
Slide the tube over the eye to the bend of the hook (veiling the bend).
Tie off tinsel with the thread – 3 wraps only – secure with a half-hitch
Leave the thread to dangle, or if you have only one bobbin, leave about 5”, cut it off, and attach to hackle pliers, letting it dangle.
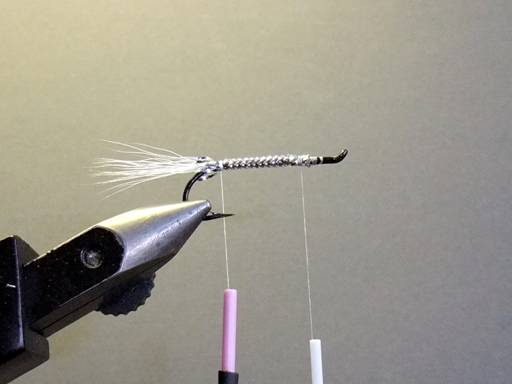
Push the tinsel back a little from the eye. Attach the second thread at the eye and wind back to the tinsel, to the ‘3-eye’ position.
Pull the tinsel forward over the thread (and buck tail butt) and tie off smoothly.
Leave the thread at the ‘3-eye’ position.
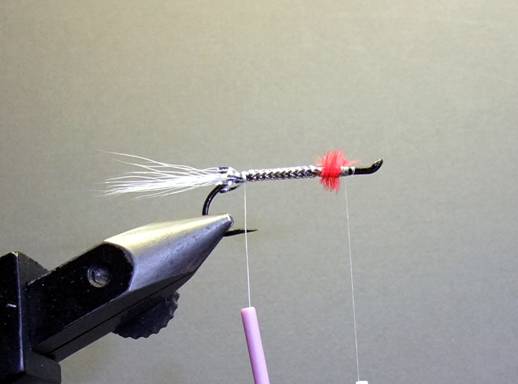
Tie in the red ostrich herl, wrapping the thread to the ‘2-eye’ position. Apply three wraps of herl to the ‘2-eye’ position and tie off.

Tie in the squirrel strip or a thin rabbit strip (demonstrate), and bind within the ‘2-eye’ position, stopping thread at the ‘1-eye’ position.

Tie in the hackle by the butt, binding the stem back to the ‘2-eye’ position (over the tie-in of the rabbit strip).
Wrap the thread to the ‘1-eye’ position, this marks where the hackle will stop.
Wrap hackle to the thread and tie off (within the ‘1-eye’ position).
Wrap a smooth head (you should have all the ‘1-eye’ area to do it) and whip finish.
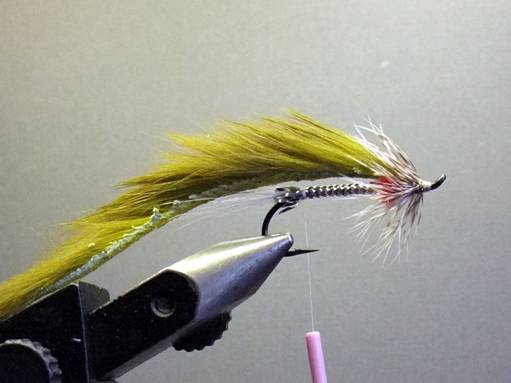
Return to the bend of the hook and the ‘forgotten’ thread.
Moisten the fur in front of the thread and make a part a very little space in front of the thread.
Grasp the tail of fur and pull tight. The part should line up with the thread.
Make 2 or 3 wraps of thread and whip finish.
Cut the leather of the fur strip at 1/2 the distance of the buck tail tail. The fur should reach to the end of the buck tail.
For more great info, check out:
Beginning Fly Tying | Intermediate Fly Tying | Advanced Fly Tying.