CADDIS

Materials:
- Hook: size #14
- Thread: Danvill 6/0 White
- Deer hair - any color
- Synthetic Paintbrush bristles
- 10 lb monofilament
- Flexament
- Markers
- Tissue
- Microfibetts
 Start the thread on hook and return to the hook eye
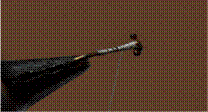 Add monofilament eyes with figure 8 wraps (eyes made from melting 10lb test with a candle
 Upon top of the eyes add 2 brown microfibets
 Lightly tie in a clump of deer hair for the abdomen leaving room for the thorax. Note: do not wrap the deer hair tightly except at the tie in point
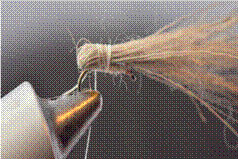 Pull the deer hair forward and lightly wrap it to the hook trying not to compress the hair
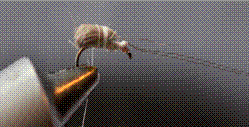 Cut the excess hair and with your thread lightly wrap the deer hair down. Be careful not to compress the deer hair or it will lose it's boyancy
 With light, smooth wraps form a nice smooth abdomen
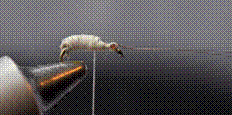
 Color the abdomen with markers and coat the thread with flexament. This does 2 things; It sets the color and also makes the fly more buoyant
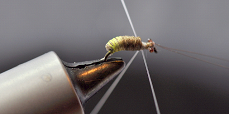 Now tie in a paintbrush bristle under the hook just in front of the abdomen, using figure 8 wraps
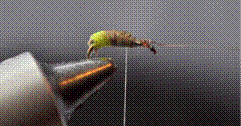
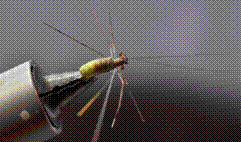 Add two more sets of legs as shown

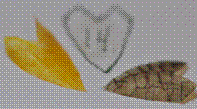 The wing material is made from a single ply of facial tissue impregnated with flexament. Here is a pair of colored wings next to the size 14 wing gauge. It's a good idea to make a pattern so you can produce wings fast and easy
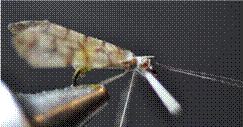 Tie in the wing material behind the mono eyes and whip finish. With a marker color the thread to match the rest of the fly and add some head cement
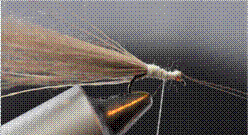
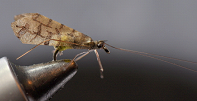 Here is the finished fly. All the materials in this fly can be colored to fit any hatch or species variation
For more great info, check out:
Beginning Fly Tying | Intermediate Fly Tying | Advanced Fly Tying.